
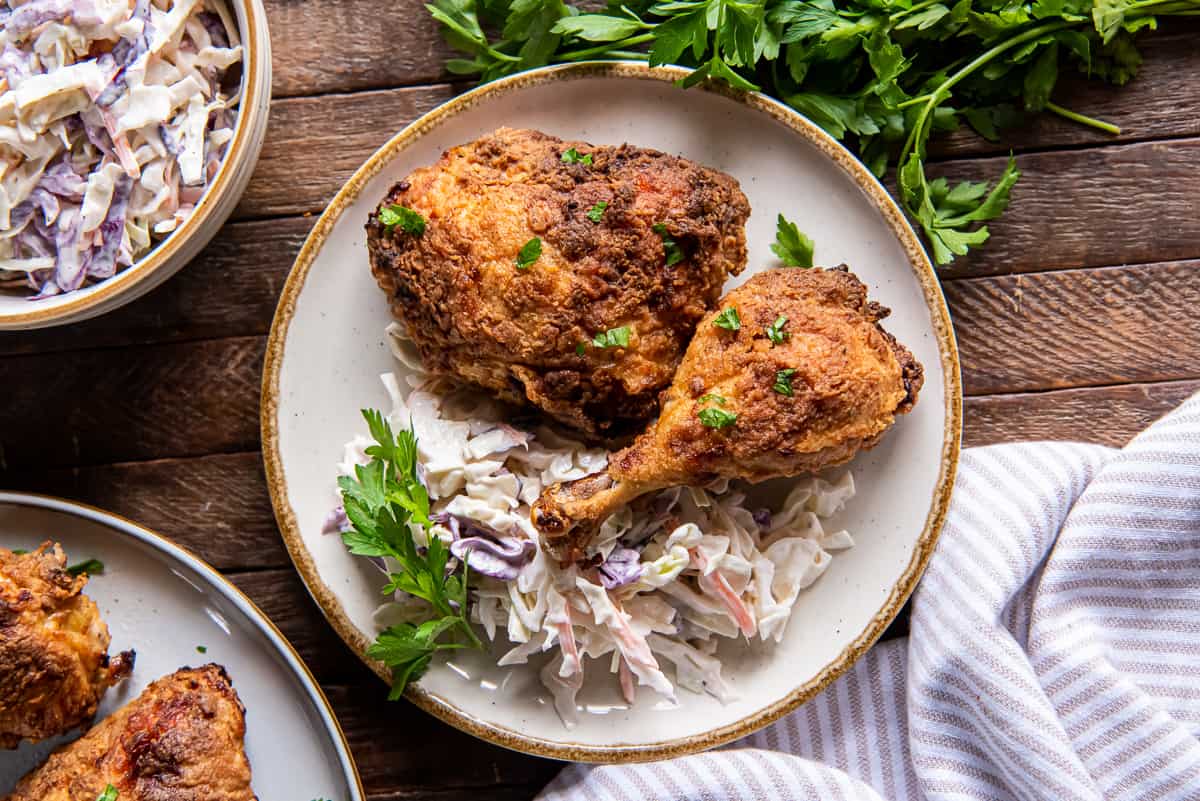
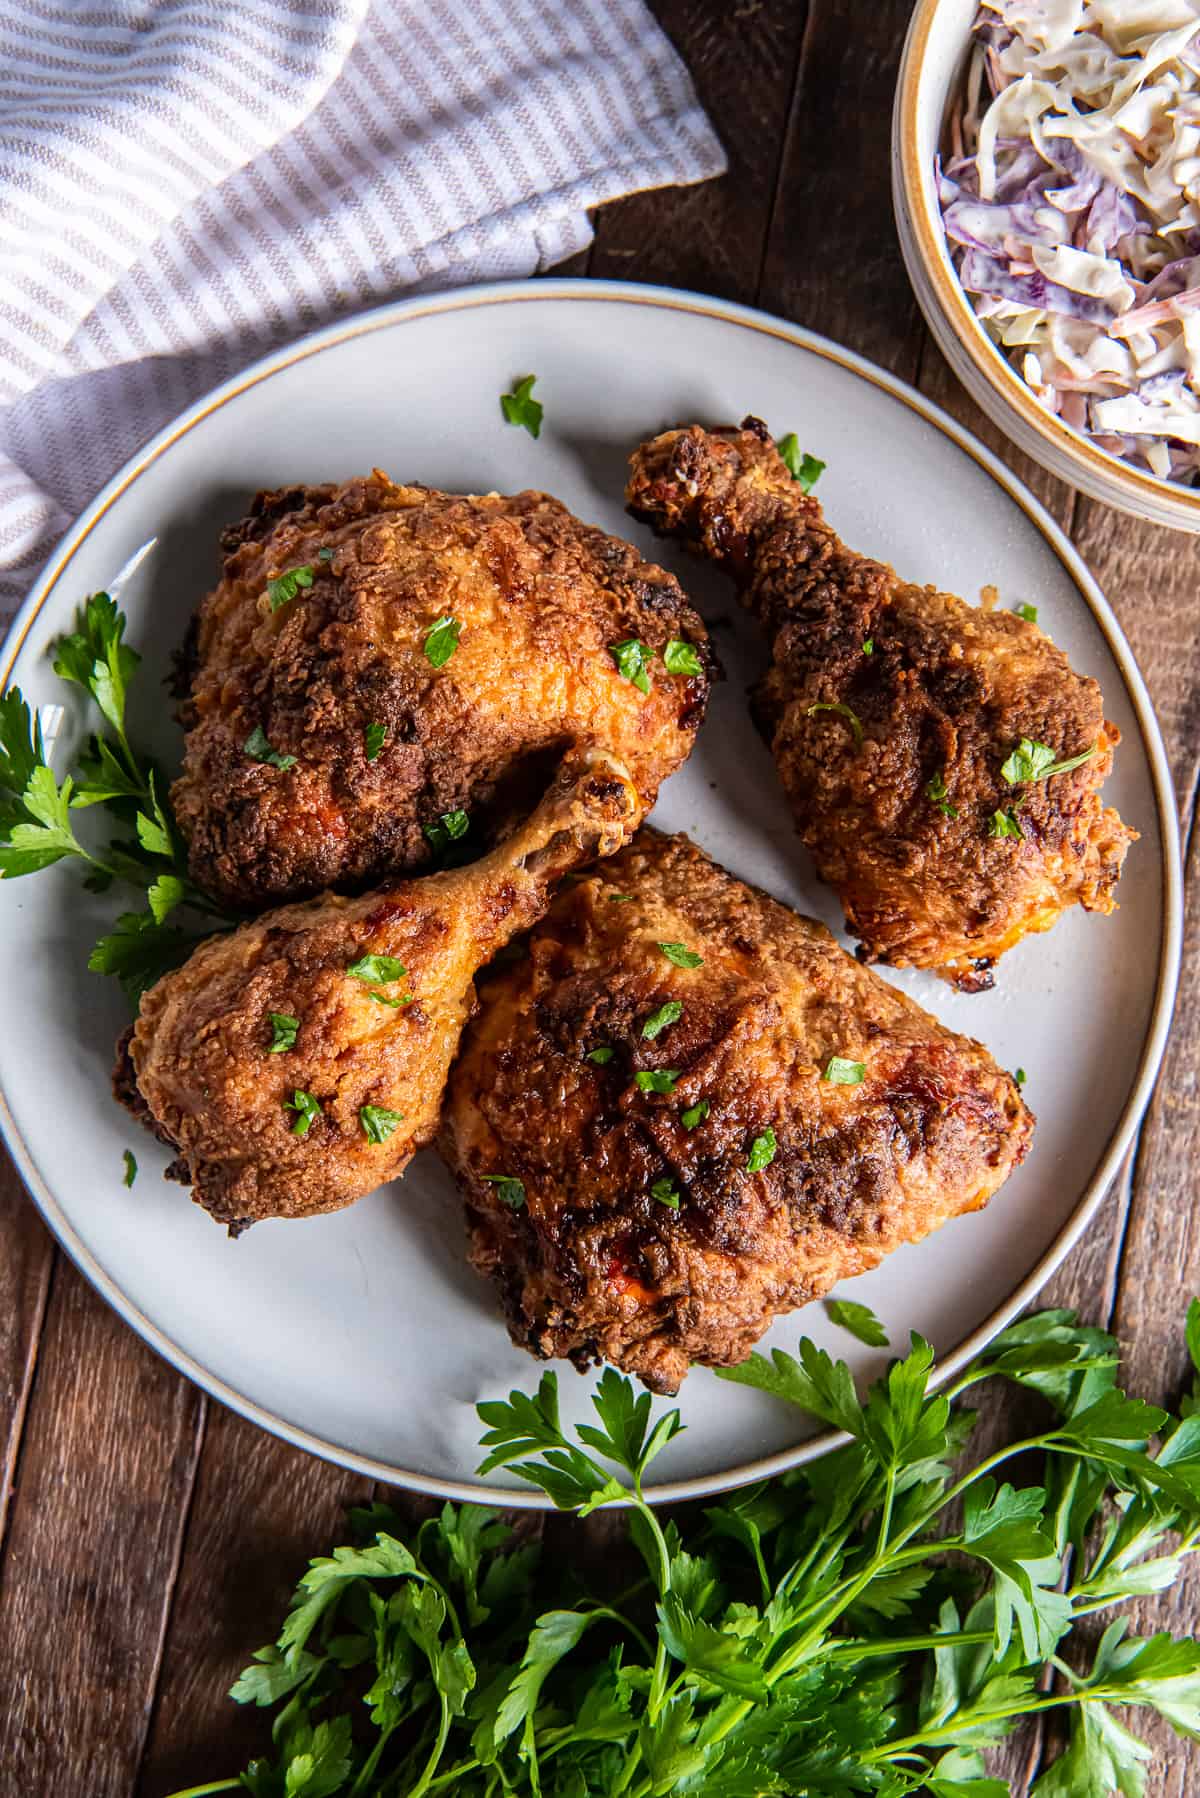
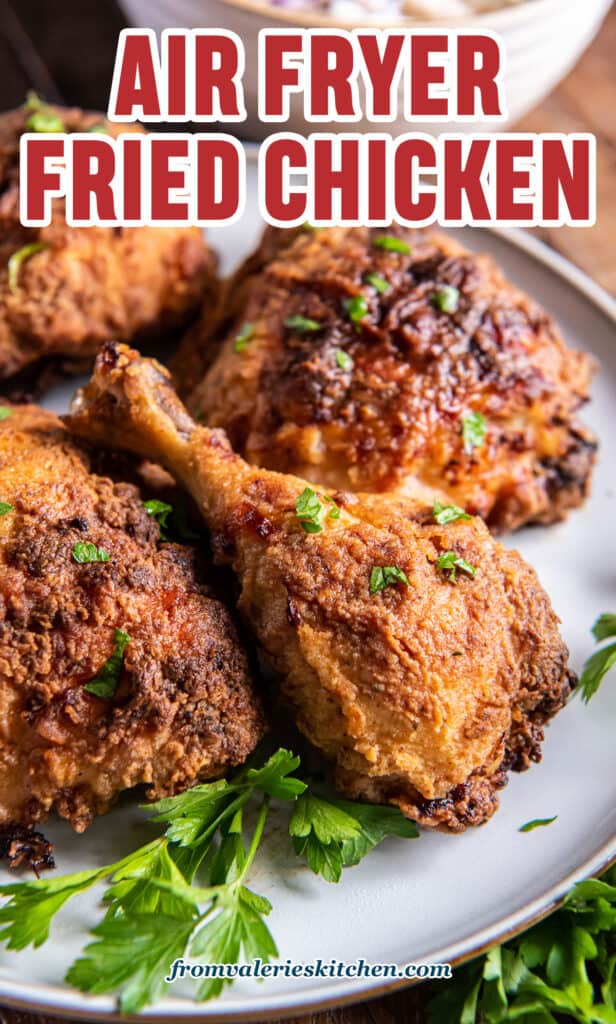
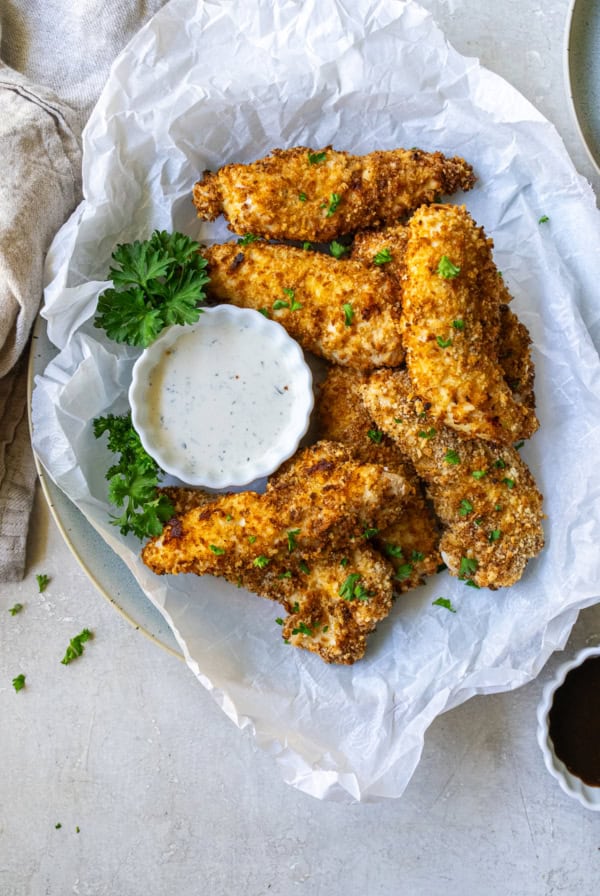
This crispy Air Fryer Fried Chicken is made with a tiny fraction of the oil used in traditional methods. It’s perfectly seasoned with incredibly tender and juicy meat!
Serve this delicious chicken with California Coleslaw for lighter but highly satisfying meal.

This post may contain affiliate links. Please read our disclosure policy.
If I were to tell you that you could create perfectly crispy fried chicken using just a teeny-tiny bit of oil would you believe me? My family absolutely loves this chicken. The flavor is spot-on, classic fried chicken. No one would ever guess you didn’t deep fry it.
I’ve long been a fan of oven-frying as a way to reduce the amount of oil needed to create a crispy, satisfying result. I’ve used the method for everything from Crispy Oven Baked Fries, Baked Chicken Taquitos, and one of my most popular recipes of all time, my Baked Eggplant Parmesan.
So, it’s not suprising that I’m in love with my air fryer. It does an exceptional job of quickly cooking fried chicken with crispy skin and tender meat.
Table of contents
Why You’ll Love this Recipe
Fast Fried Chicken: Once you’ve got the prep out of the way, you’ll be less than 30 minutes away from this irresistible chicken.
Skin-On or Skinless: One of the most exciting results of my testing is that this fried chicken recipe works beautifully with the skin on or off. On my third round I decided to pull the skin off of my bone-in chicken thighs and the result was fabulous!
Clean and Easy: Air fryers are easy to clean and you’ll have no oil to dipose of. You won’t miss the messy oil spatters on your stove or dealing with a big pot of hot oil.
Make-Ahead: This air fried chicken is delicious served cold straight from the refrigerator. Make it in advance and pack it for a picnic or lunch at work.
Ingredient Notes
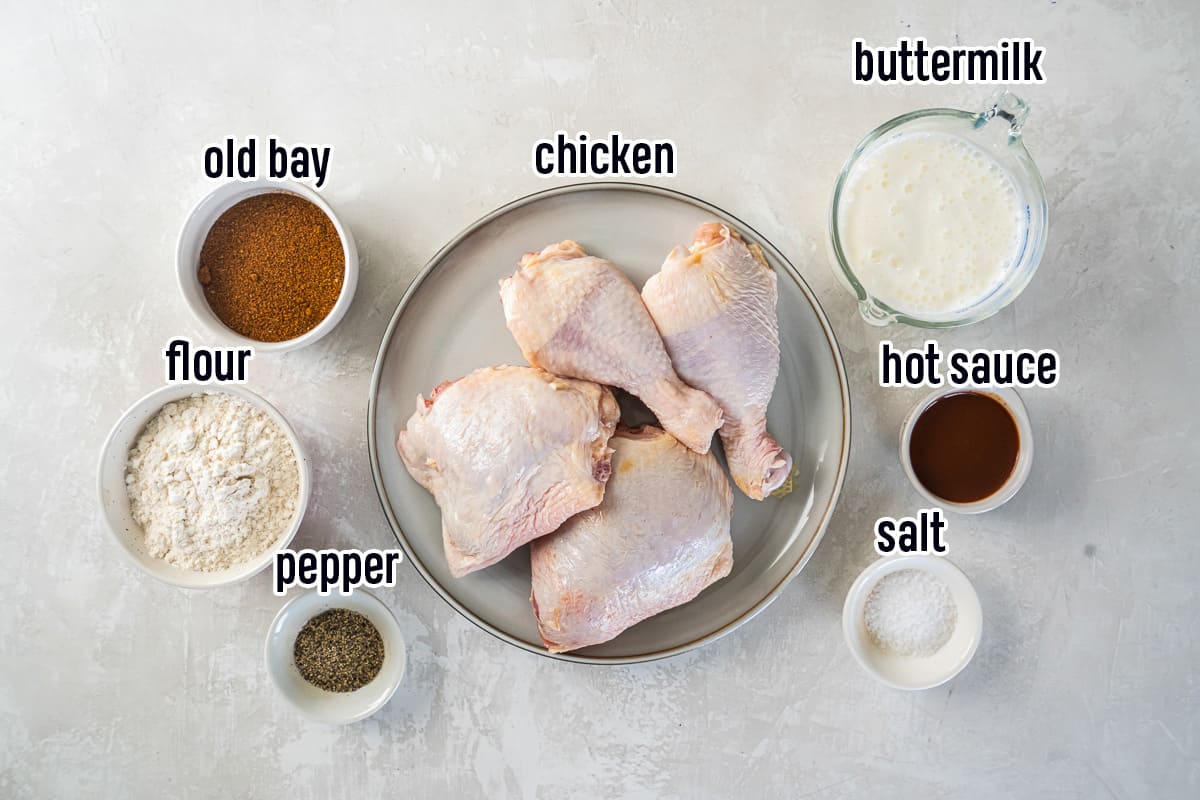
- Chicken: For the best result I recommend using bone-in chicken pieces like thighs, drumsticks, or and breasts. If you want to reduce the fat content even more, the skin can be removed. The chicken is seasoned with a little salt and pepper before it’s breaded.
- Buttermilk and hot sauce: The chicken is marinated in this mixture to help the breading adhere. The hot sauce doesn’t make it spicy, it just adds a bit of zing.
- Breading: The coating is a simple mixture of all-purpose flour and Old Bay Seasoning. You don’t want to skimp on the Old Bay – the flour should be well-seasoned. Old Bay is a blend of celery salt, red pepper, black pepper, and paprika and perfectly creates that classic fried chicken flavor.
How to Make Air Fryer Fried Chicken
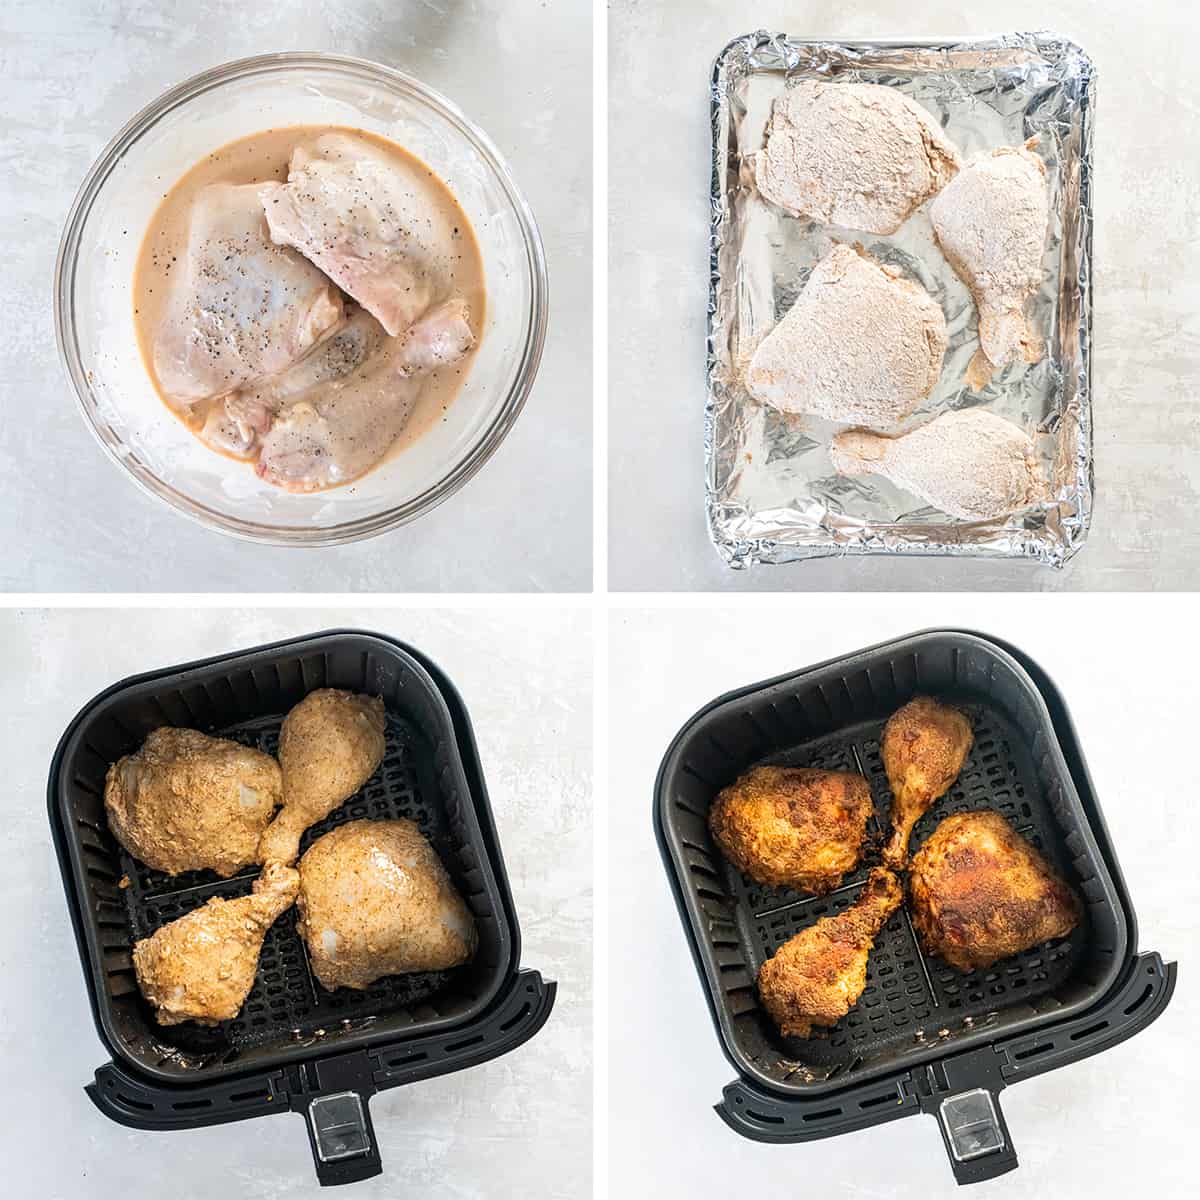
- Marinate the chicken: Let the chicken marinate in the buttermilk and hot sauce mixture for 5 to 10 minutes or cover and refrigerate it for up to 24 hours, if prepping in advance.
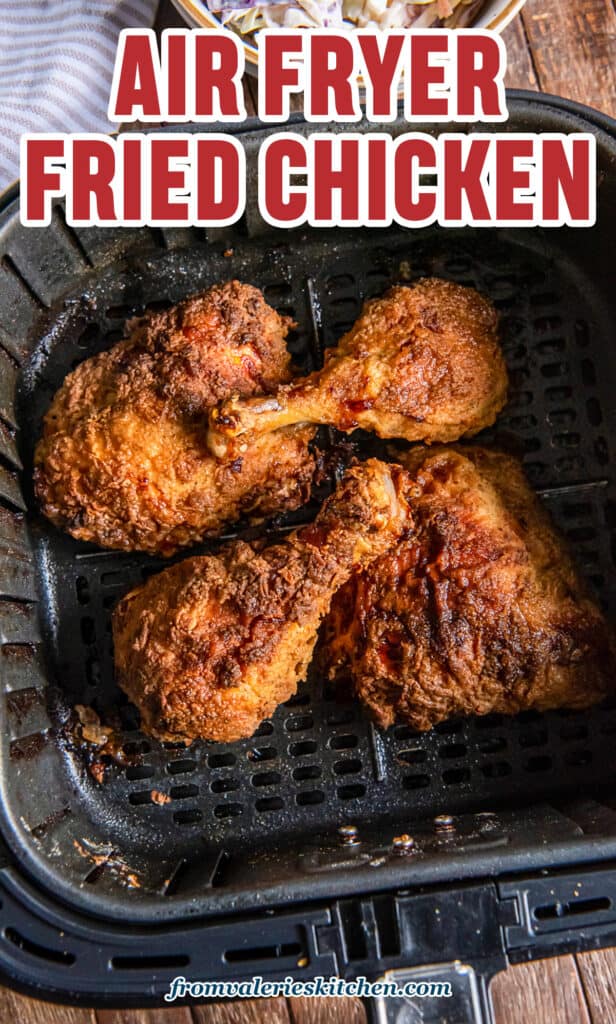
- Bread the chicken: Combine the flour and Old Bay Seasoning in a large plastic food storage bag and shake it to combine the mixture. Bread each piece of chicken individually, then transfer them to a foil lined baking sheet to rest while you preheat the air fryer to 390 degrees F for 5 minutes.
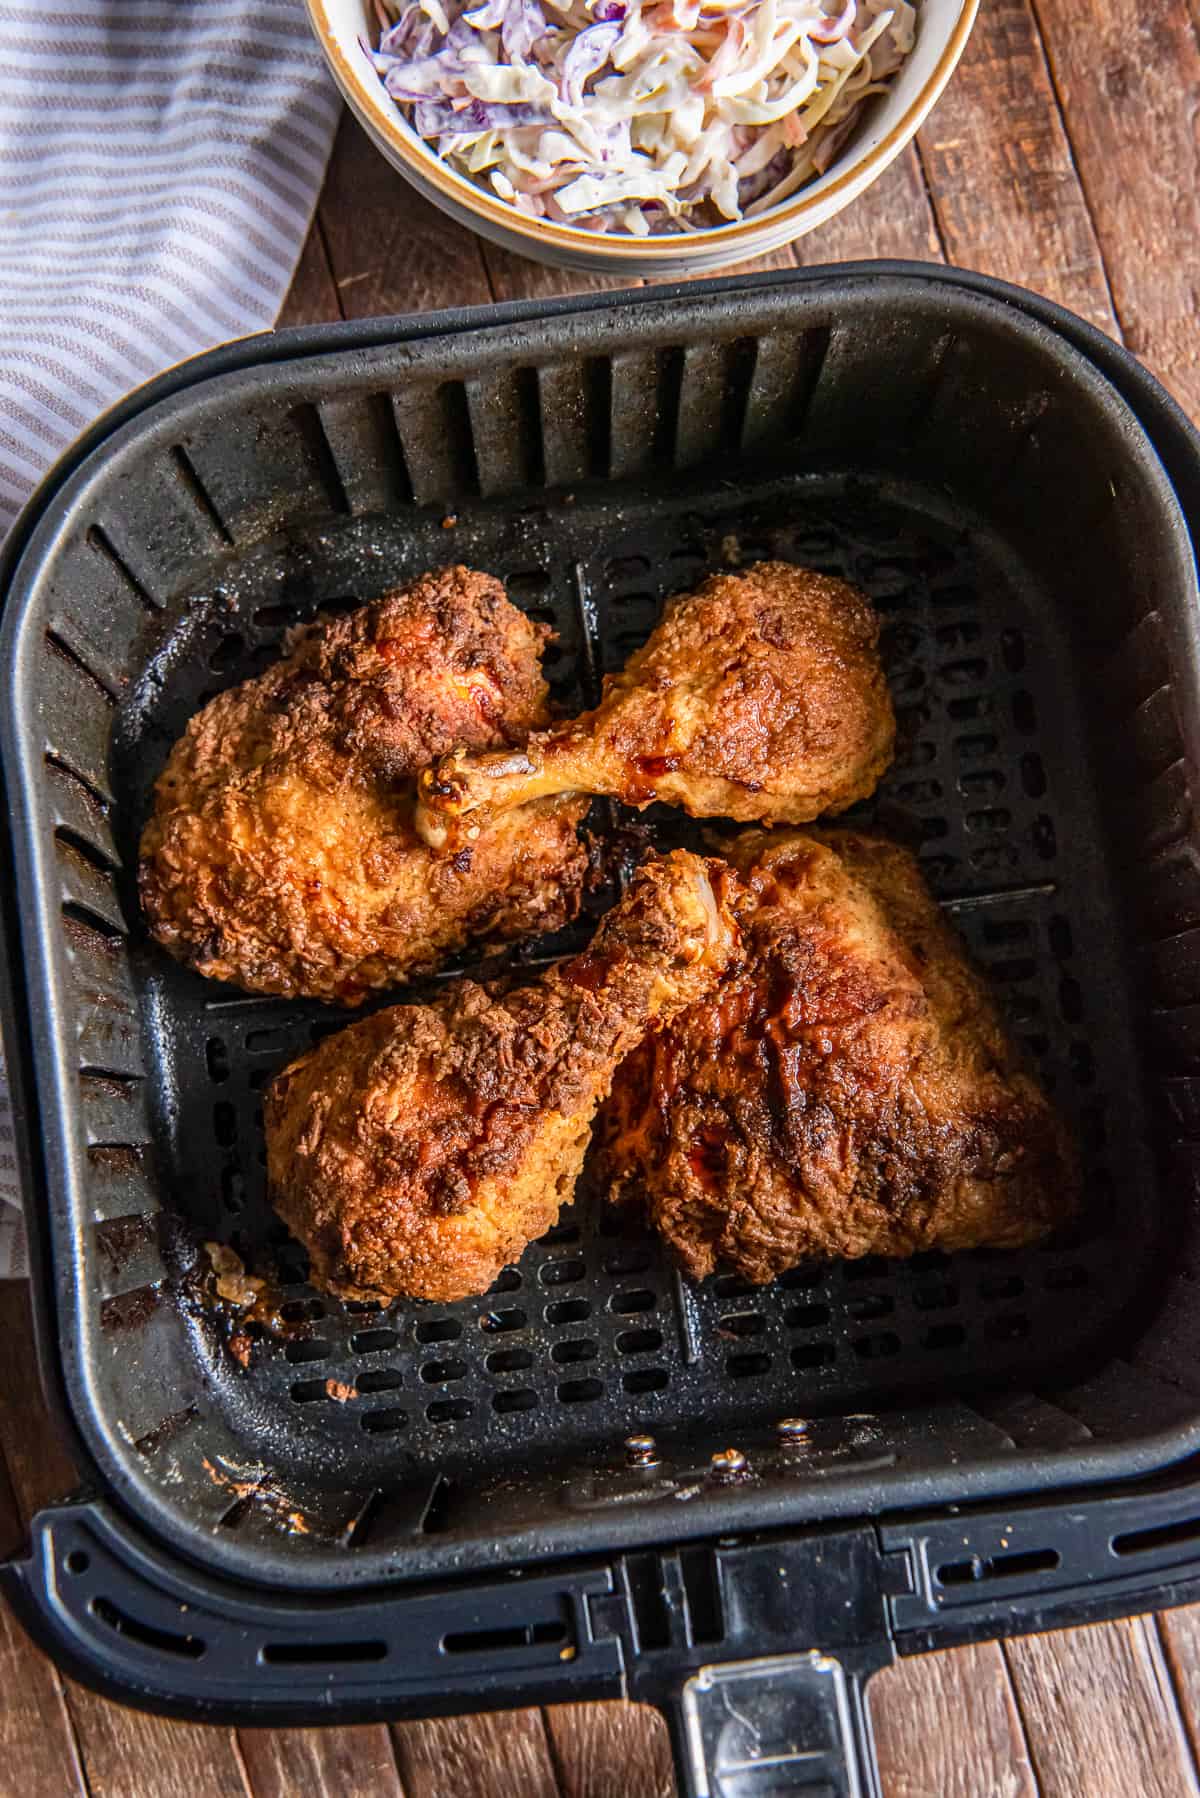
- Coat with oil: Mist the bottom of the air fryer basket and both sides of the chicken with oil and transfer them to the preheated air fryer. It’s okay if the chicken is touching but the pieces should not overlap.
- Cook: Air fry at 390 degrees F for 25 minutes. The internal temperature of the fried chicken should reach at least 165 degrees F when checked with an instant read meat thermometer.
Tips for the Best Air Fryer Fried Chicken
Marinate in advance. The chicken can be breaded and air fried immediately or you can cover and refrigerate it and allow the chicken to marinate in the buttermilk mixture for up to 24 hours. This means you can get this portion of the recipe done in the morning and it will be ready to go when you get home from work.
Mist the chicken with oil. Using an oil mister allows you to precisely control the amount of oil you’re using and makes it really easy to apply oil to items that have been breaded. I also use it to apply a light coat of oil to the air fryer basket to help ensure the items won’t stick during the cooking process.
Check for dry spots. About halfway through the cooking time, open the unit and mist any dry spots with a little more oil. I love that you can open an air fryer to check on the items through the cooking process.
No aerosol nonstick sprays. You don’t want to use an aerosol nonstick cooking spray (like Pam) since many contain additives that will damage the coating of your air fryer basket over time. Instead, use a mister or pasty brush to apply your oil of choice.
Don’t overlap. Only add as many pieces of chicken to the air fryer as will fit in one layer. Instead, cook it in batches, if needed. It’s fine if the pieces touch, but they shouldn’t overlap to allow for air flow over as much surface area as possible.
Double the recipe. This recipe makes enough for two, but you can easily double it and cook in batches. Add a little more buttermilk and hot sauce to the remaining marinade after dipping the first batch, and let the second batch marinate in the fridge while the first cooks. For best results, mix up a fresh bag of the flour mixture for breading the second batch. Cook extra and stash it in the fridge. It’s great cold for picnics and also reheats well.
Storage and Reheating Tips
Store leftover Air Fryer Fried Chicken in an airtight container in the refrigerator for up to 4 days. Preserve the crispy goodness of fried chicken by reheating it in an air fryer preheated to 375 degrees F for about 4 to 5 minutes, flipping halfway through. Avoid using the microwave for reheating as it has a tendency to make the breading soggy.
Sign up for my free newsletter for all the latest recipes and join me on Facebook, Instagram and Pinterest for more cooking inspiration!
Air Fryer Fried Chicken

Video
Ingredients
- 4 bone-in chicken pieces (skin-on or skinless), thighs or drumsticks are my favorite
- salt and fresh ground black pepper, to taste
- 1 cup buttermilk
- 3 tablespoons hot sauce
- 1 cup all-purpose flour
- 3 tablespoons Old Bay Seasoning
- vegetable or canola oil for misting, as needed
Instructions
- If using skin-on chicken, trim any excess fat from the edges, or remove it completely, and season both sides with salt and pepper, to taste.
- Whisk together the buttermilk and hot sauce in a medium mixing bowl. Add the chicken pieces and push them down to submerge them in the liquid. Let the chicken marinate for 5 to 10 minutes or cover and refrigerate it for up to 24 hours if prepping in advance.
- Line a small baking sheet with foil or wax paper. Add the flour and Old Bay Seasoning to a large plastic food storage bag and shake it to combine the mixture.
- Drop one piece of chicken into the flour mixture and shake the bag to coat the chicken well, shaking off any excess flour. Transfer the coated chicken to the foil-lined baking sheet and repeat the breading process with the remaining chicken. Let the coated chicken rest while you preheat the air fryer to 390 degrees F for 5 minutes.
- When the air fryer is preheated, use an oil mister to lightly coat the bottom of the air fryer basket with oil. Lightly coat both sides of the chicken with oil and transfer them to the preheated air fryer. It's okay if the chicken is touching but the pieces should not overlap. Cook at 390 degrees F for 25 minutes.
- Check on the chicken about halfway through the cooking time and mist any dry spots with additional oil.
- The internal temperature of the fried chicken should read at least 165 degrees F at the end of the cooking process.
Notes
Nutrition
Nutrition information is automatically calculated using generic ingredients, and is an estimate not a guarantee. For more accurate results, please refer to the labels on your ingredients at home.
Like this? Please rate & comment below!
This post was originally published on May 28, 2019. It has been updated with new text and images.


I overcooked and over seasoned it a little but overall I give this recipe a 9/10! Next time I won’t add so much old bay and I will air fry the chicken on 395° for 20 minutes instead of 400°
This rocked
This was amazing! Even my kids who don’t like bone-in chicken ate it all. We don’t have an air fryer, but used our convection oven at same temp. Only change they asked me to make for next time was to add some salt (I didnt have a full amount of Old Bay either). I also didn’t have buttermilk so I substituted regular milk with a little vinegar in it ahead of time. Super excited. Wondering how to adapt it for a regular oven when we are on vacation.
I can’t cook- I just can’t. But I did this and it’s honestly the best meal I’ve made. My husband and son loved it too!
Happy to worked out so well for you! Thanks so much for your comment. 🙂
I love this recipe! I let my chicken soak in the buttermilk mixture overnight and it turned out moist and tender. Can this be made a day ahead and then warmed in the oven? Would it still be crisp?
So happy you enjoyed the recipe! I’d be inclined to warm leftovers in the air fryer to re-crisp it a little. I think with fried chicken, it’s always best eaten right away but we also love leftovers cold from the fridge.
I was so pleasantly surprised by how easy this was to make, and the delicious results. The hot says and Old Bay seasoning give it just the little bit of zip it needs. Definitely worth making again! Next time I’m going to try it with the skin off, just to see how it comes out.
I have a convection oven. What time/temperature would you suggest for cooking the chicken?
I’m afraid I haven’t tested this recipe in a convection oven so I can’t be sure.
This recipe was awesome, even with my picky son in law. I will use this again, thank you.