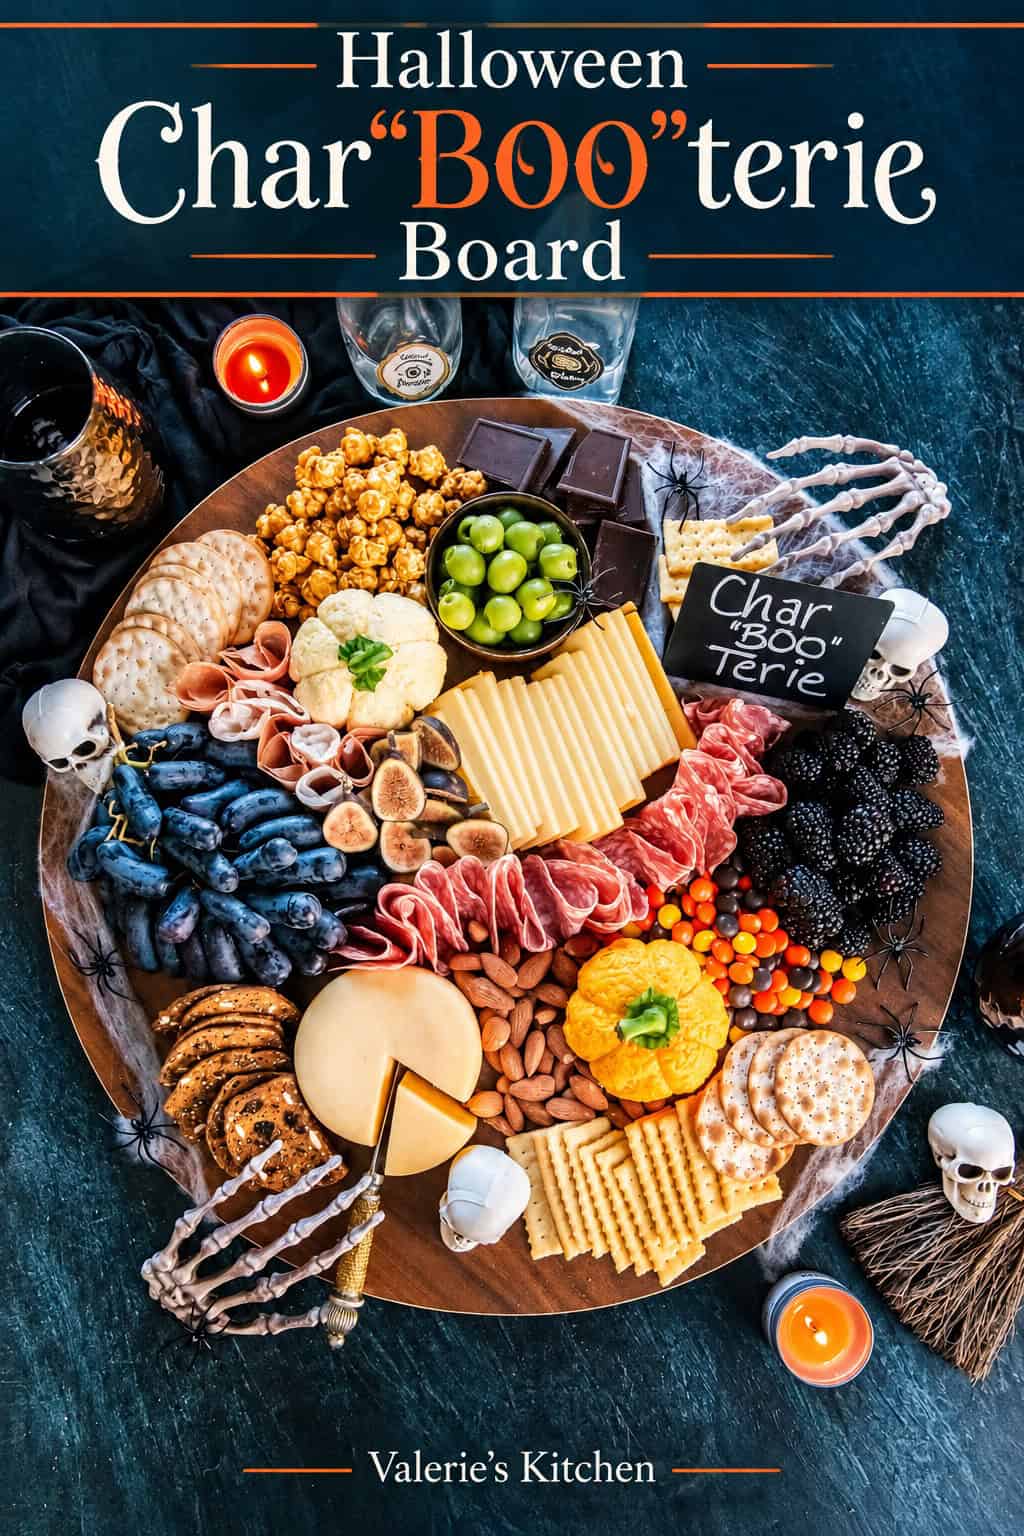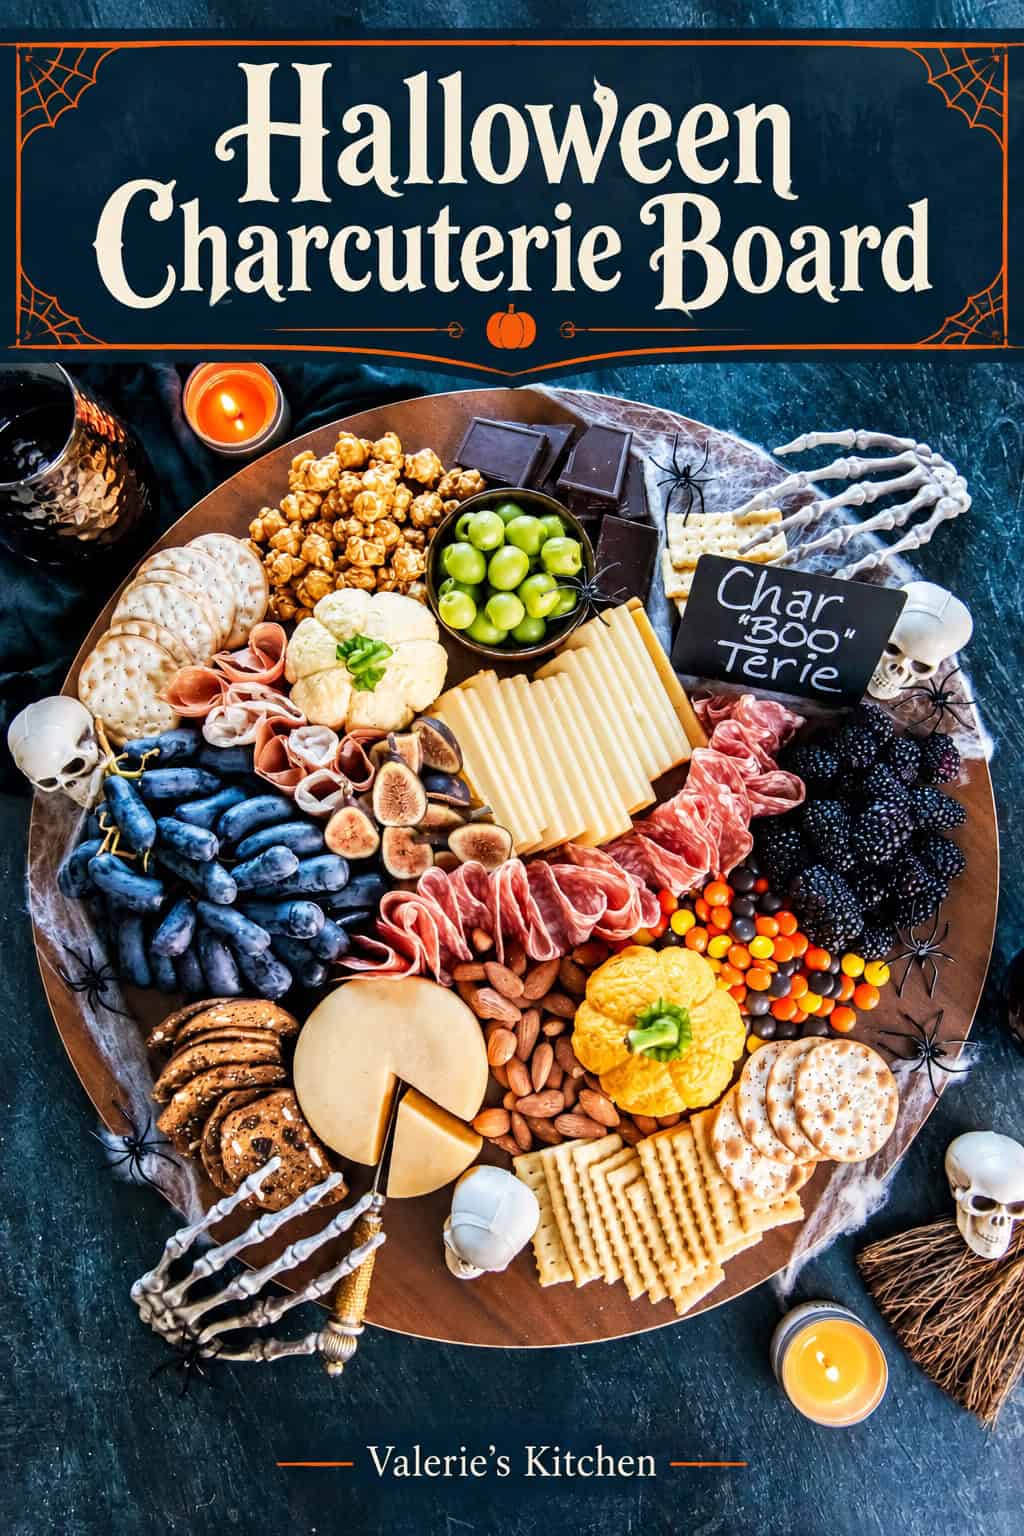
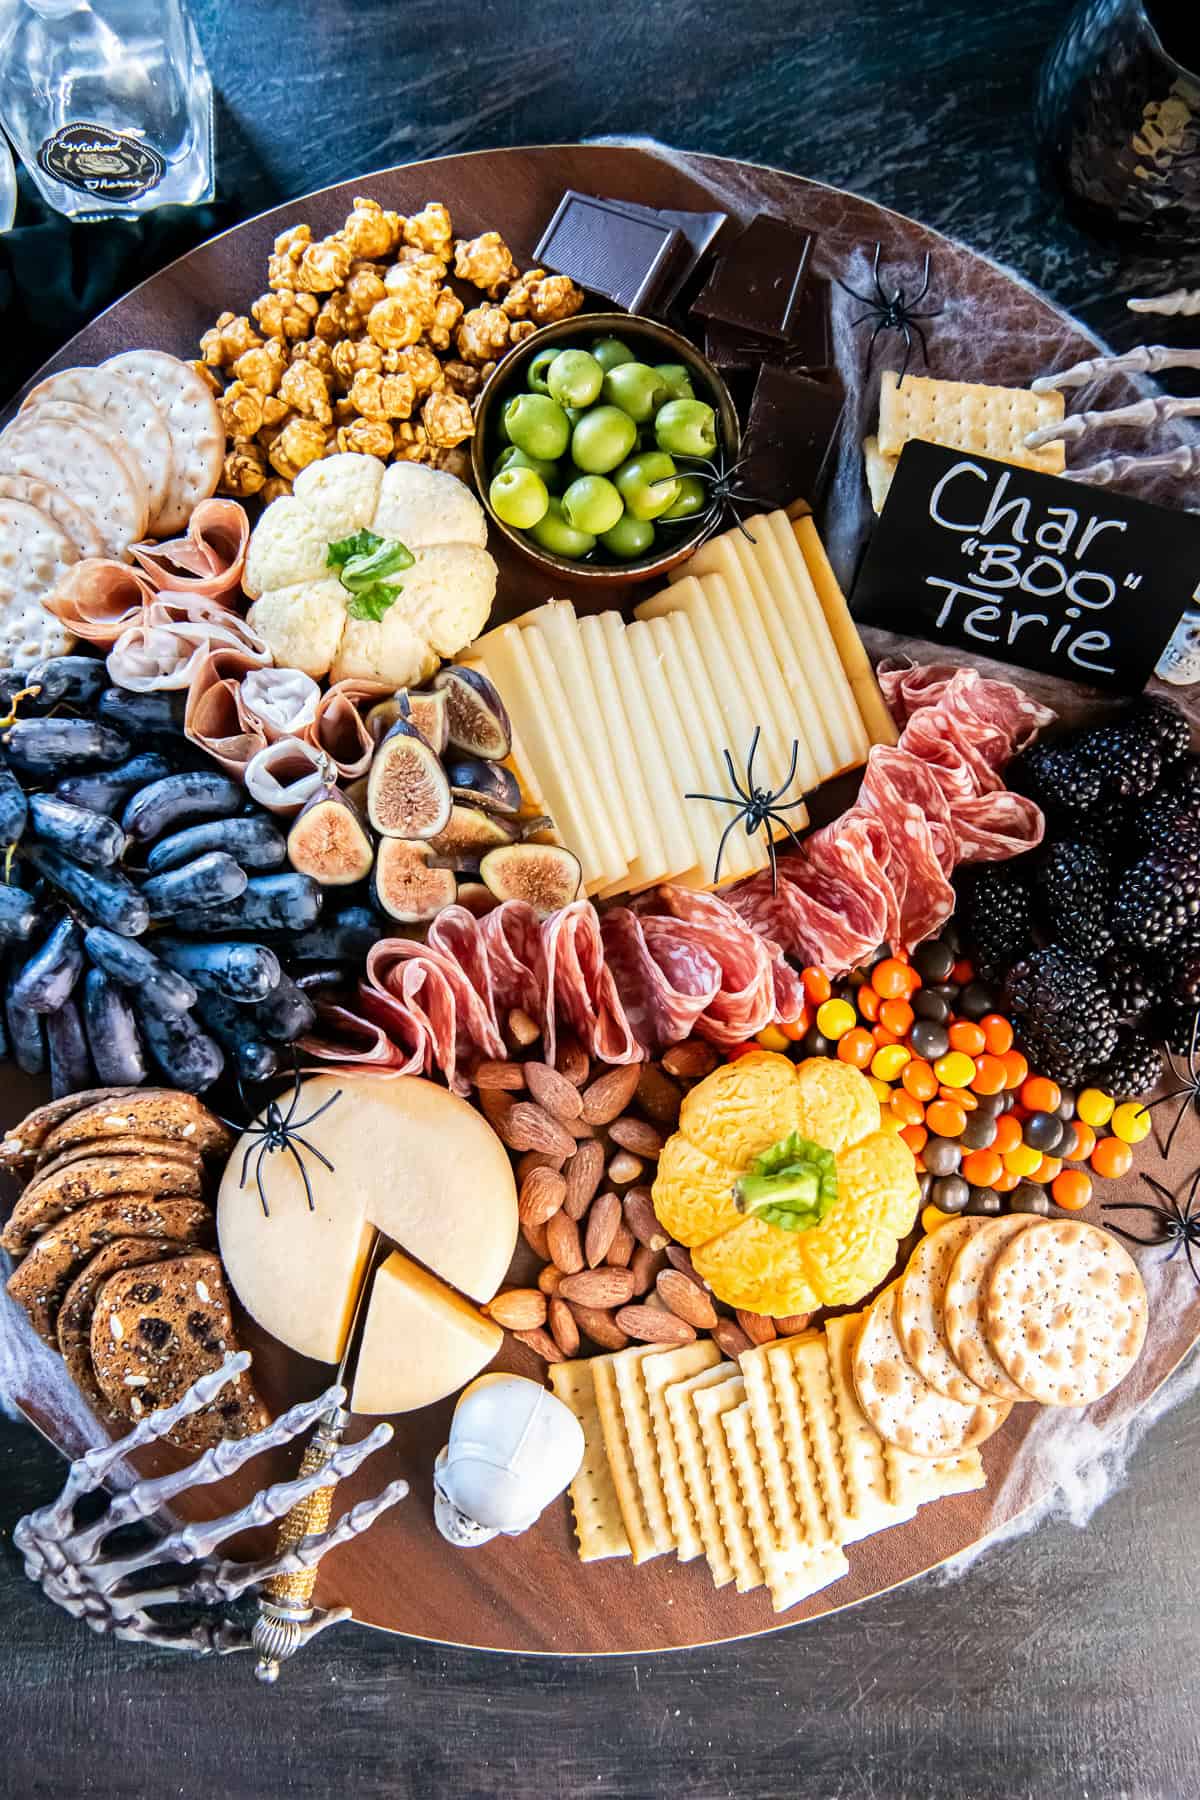
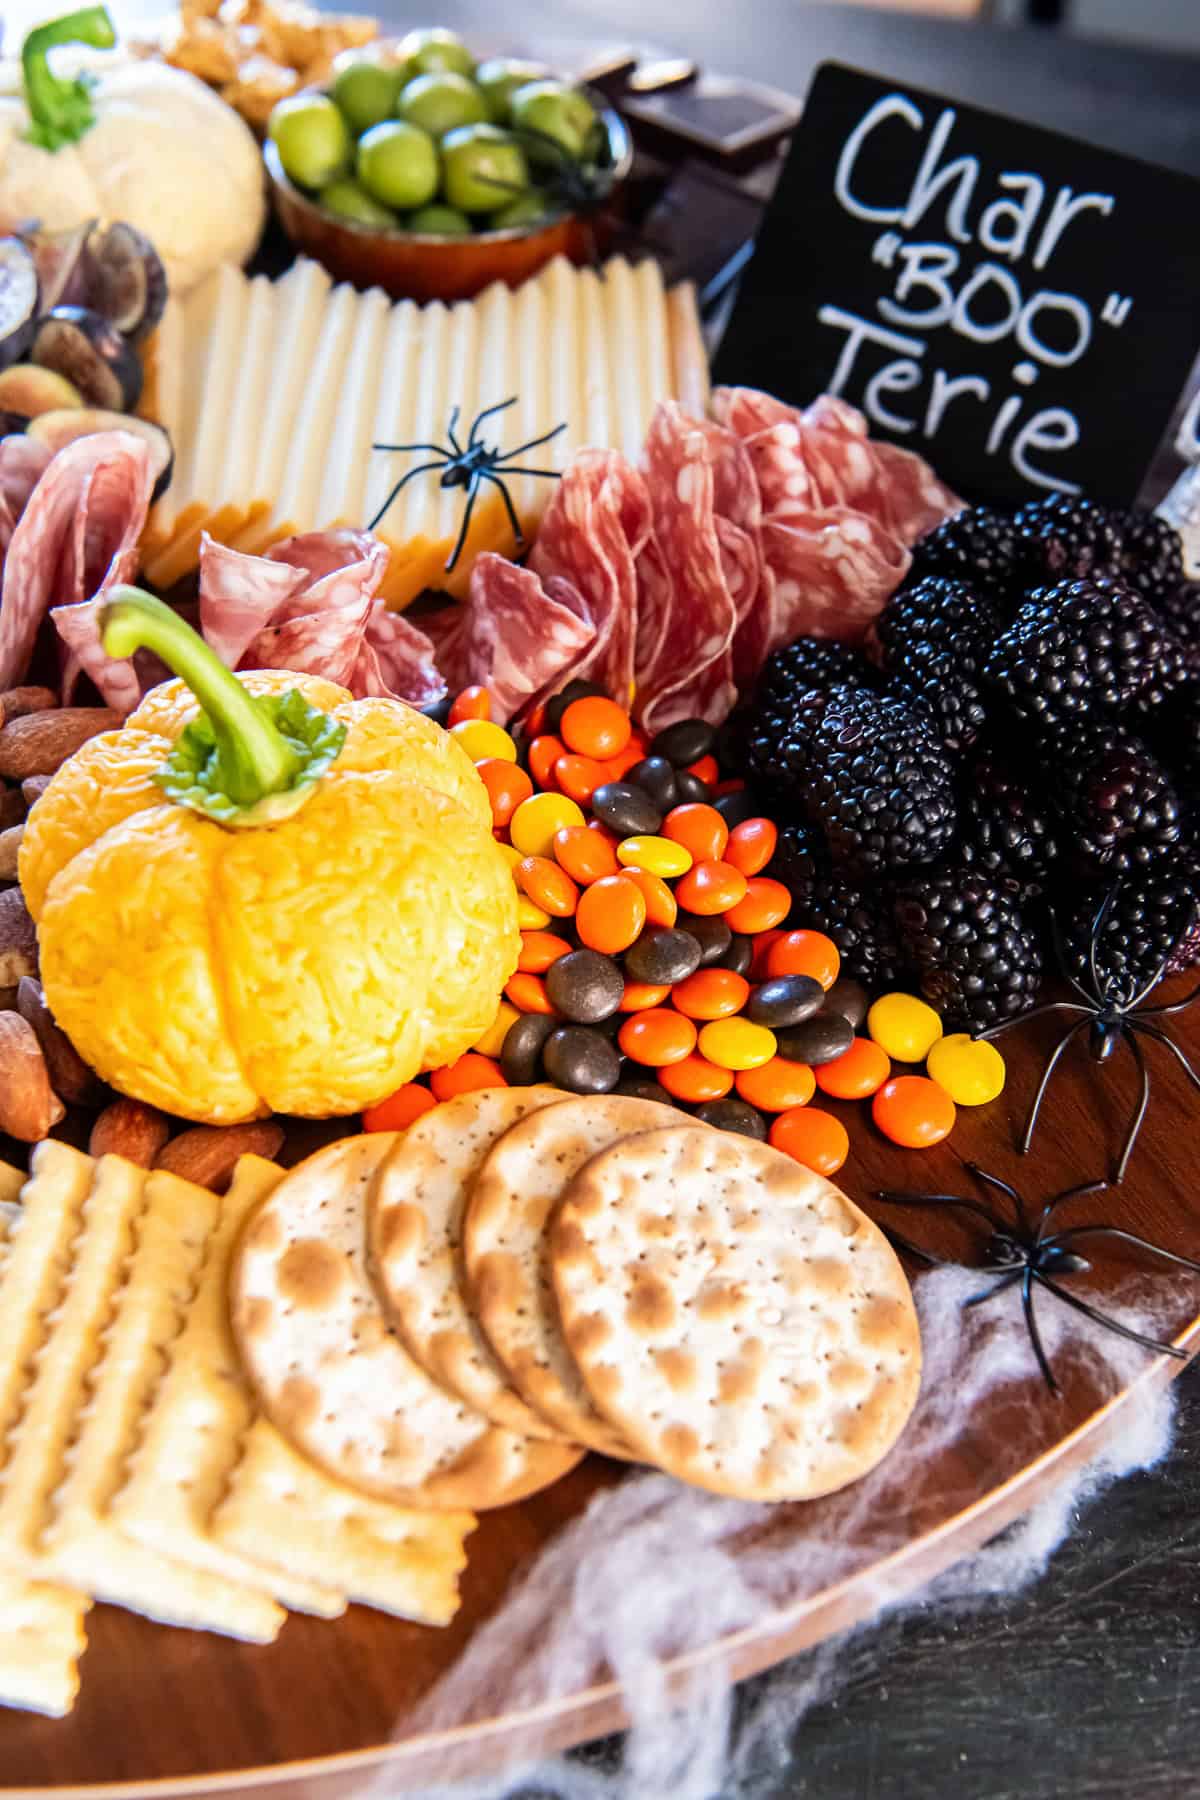
Add a fun, spooky touch to your festivities with this Halloween Charcuterie Board! Two adorable Boursin cheese pumpkins steal the show, surrounded by an assortment of cheeses, cured meats, fruit, crackers, and Halloween sweets. It’s easy to assemble and it will make a big impression at your Halloween gathering!
This post may contain affiliate links. Please read our disclosure policy.
Pin this now to find it later
Pin ItTable of Contents
Easy Halloween CharBOOterie
Putting together a beautiful Halloween-themed charcuterie board is easier than you might think! You definitely don’t need Martha Stewart-level skills. Just the right assortment of delicious treats and a few spooky Halloween props are all it takes to create a picture-perfect spread for your party.
Prepare a few special touches yourself, like the Boursin pumpkin cheeseballs and some of my homemade Halloween treats, or pick up everything from the grocery store for a quick and easy Halloween party spread.
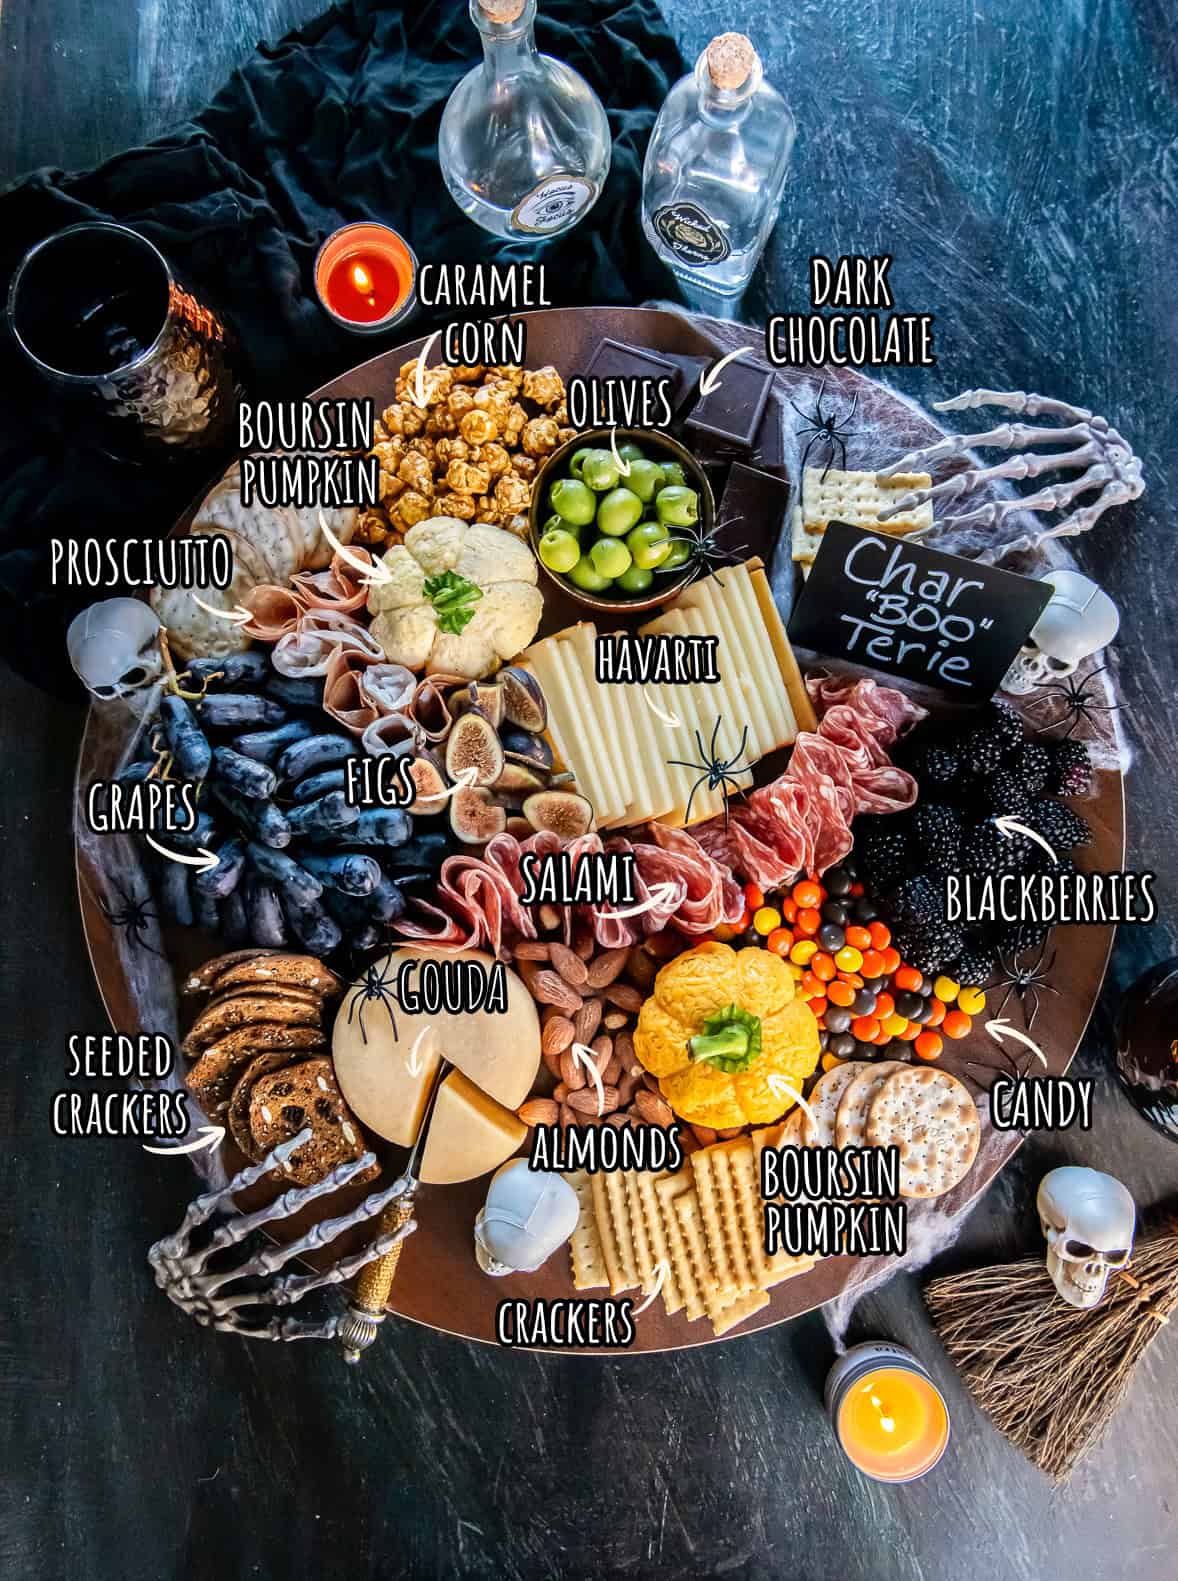
What to Put on a Halloween Charcuterie Board
Boursin Pumpkins
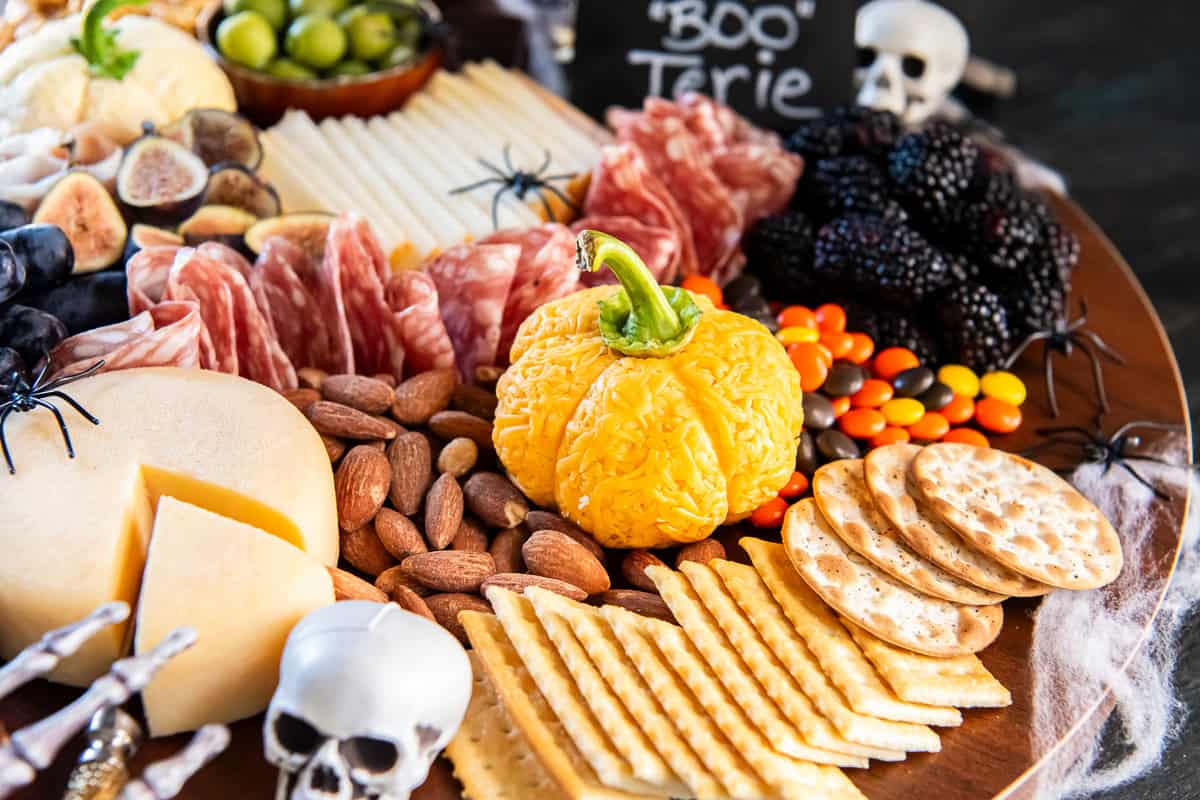
Adding one or two of these cute little pumpkin cheese balls will bring a fun Halloween vibe to your board. For each pumpkin, you’ll need one package of Boursin cheese. Any flavor will work, but the Caramelized Onion flavor is chef’s kiss delicious! To coat the cheese balls, I used finely shredded sharp cheddar for one and white cheddar for the other. Monterey Jack is another good option. Bell pepper stems make the perfect finishing touch, but short pretzel sticks work, too. See the step-by-step directions to make these below.
Additional Cheese
I used a wedge of aged Gouda and sliced Havarti. Other good choices include sharp cheddar, Gruyère, Manchego, a wedge of Brie, or a log of goat cheese drizzled with honey.
Meats
Salami and prosciutto add savory flavor and are easy to fold into pretty shapes. Soppressata, pepperoni, or capicola would also work well.
Fruit
Dark purple grapes, blackberries, and fresh figs add beautiful deep colors to the board. Try blueberries, black plums, or slices of crisp red or green apple. If fresh figs aren’t available, dried figs or dried apricots are a great alternative.
Briny + Crunchy
Castelvetrano olives, roasted salted almonds, and an assortment of crackers add contrasting flavors and textures. My Easy Glazed Nuts or Perfect Roasted Pumpkin Seeds would be delicious here, too! Try Kalamata olives, cornichons, pecans, pistachios, pretzel crisps, or breadsticks.
Halloween Sweets
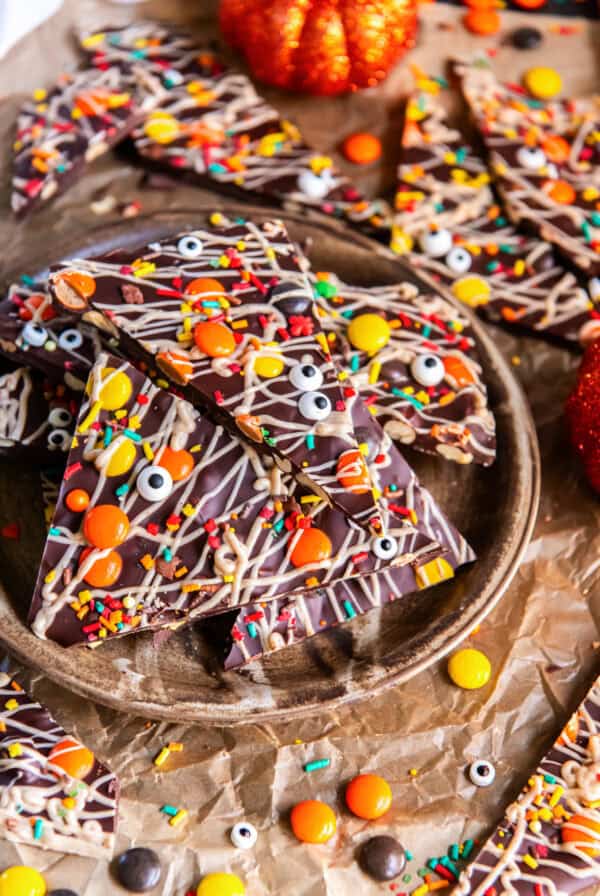
Reese’s Pieces bring a pop of orange, while dark chocolate and caramel popcorn add something sweet. Make a batch of my homemade Caramel Corn or keep it simple with a bag from the store. My Halloween Bark would be perfect or just grab some candy corn, chocolate-covered pretzels, or other Halloween candies.
Choosing the Right Board
A large wooden charcuterie board makes a beautiful base for all those Halloween goodies! I love the warm, rustic look of wood against the dark fruit, colorful cheeses, and spooky decorations.
For a board like this, I recommend a round wooden board that’s at least 16 inches across, although 18 to 20 inches will give you more room to work with. If your board is smaller, simply scale back the ingredients or make just one cheese pumpkin. A silver or pewter-colored metal tray is a great option that would give it a slightly spooky, vintage look.
Don’t have a large round board? A rectangular serving platter, cutting board, or even a large baking sheet lined with parchment paper will work, too. Just choose something sturdy with enough room for all your goodies and a few fun Halloween decorations!
How to Make Boursin Cheese Pumpkins
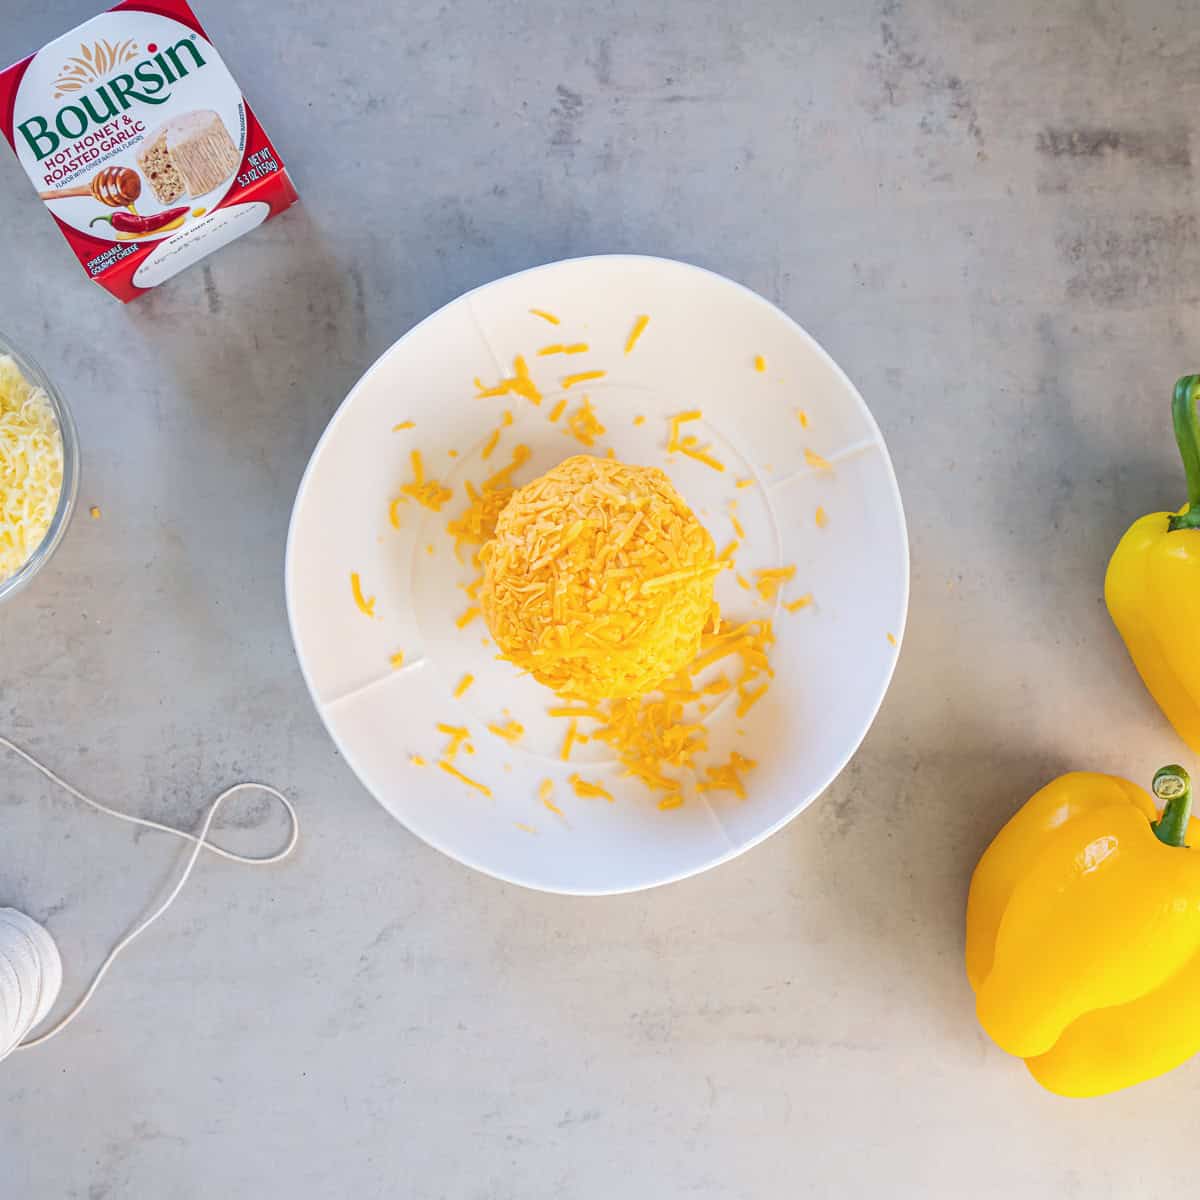
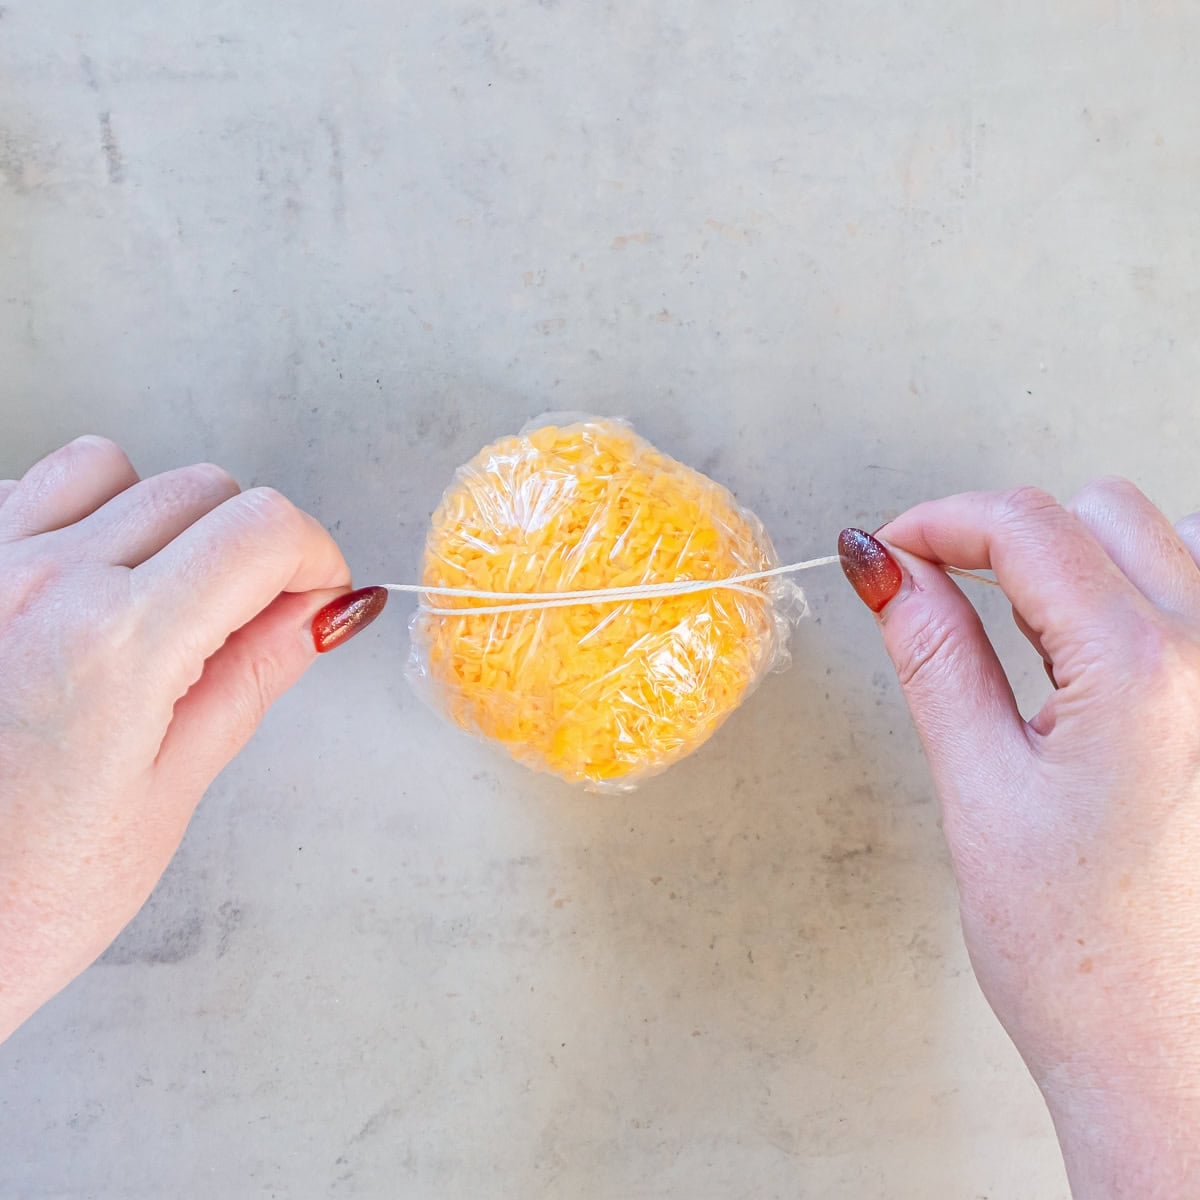
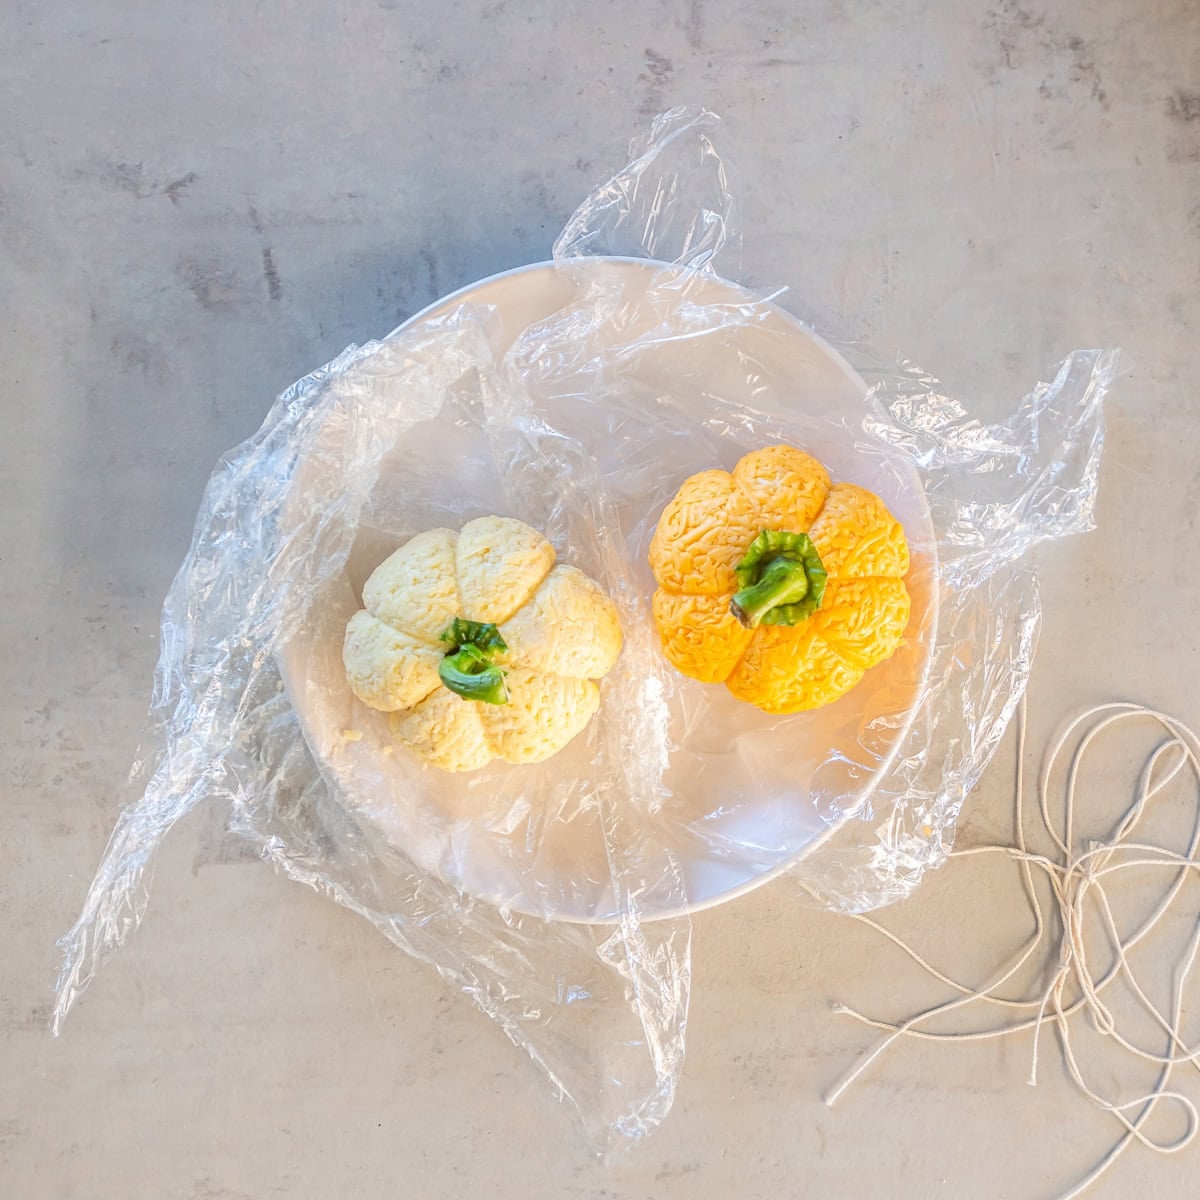
- Shape and coat: Gently shape one package of cold Boursin into a ball, flattening the bottom slightly. Roll it in finely shredded sharp cheddar, pressing gently until evenly coated.
- Wrap: Place the cheese ball in the center of a generous piece of plastic wrap. Bring the plastic up around the cheese ball and wrap it snugly.
- Tie: Cut a 3- to 4-foot length of kitchen twine. Center it underneath the wrapped cheese ball, bring the ends up over the top, and cross them.
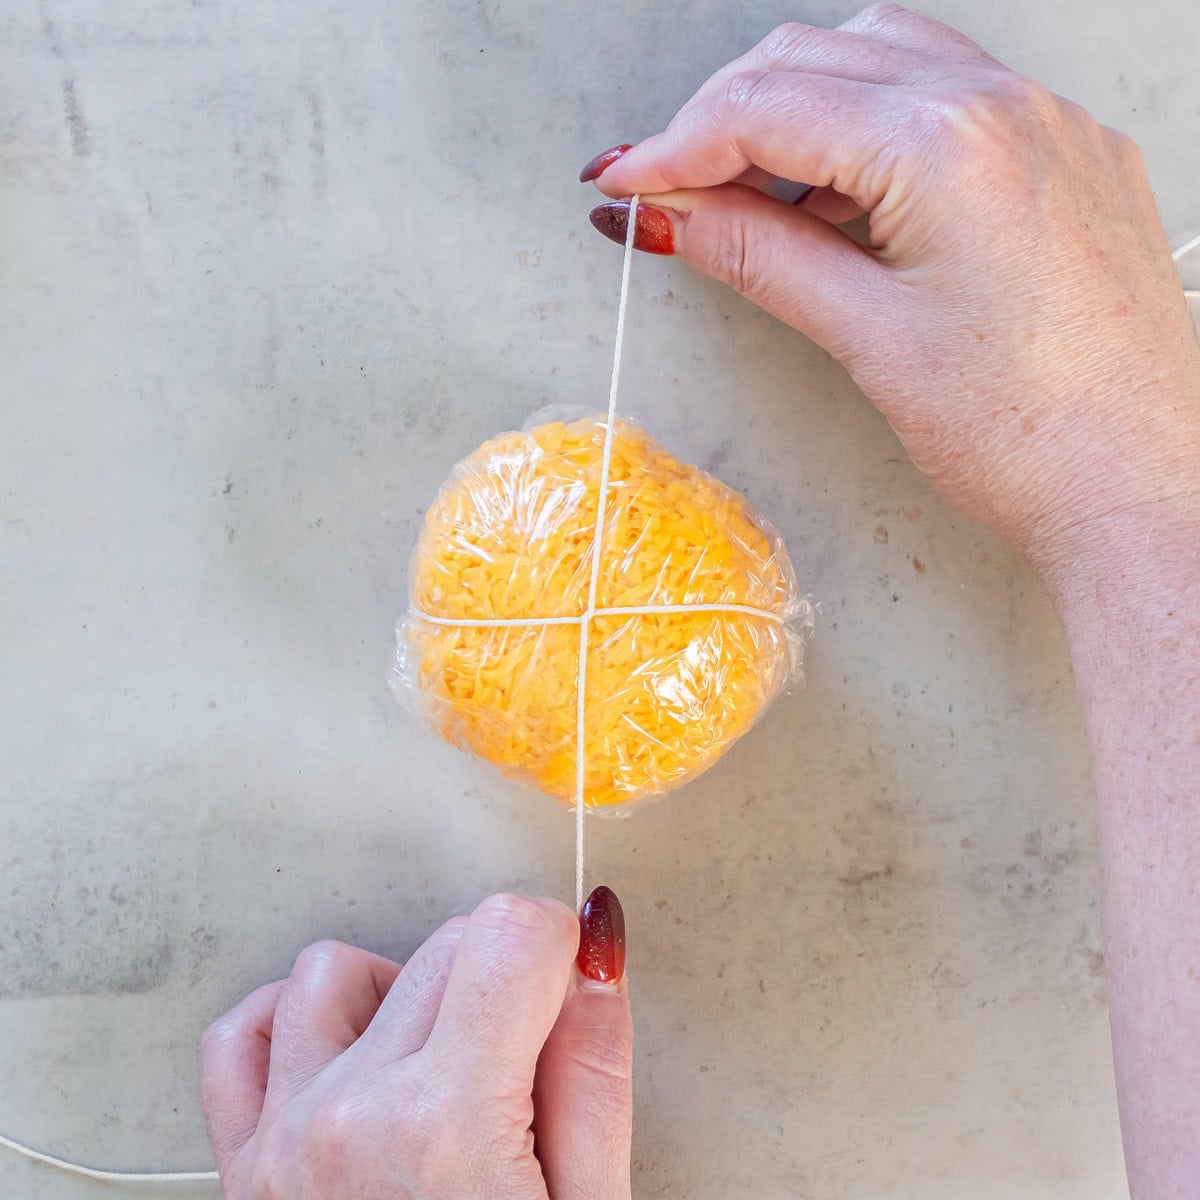
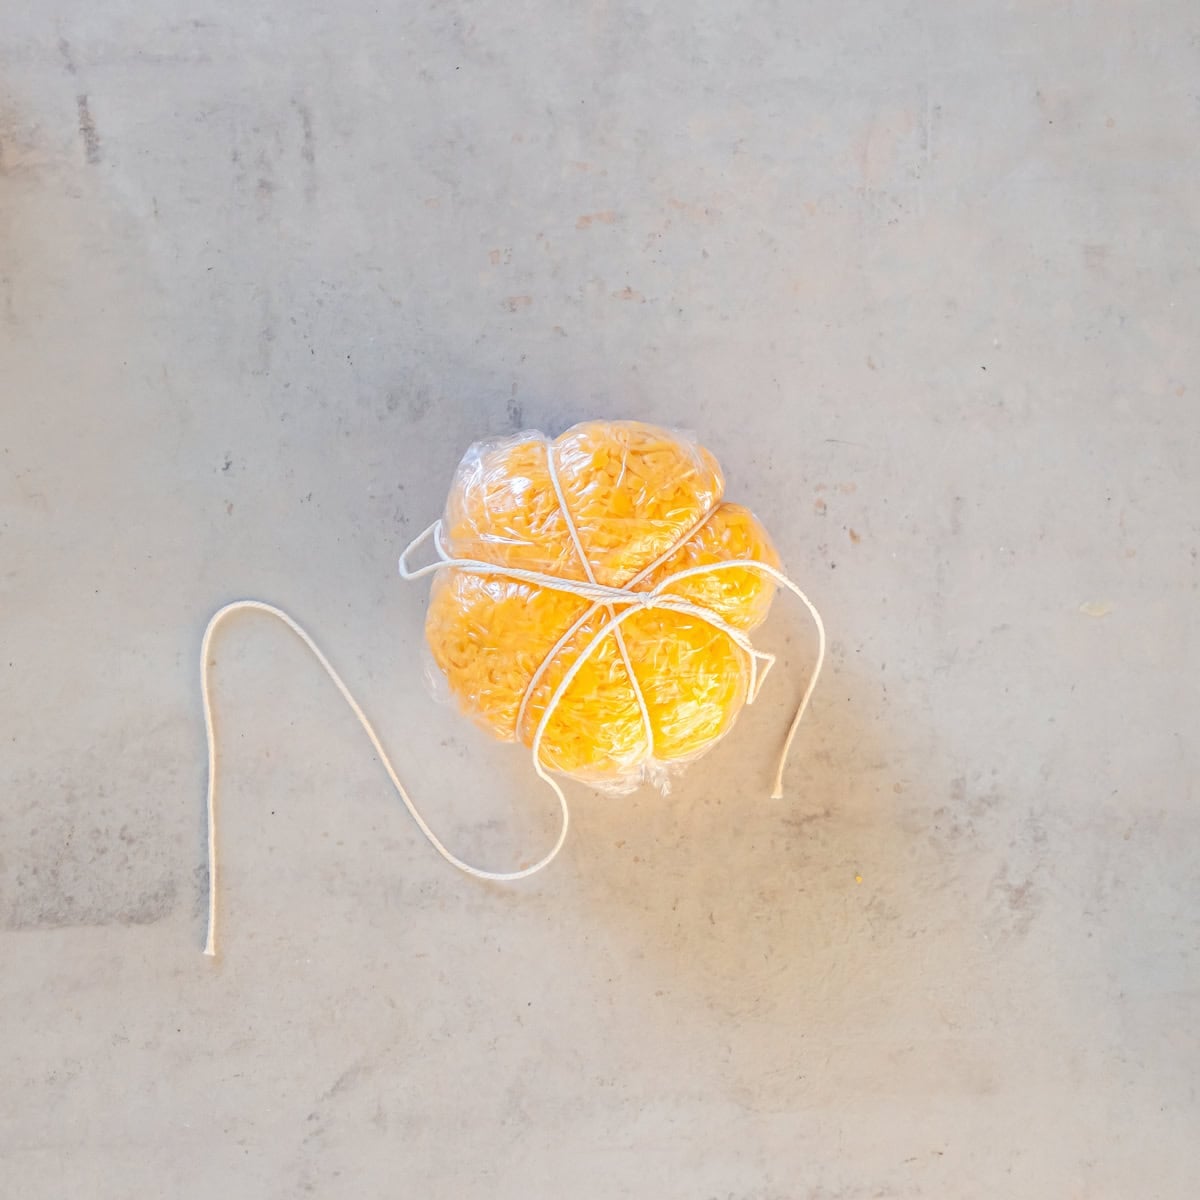
- Create the pumpkin ridges: Turn the cheese ball and bring the twine down the opposite sides, crossing it underneath. Continue turning and wrapping at different angles until you’ve created six sections. Keep the twine snug enough to form indentations without cutting deeply into the cheese.
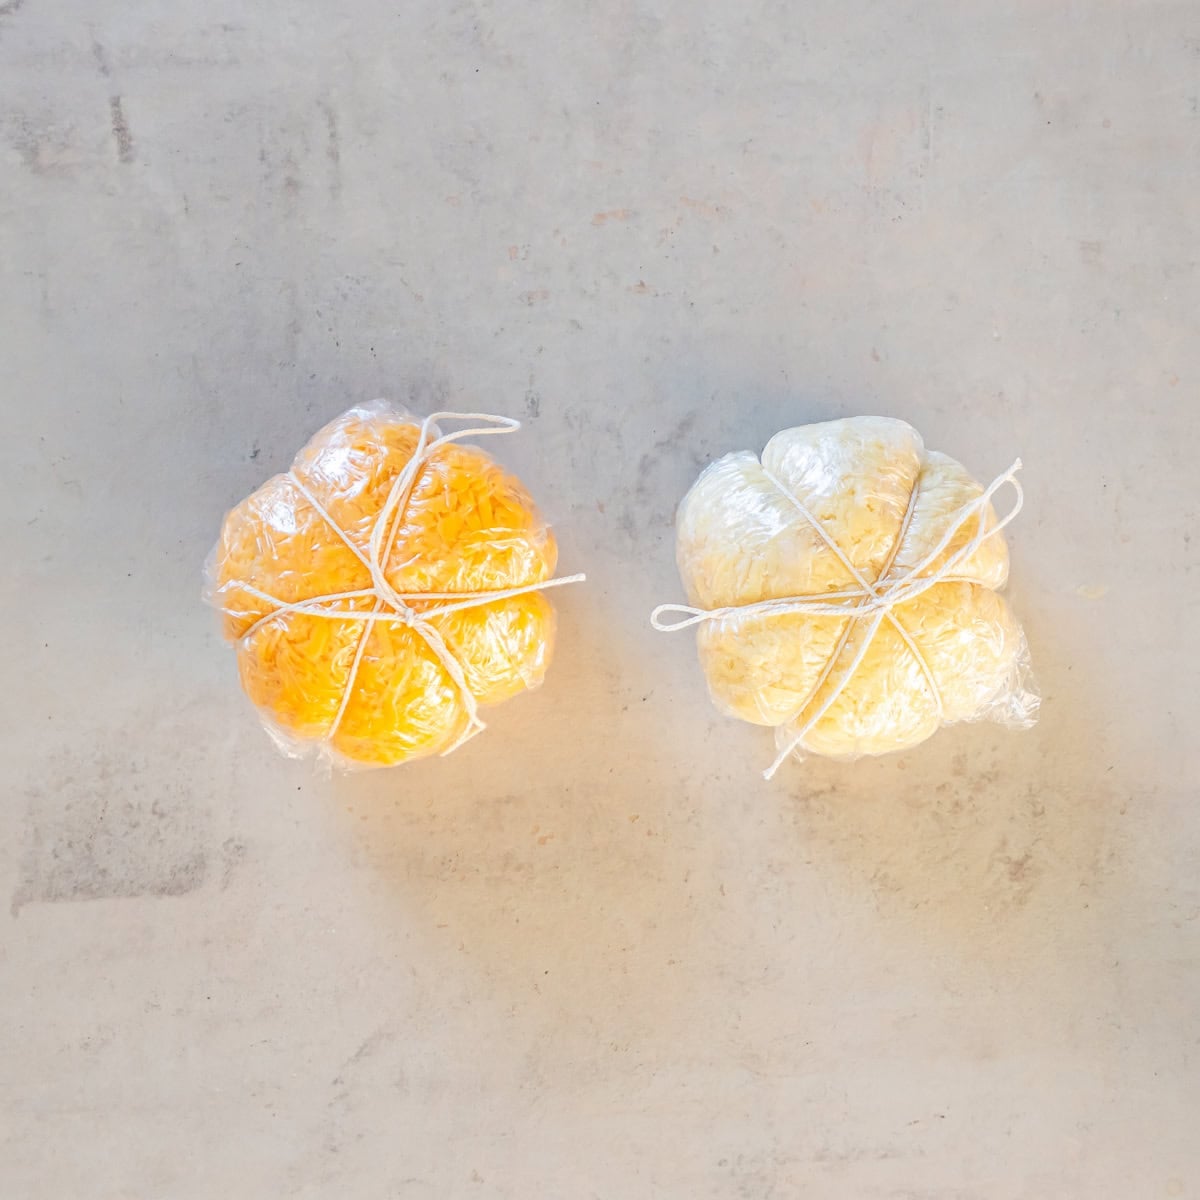
- Repeat with the white cheese: Tie the twine securely, then repeat the process with the second package of Boursin, using finely shredded white cheddar or Monterey Jack. Refrigerate both wrapped pumpkins for 1 hour, or until firm.
- Finish the pumpkins: Carefully snip and remove the twine, then gently peel away the plastic wrap. Press on any additional shredded cheese needed to cover bare spots, and insert a clean bell pepper stem into the top of each pumpkin.
How to Assemble a Halloween Charcuterie Board
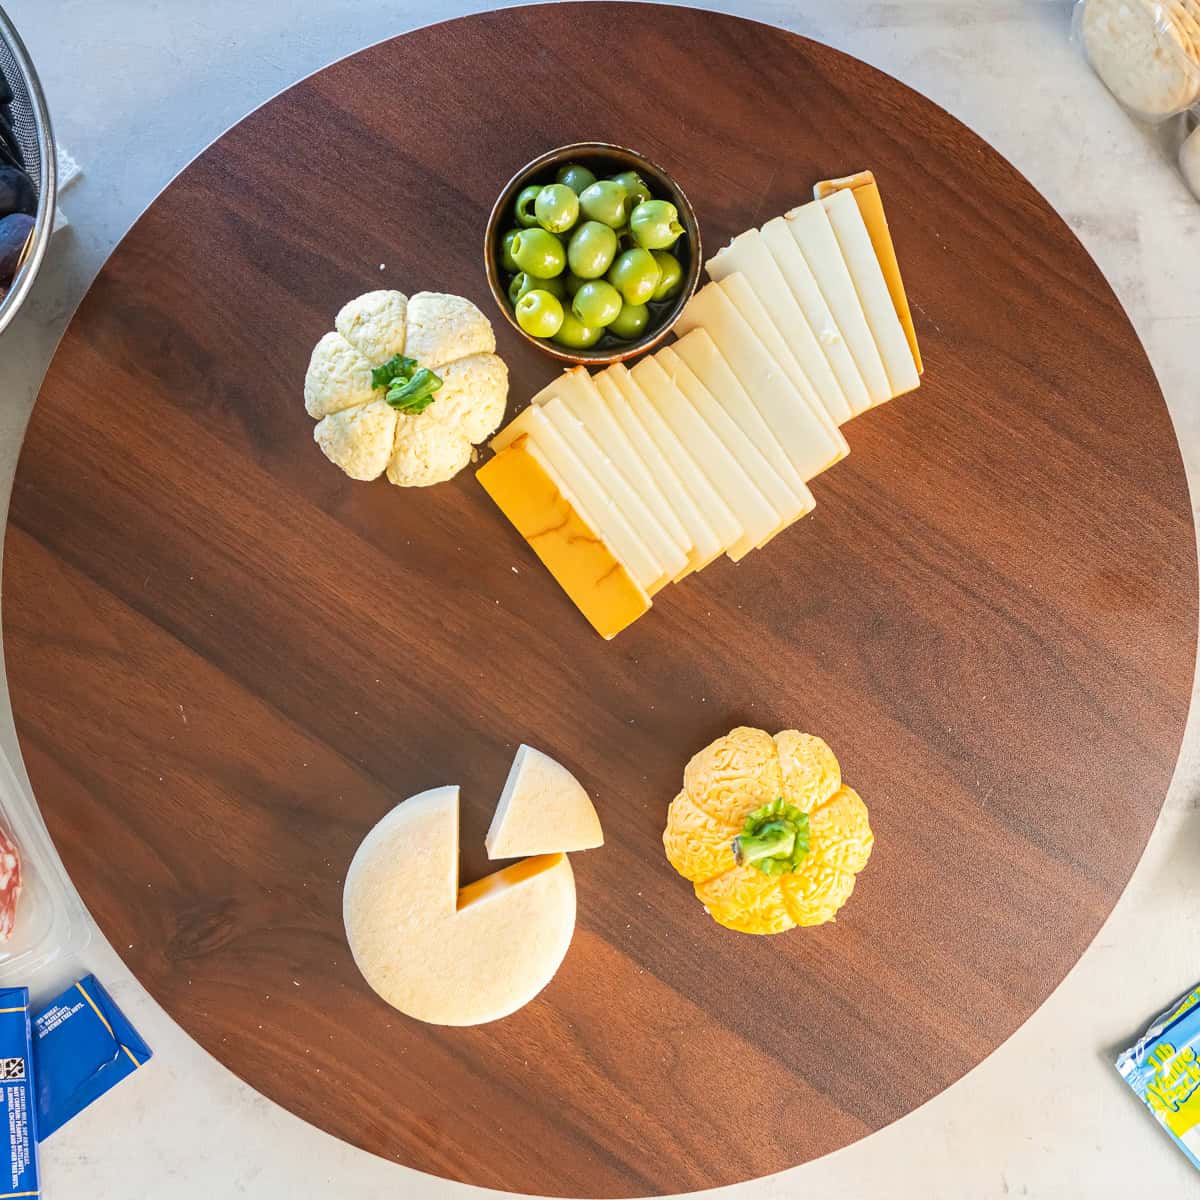
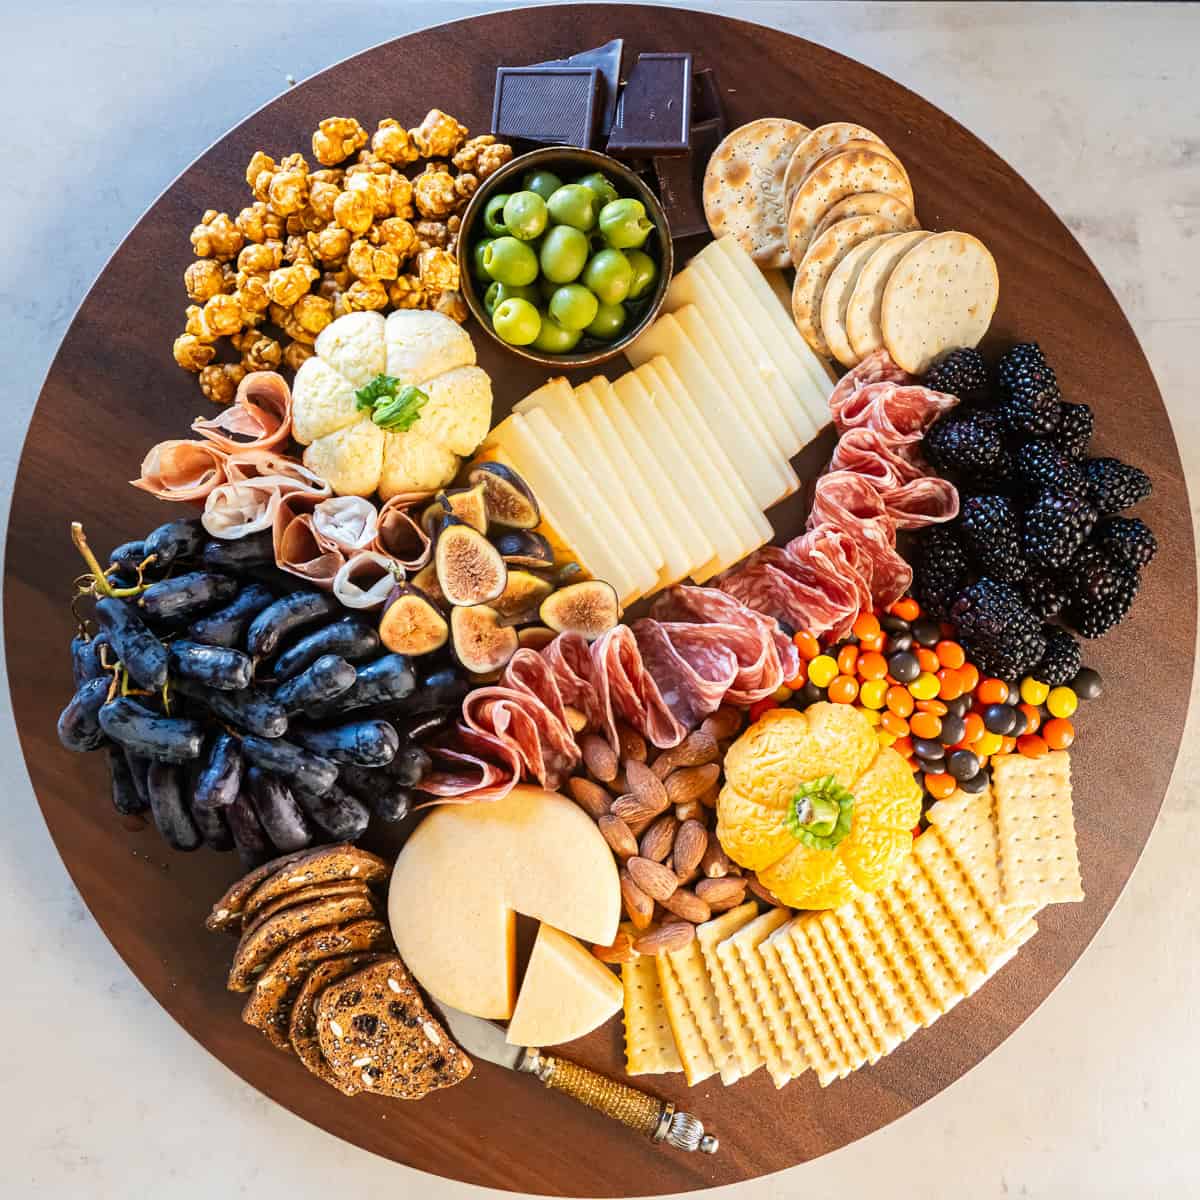
- Start with the cheeses. Place the two Boursin cheese pumpkins on opposite sides of the board. Add a small bowl of olives, then arrange the sliced cheeses and Gouda wedge, leaving plenty of room for everything else.
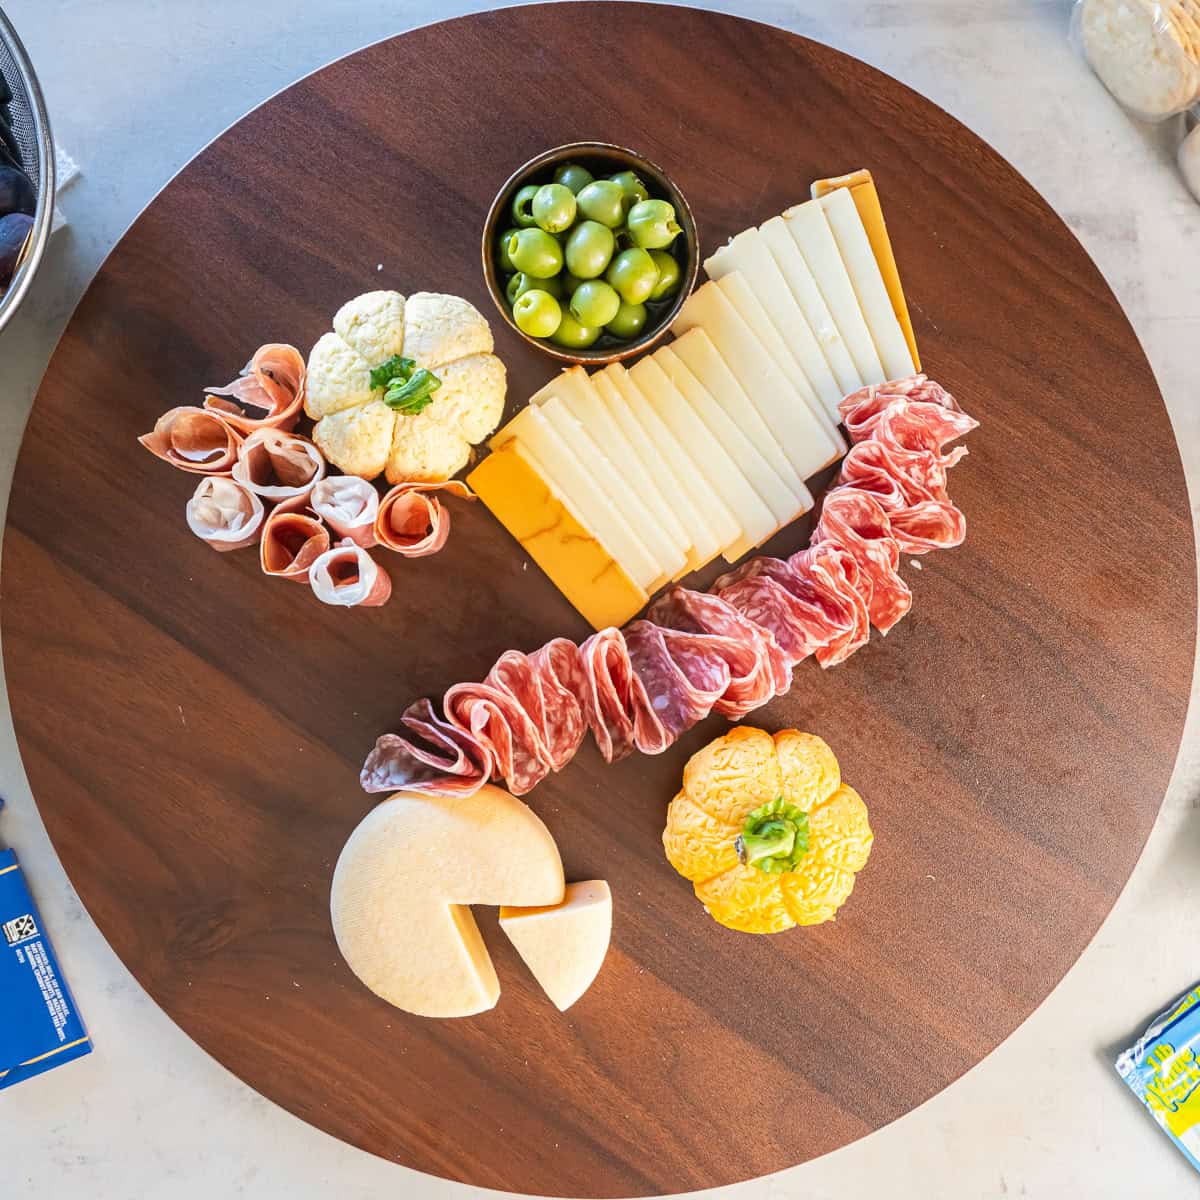
- Add meats. Fold the salami and prosciutto into loose ribbons and tuck them around the cheeses. I like to arrange the salami in a winding row across the board and fill in smaller spaces with the prosciutto.
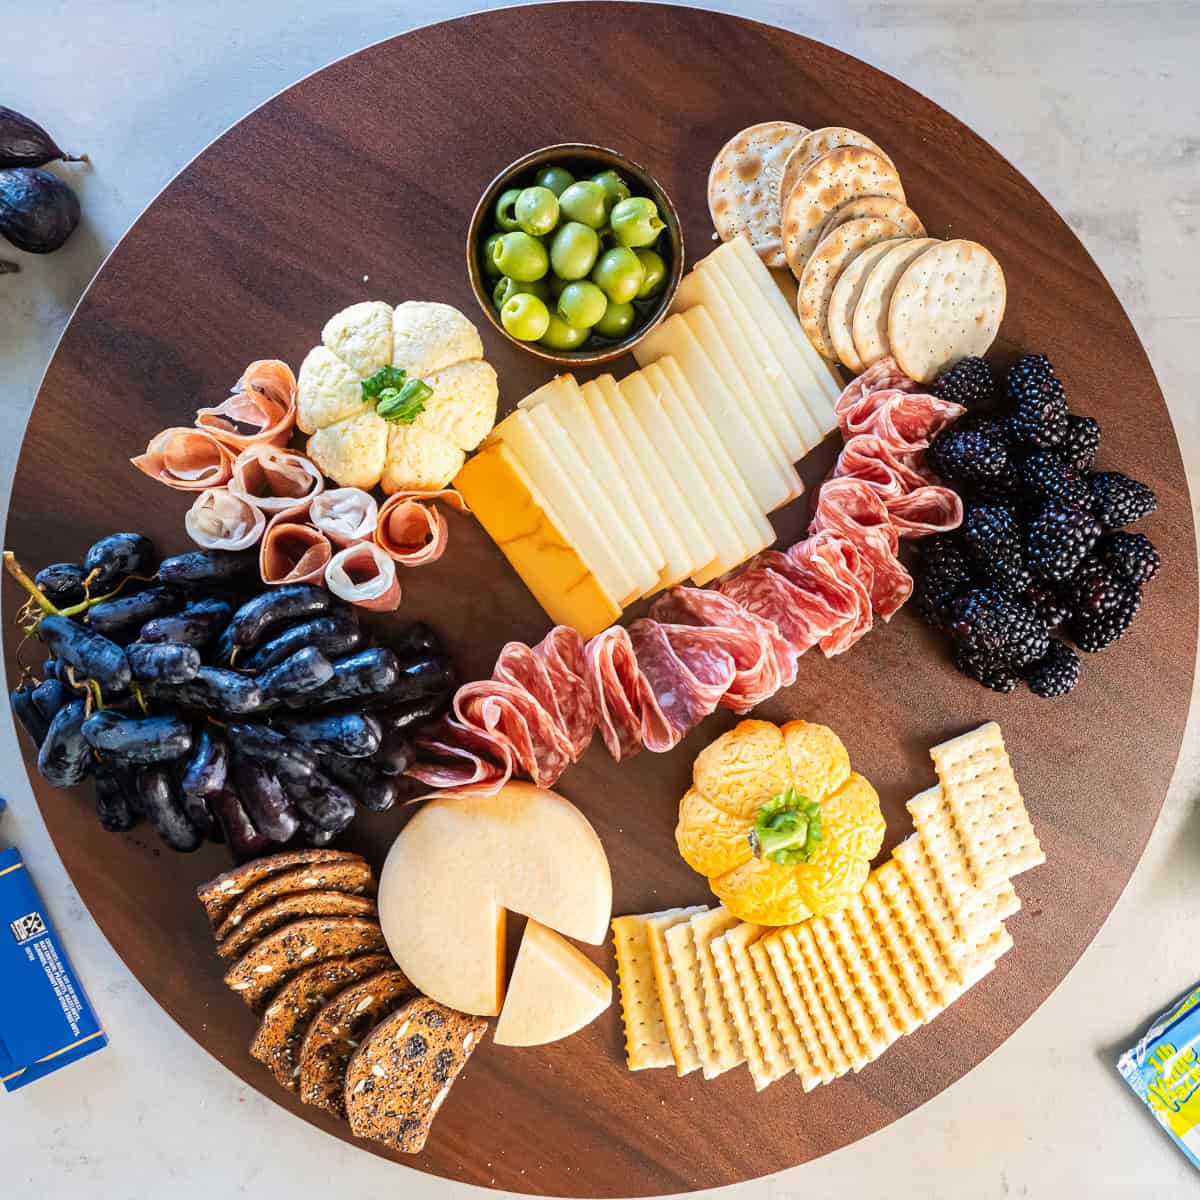
- Add fruit and crackers. Arrange clusters of grapes and blackberries around the board, then tuck in the crackers and crisps. Try to spread out the different colors and textures for a nice balance.
- Fill in the gaps. Now for the fun part! Add the figs, almonds, caramel popcorn, dark chocolate, and Halloween candy to fill in the remaining spaces. Don’t worry about making everything perfect. A full, abundant board is exactly what you’re going for!
Make it Spooky! 🎃
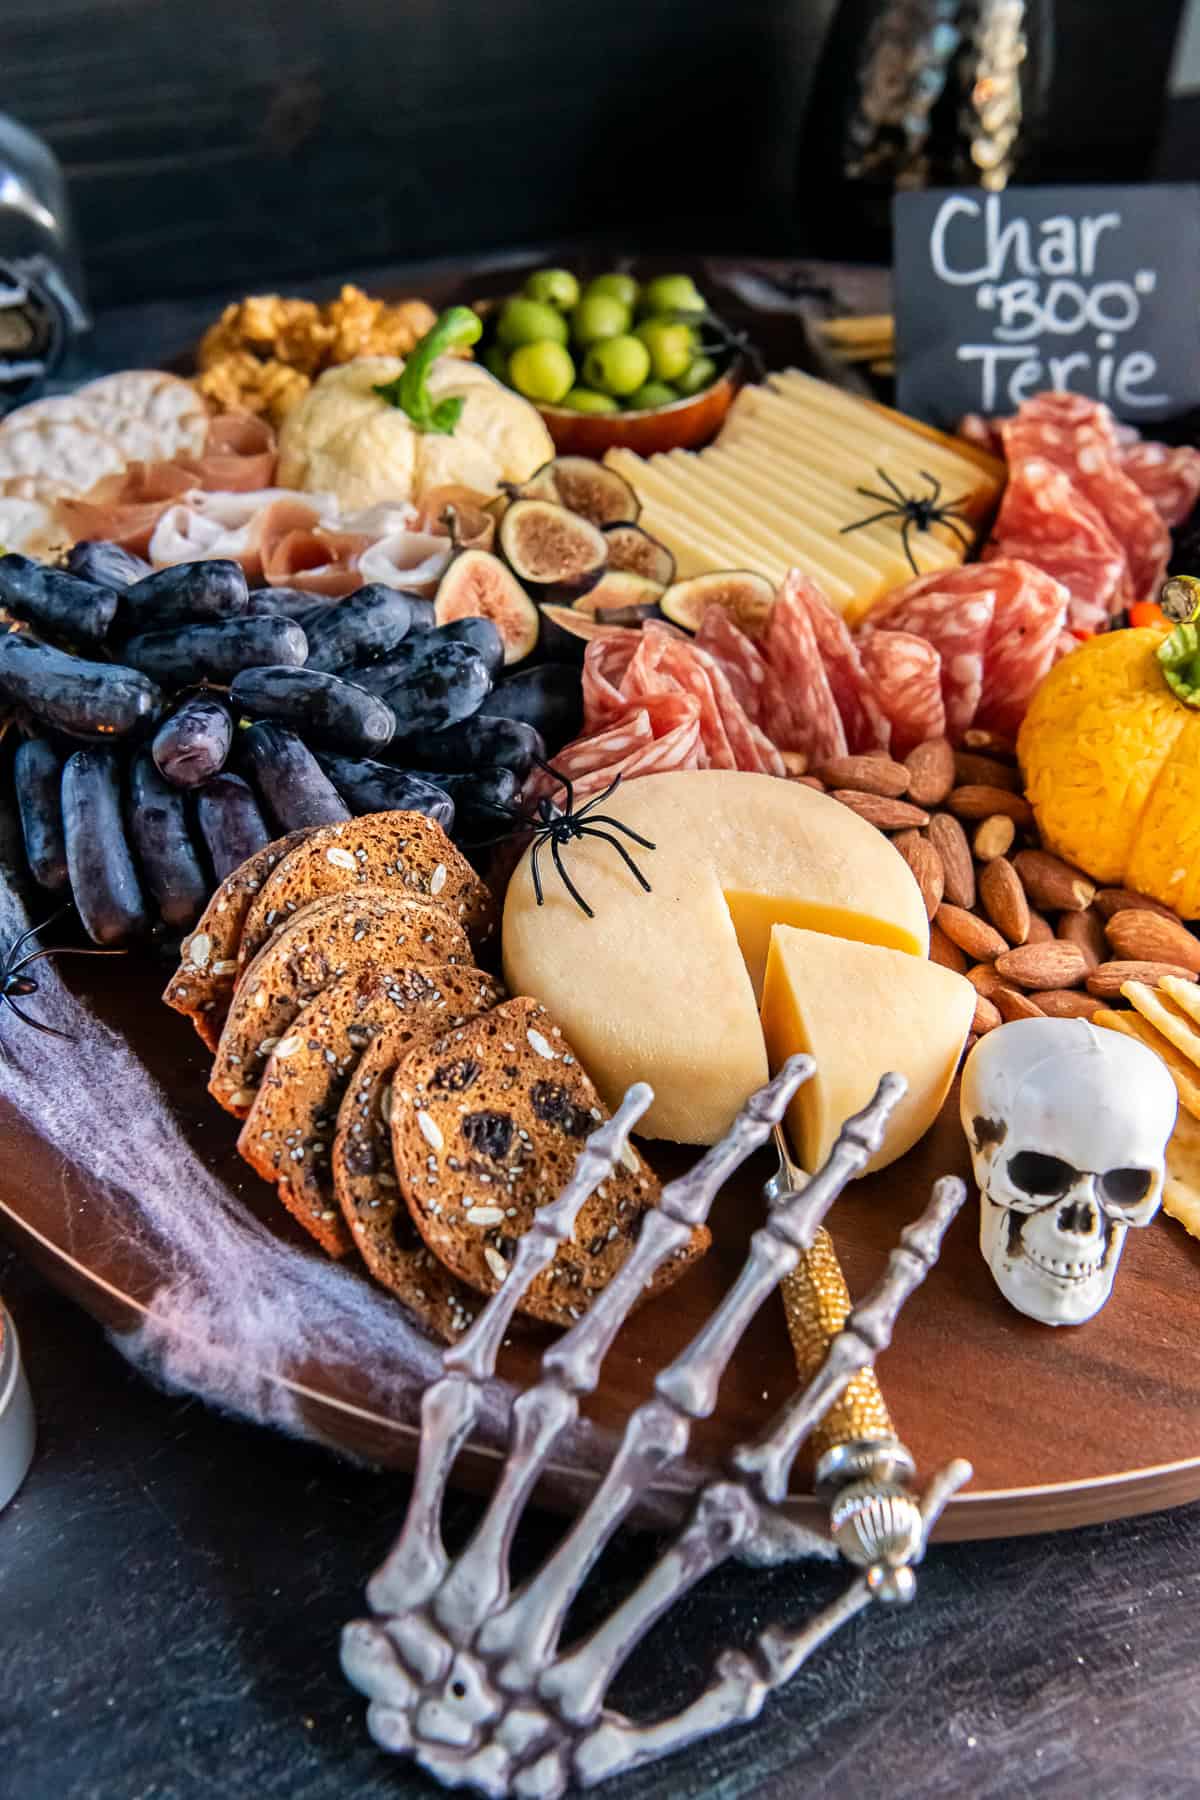
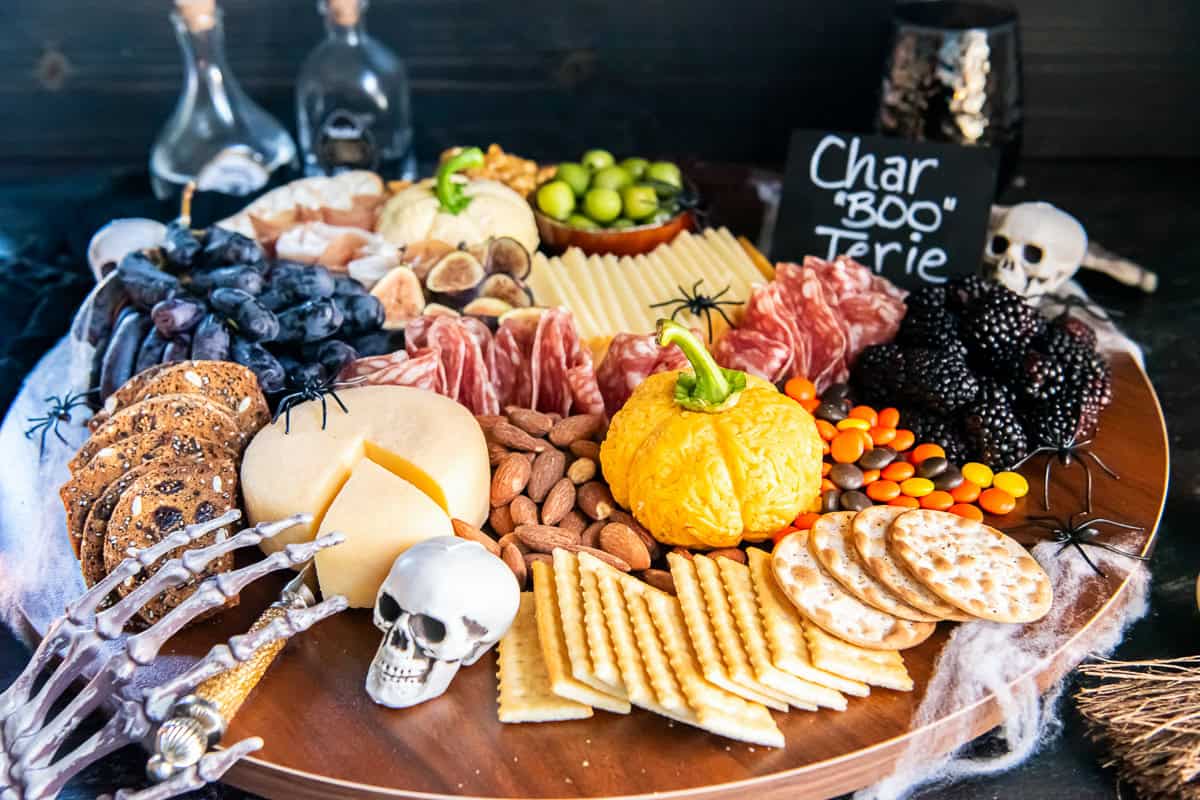
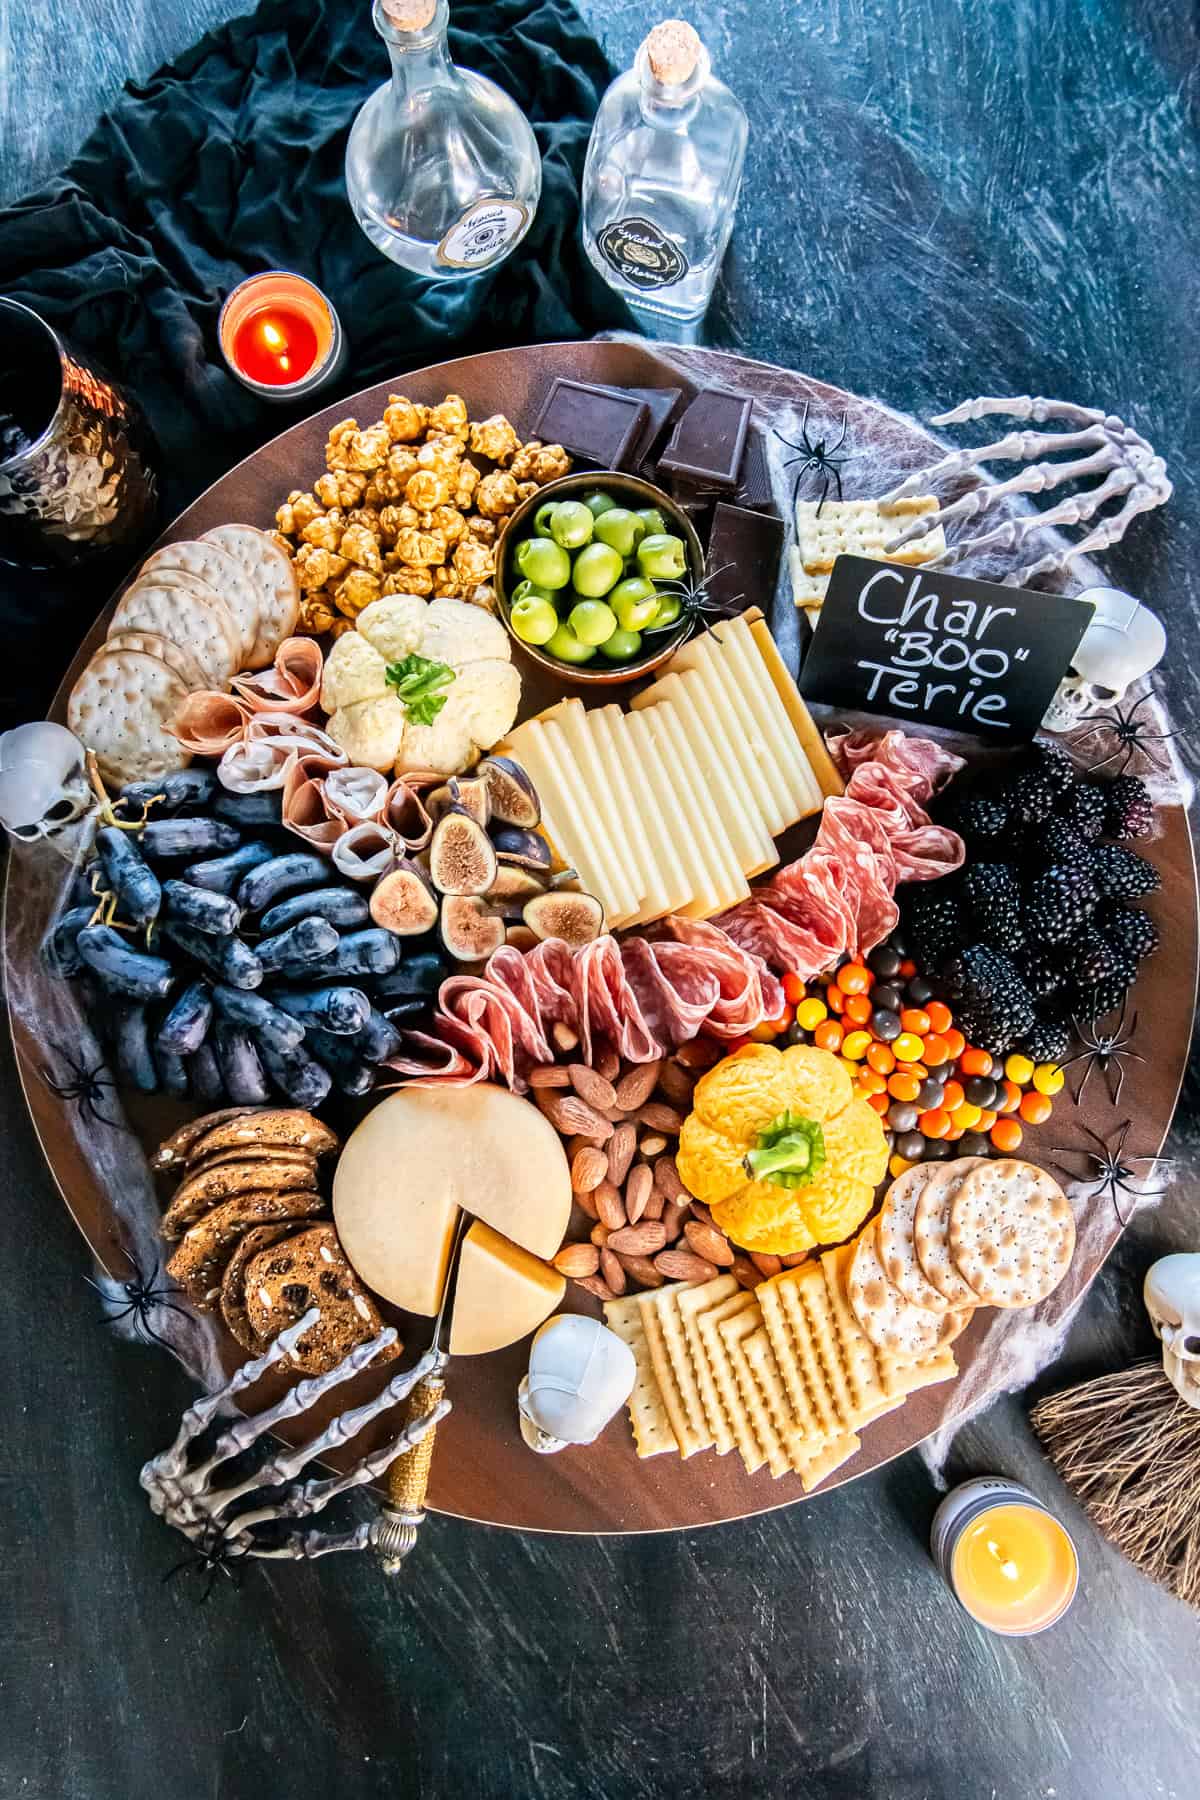
Once you’ve arranged all the delicious goodies, it’s time to have some fun with the Halloween decorations! I used a mini chalkboard sign to write Char”BOO”terie. These mini chalkboard signs are super useful to have on hand for parties if you entertain a lot.
I also tucked skeleton hands, little skulls, and black spiders around the board, then added some wispy cobweb and candles to complete the spooky scene. You can find inexpensive Halloween decorations on Amazon or use what you already have at home. Just be sure to keep decorations that aren’t food-safe from touching the food.
Sign up for my free newsletter and join me on Facebook, Instagram and Pinterest for for all the latest recipes and more cooking inspiration!
Equipment
Ingredients
Boursin Pumpkins
- 2 (5.2-ounce) packages Boursin cheese, any flavor
- ½ cup finely shredded sharp cheddar, for coating one pumpkin
- ½ cup finely shredded white cheddar or Monterey Jack cheese, for coating one pumpkin
- 2 bell pepper stems, short pretzel sticks can be substituted
Additional Cheese
- 1 small wedge aged Gouda
- 4 to 6 ounces Havarti, or another firm pale cheese, sliced and fanned
Meats
- 3 to 4 ounces salami, sliced
- 3 to 4 ounces prosciutto, sliced
Fruit
- ½ pound purple or black grapes
- 6 ounces blackberries
- 3 to 4 fresh figs, halved or quartered
Briny + Crunchy
- ½ cup pitted Castelvetrano olives, in a small bowl
- ½ cup roasted salted almonds
- Assorted crackers, 2 to 3 varieties, about 4 to 6 ounces total
Halloween Sweets
- ½ cup Reese’s Pieces
- 2 to 3 ounces Dark chocolate squares or chunks
- 1 to 2 cups Caramel popcorn
Instructions
How to Make Boursin Pumpkins
- Shape the Boursin: Unwrap one package of cold Boursin. With clean hands, gently shape it into a smooth ball. Press the bottom of the ball gently against your work surface to create a flat base. Repeat with the second package.
- Coat the pumpkins: Place the finely shredded sharp cheddar on one plate or in a shallow bowl and the finely shredded white cheddar or Monterey Jack on another. Roll one Boursin ball in the cheddar and the second in the white cheese, gently pressing the cheese onto the surface until each pumpkin is evenly coated. Press on a little additional cheese anywhere the Boursin shows through.
- Wrap the pumpkins: Place each coated cheese ball in the center of a generous piece of plastic wrap. Bring the plastic wrap up and around the cheese ball and wrap it snugly. Don't intentionally flatten the cheese balls. Wrapping and tying them will naturally create the slightly squat pumpkin shape.
- Tie: Cut a long piece of kitchen twine for each pumpkin, about 3 to 4 feet long.Place the center of the twine underneath one wrapped cheese ball, with the ends extending up opposite sides. Bring the ends together over the top and cross them.Turn the cheese ball and bring the twine down the opposite sides and underneath, crossing the twine again on the bottom. Continue turning the cheese ball and wrapping the twine around it at different angles until you've divided it into 6 sections, similar to tying ribbon around a package several times.Keep the twine snug enough to create visible indentations, but don't pull so tightly that it cuts deeply into the cheese. Tie the ends securely. Repeat with the second cheese ball.
- Chill: Refrigerate the wrapped and tied pumpkins for at least 1 hour, or until firm. They can also be prepared several hours in advance or refrigerated overnight.
- Finish: Use kitchen scissors to carefully snip the twine and remove it. Gently peel away the plastic wrap, taking care not to disturb the coating. If any shredded cheese sticks to the plastic wrap or leave a bare spot, gently press a little additional onto the area. Gently press a clean bell pepper stem into the center of each pumpkin. Short pieces of pretzel rod can be substituted.
Assemble the Charcuterie Board
- Start with the two Boursin pumpkins and any small bowls, then arrange the cheeses, meats, fruit, crackers, olives, nuts, and sweets around them in clusters. Try to distribute the colors and textures throughout the board and fill in smaller gaps with items like almonds, Reese’s Pieces, and caramel popcorn. The finished board should look festive, but still like an appetizing charcuterie board.
- Add the Char “BOO” terie sign, if using.
- Add the skulls, spiders, skeleton hands, and wispy webbing last, tucking them in where they fit.
Notes
Like this? Please rate & comment below!