Whether this is your first time roasting a turkey for the holidays or you’ve done it year after year, this guide for How To Choose, Prep, and Roast Your Turkey will help brush up on techniques and tips to help you roast a perfect, succulent turkey.
This post may contain affiliate links. Please read our disclosure policy.
Choosing Your Turkey
First up is the big decision, fresh or frozen. You’ll need to make this choice at least a couple of weeks before the big day. If you want a fresh bird of a certain weight, check with your local store to see if you might need to order it in advance. You don’t want to walk in to the store 3 days before Thanksgiving to buy your 14 pound fresh turkey to find that all they’ve got left are 20 pound frozen birds. Fresh turkeys should be roasted within 1 or 2 days or no later than the “Best By” date stamped on the packaging. If your choice is frozen, you can purchase it far in advance and store it in your freezer. Look for sales and scoop one up at the best price you can find. Just be sure to have it on hand in time for the thawing process, which we’ll talk about below.
As far as which is better, this is purely a personal choice. Ask a room full of 100 people what they think and you’ll hear some pretty strong opinions on both sides. Over the years, I’ve roasted nearly every type of turkey available, fresh, free range, organic, and frozen, and have had excellent results with a basic frozen Butterball turkey. I also love the way the Butterballs are packaged and prepared.
Considering the price of a frozen turkey is usually significantly less than fresh, I’ve stuck with the frozen for many years now. Of course, you may have considerations that go beyond flavor and quality. Your method is going to play a big part in your choice. If you are brining, you will need to select a fresh or frozen minimally processed turkey but if you just want to just season and roast, then a frozen Butterball (or similar brand) is a great choice.
I strongly support equal opportunity for all turkeys and all turkey buyers.
Size Matters
How much turkey do you need? Count on about 1-1/2 pounds per person to ensure plenty of leftovers. Have 8 to 10 guests coming? I’d probably go with a 15 to 18 pounder. I always go with a larger turkey so that I can send some leftovers home with the older boys and still have plenty left for us here.
Thawing Your Frozen Turkey
If you choose a frozen turkey it’s vital that you thaw it completely before roasting. It takes approximately 1 day (24 hours) per 4 pounds to thaw in the refrigerator, so, for instance, if you have a 16 pound turkey, it will take 4 full days to thaw completely. Place it on a rimmed baking sheet before placing it in your fridge in case any juices escape the packaging while thawing. You don’t want to put an icy bird in the oven so ensuring that the turkey is completely thawed is a very important part of the process. A fully thawed turkey should be cooked within 1 or 2 days. For more safe thawing tips visit the USDA website:
To Brine or Not To Brine
Again, a personal decision. I wet brined a fresh turkey one Thanksgiving and found that for me, the wet brining process is too fussy to bother with. I’d rather spend my time baking pies and doing other food prep than dunking my great big bird in a salty water solution. Many frozen turkeys, including Butterball, are injected with a salt solution prior to freezing which provides a similar result to brining. Look for something like this on the packaging “Contains up to 8% of a solution of Water, Salt, and Spices to Enhance Tenderness and Juiciness”. Although many folks will still brine these turkeys, it’s not necessary. I won’t be covering the wet brining process in this post but for those interested, here some excellent information on the subject:
If you’ve decided to brine, here are a couple of great links to the step-by-step process:

If you want to brine I highly suggest doing a dry brine. It is a fabulous method that results in a succulent turkey with a beautifully browned, crisped skin. It’s important to start with a minimally processed turkey that has not been injected with a salt solution, so no Butterballs for this method. I’ve broken the dry brine method down into great detail in my post for my new favorite holiday turkey recipe – Dry Brine Turkey with Garlic Butter Rub.
Some Stuff About Stuffing
Many of us grew up eating stuffing straight from the turkey. It was the way it was done back in the day and both Mom and Grandma would look at you as if you were off your rocker if you told them this wasn’t the best way to do things. However, these days the USDA recommends the stuffing be baked separately for optimum safety. My feelings on this are that it just isn’t worth even the seemingly small risk of contamination and besides, I am so in love with my Crock-Pot Stuffing that the slow cooker will forever be my method of choice.
Prepping and Seasoning the Turkey
I always prep my bird on a foil lined baking sheet or cutting board so that when it’s ready to transfer to the roasting pan the foil can be tossed. It is now recommended that you skip the bird bath to help prevent contamination in your kitchen. I’m absolutely fine with this change. No more awkward fumbling with a heavy, slippery turkey in the kitchen sink. Remove the gizzard and organs from the cavities of the turkey and blot it dry with some paper towels.
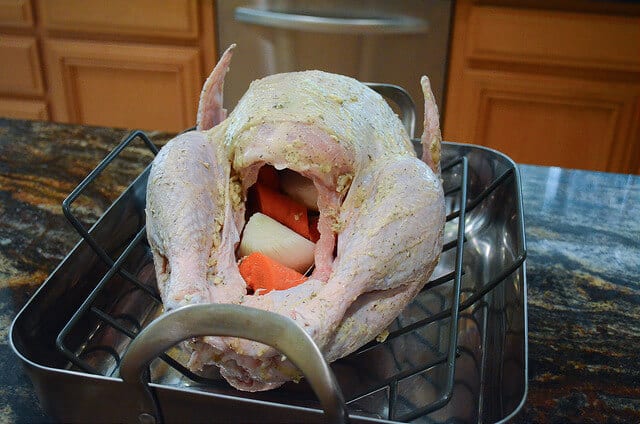
If you’re stuffing your turkey, pack it loosely in the cavity. If you’re cooking the stuffing separately, fill the cavity of your turkey with any variety of aromatics that you have on hand. These can include chunks of carrot, onion, apple, and fresh herbs like rosemary, thyme, or sage. The purpose of the aromatics is to enhance the depth of flavor of the turkey drippings for a rich, flavorful gravy.
For the seasonings you can go as simple as salt and pepper or follow a huge variety of recipes that include other spice combinations. I like to mix my seasonings with a mixture of softened butter and olive oil and then carefully lift the skin covering the breast portion of the turkey and spread some of the seasoned butter mixture directly over the breast meat on both sides. Massage the remainder of the mixture all over the skin of the entire turkey.
Place the turkey on a rack in your roasting pan. It’s important to use a rack so the turkey is a bit elevated and heat can circulate around the entire bird.
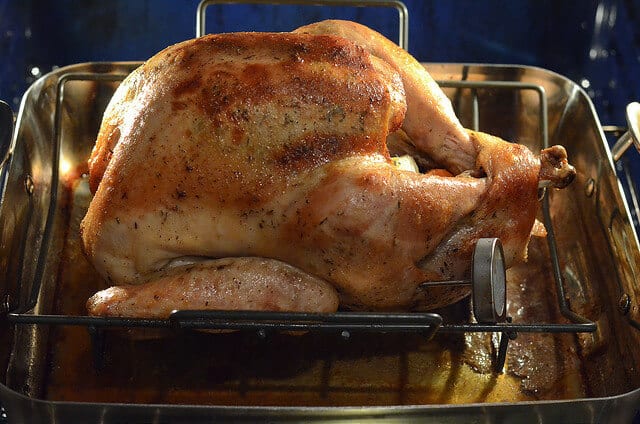
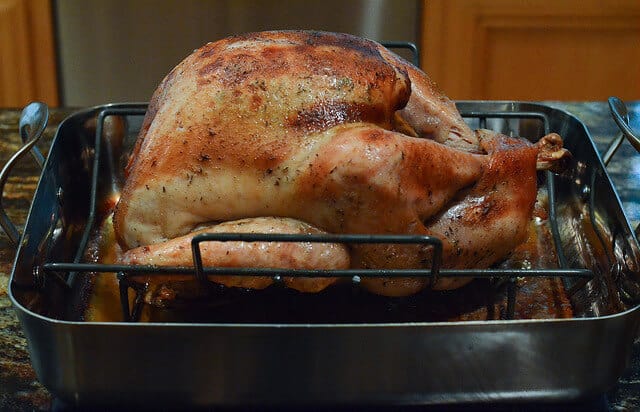
Roasting Time
Again, I’m going with the USDA recommendation here. Years ago, the recommendation was to roast to an internal temperature of 180 degrees which accounts for the millions of dry turkeys that graced the tables of many families during that time. The current recommendation is to roast the bird to an internal temperature of 165 degrees, as measured in the meatiest part of the thigh. If all food safety precautions have been taken, the risk of bacterial contamination is highly unlikely once the turkey reaches this temperature. The turkey’s temp will continue to rise upon resting once pulled from the oven, so you don’t want to let it roast any longer to guarantee a moist, succulent result.
The amount of time it takes for your turkey to reach this temperature will vary based on oven temperature, the weight of the bird, and whether it is stuffed or unstuffed. It takes approximately 15 minutes per pound to roast an unstuffed turkey at 325 degrees. Stuffed turkeys take a bit longer.
Click below for a handy chart including approximate roasting times for both stuffed and unstuffed turkeys:
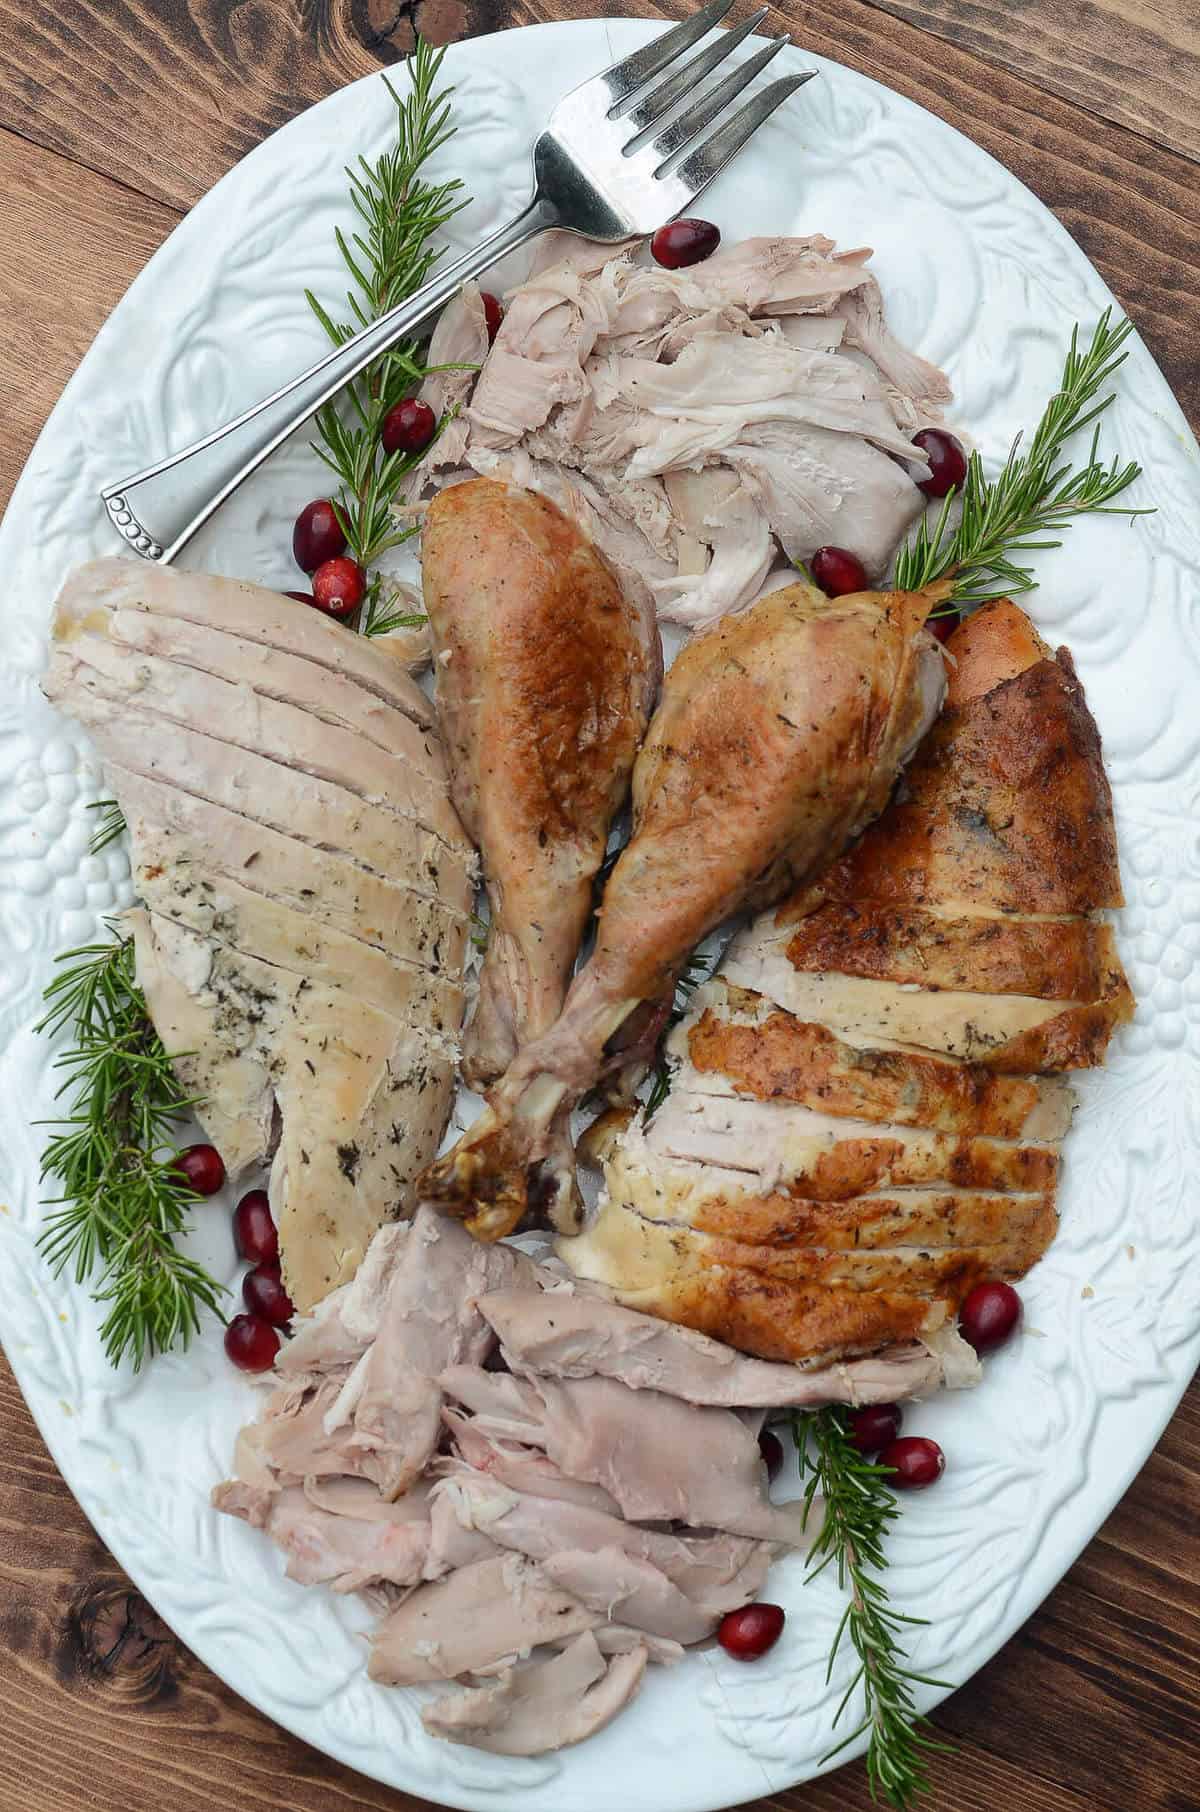
Give It A Rest
When calculating the total time it will take you to prepare your turkey, don’t forget to add in a 30 minute resting period after it comes out of the oven. The resting period should not be skipped to ensure a moist result. The turkey will retain more of it’s juices and will also be easier to carve after 30 minutes. During this time you can make the gravy, mash the potatoes, bake the rolls, and deal with any other side dishes you are preparing. Tent the turkey loosely with foil while it rests.
Those are my turkey tips, but before I go, be sure to check out my favorite recipe when I’m working with a Butterball, my Herb Roasted Turkey with full step-by-step instructions.
Get my recipe for Herb Roasted Turkey Recipe.
I wish you a wonderful holiday and a juicy, delicious turkey!


Do you cover the turkey while roasting?
If you feel it’s getting too dark before the end of the roasting time it’s fine to lightly tent the turkey with a piece of foil.
This will definitely make my Thanksgiving prep easier, thanks!
The absolute perfect turkey!
I’m going to follow your directions, the turkey looks delicious
I hope it works out great for you! Happy Thanksgiving, Patty 🙂
I have been stuffing my turkey for years & years, this year i’m going to use the crock pot. i know it will be so good coming from Peggy. and easier.Happy thanksgiving to you all, & Merry Christmas.
Hi Sandy. It’s good to try new things! I’ve been doing my stuffing in the Crock-Pot now for years and it is an excellent method. Happy holidays to you, too!
Thank you so much for this website it was so detailed and informative! I am anxious to bake my first 20 pound herb turkey! It is just my husband and myself do you think I have a big enough bird?
It’s plenty big, Elizabeth. Start hunting for leftover turkey recipes 😉
Wonderfully informative post. Thank you!
Thank you so much for your information and step by step instructions for roasting a turkey. Everything was terrifically helpful and in enough time for Thanksgiving that I can review it now and then before the “big” day. Hope you and your family enjoy a blessed Thanksgiving.
Thank you so much for your warm comments, Peggy. I hope you and your family have a wonderful Thanksgiving and your turkey is perfect 🙂
Great information! Easy to understand and to follow. Plus the turkey looks beautiful.