
This creamy Green Chile Rice Casserole is the ultimate easy side dish, made with shortcut microwaveable rice so it’s ready for the oven in minutes. Mild green chiles, plenty of melted cheese, and a rich, tangy sour cream base come together for ultra-comforting flavor.

This post may contain affiliate links. Please read our disclosure policy.
This recipe was a staple back when I had a house full of hungry boys, and it’s one I still come back to when I want something a little more exciting than plain rice on the side.
It’s creamy, cheesy, and full of cozy Southwestern flavor from diced green chiles and simple spices. Add some shredded chicken, and it turns into a complete meal, similar to my Chicken Broccoli Rice Bake.
Table of Contents
Pin this now to find it later
Pin ItRecipe Highlights
Quick and Easy: Just 10 minutes of prep! Use microwaveable Ready Rice to eliminate the time and effort required to boil your own.
Cheesy and Comforting: Creamy, cheesy, mild green chile flavor.
Make Ahead Friendly: Assemble up to 24 hours in advance, cover and refrigerate, then bake when ready (let it sit out while the oven preheats).
Add Protein: Turn it into a complete meal by layering in cooked shredded or chopped chicken. Rotisserie chicken makes it super easy.
Versatile Side Dish: Pairs well with any protein (especially grilled meats) or your favorite Mexican entrees.

Ingredient Notes
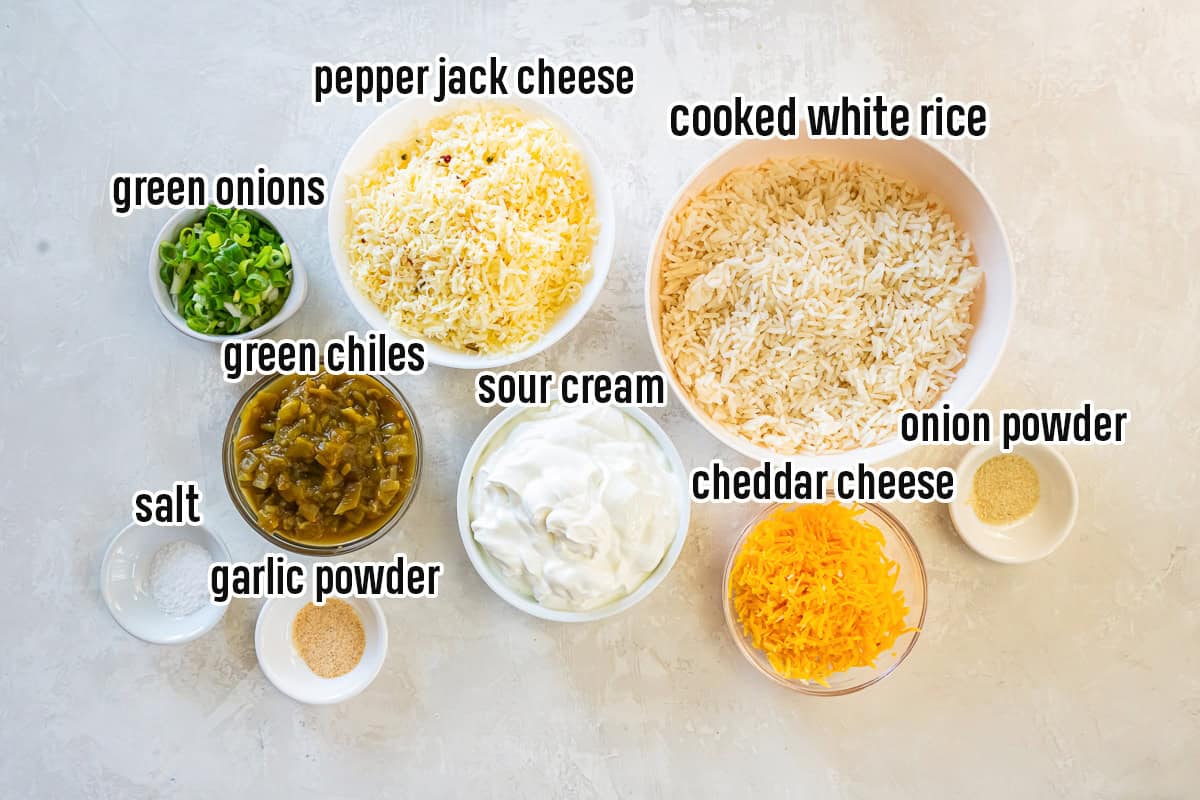
- Cooked white rice: Using two pouches of Ready Rice Jasmine makes this casserole incredibly quick and easy since it eliminates the time needed to cook rice in advance. If you do want to cook your rice, you’ll need about 3 ½ cups.
- Sour cream: Regular or light sour cream both work well. It adds richness and helps create that creamy, comforting texture.
- Diced green chiles: Choose mild for a subtle flavor or go with fire-roasted for a smokier, more complex taste. Lightly drain them before mixing them in.
- Cheese: Monterey Jack melts beautifully and gives a creamy finish, but I always use pepper Jack for a little kick. A touch of sharp cheddar on top boosts flavor and creates a golden, bubbly crust.
- Seasonings: Simple pantry staples like garlic powder, onion powder, and salt enhance the flavor without overpowering the chiles.
- Green onions: A sprinkle of fresh green onions on top adds a nice pop of color.
How to Make Green Chile Rice Casserole
This is a quick overview of how to make this recipe. You’ll find detailed instructions in the recipe card at the end of this post.
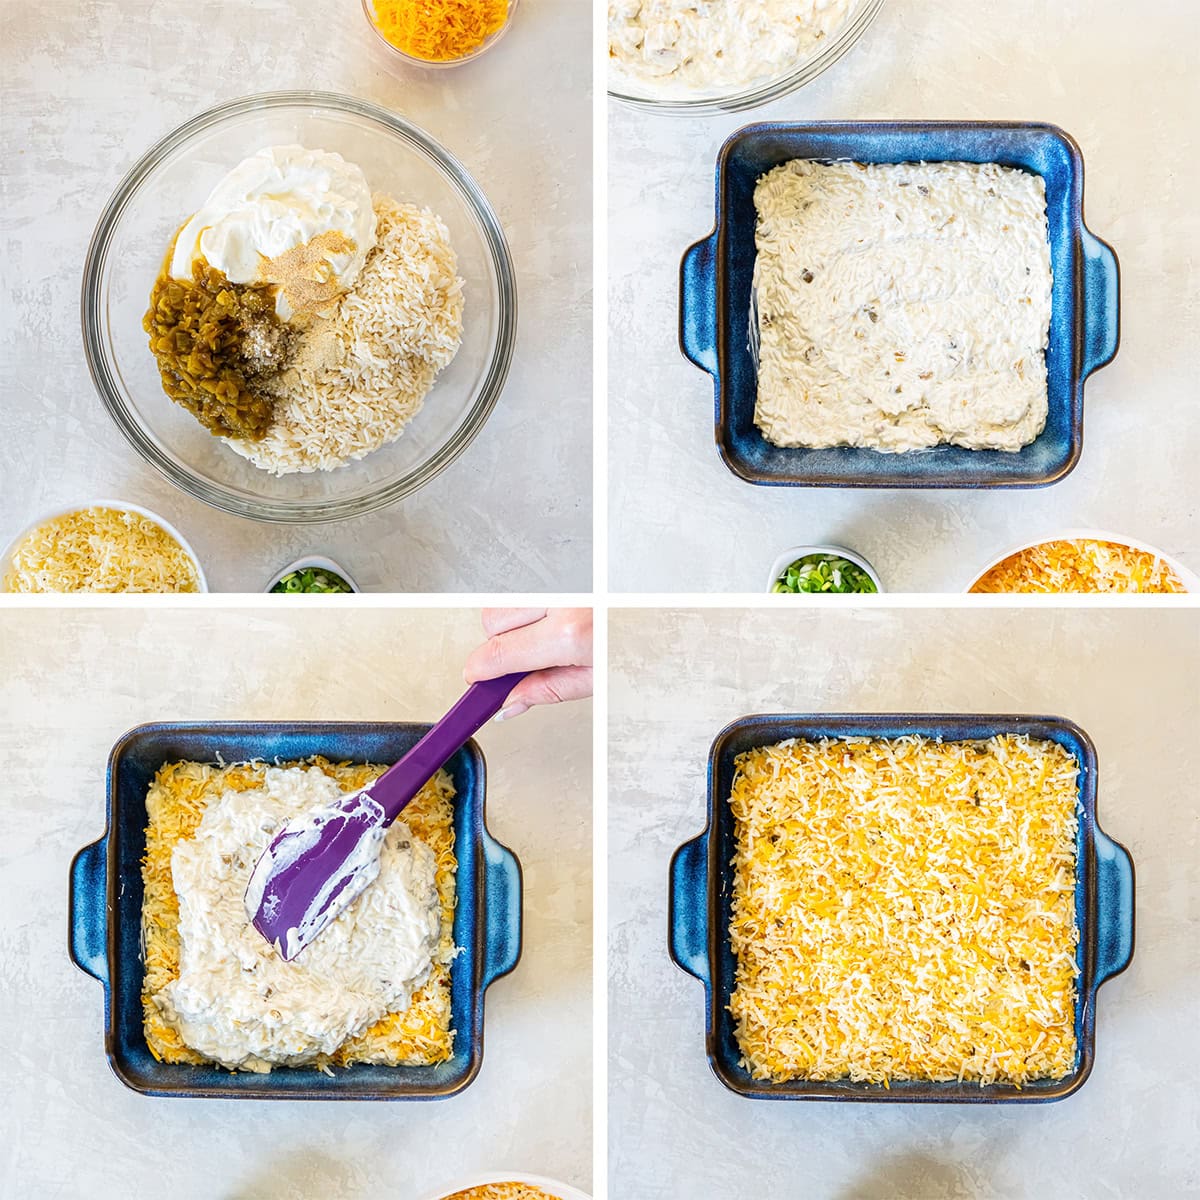
- In a large bowl, stir together the Ready Rice, sour cream, green chiles, and seasonings.
- Spoon half of the rice mixture into a greased casserole dish.
- Top with half of the cheese and spread the remaining rice mixture over the top.
- Sprinkle the remaining cheese on top, cover with foil, and bake at 350 degrees F for 25 minutes. Uncover, sprinkle with green onions, and bake for about 10 more minutes until hot and bubbly.

Storage Tips
Refrigerate: Store any leftovers in an airtight container in the refrigerator for up to 4 days.
Reheat: Warm individual portions in the microwave or reheat the whole casserole, covered with foil, in a 350 degree F oven until heated through.
Freeze: This casserole also freezes well. Wrap it tightly or transfer to a freezer-safe container and freeze for up to 2 months. Thaw in the refrigerator overnight before reheating.

Sign up for my free newsletter and join me on Facebook, Instagram and Pinterest for for all the latest recipes and more cooking inspiration!
Green Chile Rice Casserole

Ingredients
- 2 (8.5 ounce) packages Ready Rice Jasmine, (about 3 ½ cups cooked white rice)
- 16 ounces sour cream, regular or light
- 2 (4 ounce) cans diced green chiles, mild, lightly drained (use fire roasted for even more flavor)
- ½ teaspoon garlic powder
- ½ teaspoon onion powder
- ½ teaspoon salt
- 1 ½ to 2 cups shredded pepper Jack cheese or Monterey Jack cheese, packed
- ½ cup shredded sharp cheddar cheese, packed
- 1 to 2 green onions, thinly sliced and chopped fine, for garnish
Instructions
- Preheat oven to 350 degrees F. Lightly coat a 9-inch or 10-inch baking dish with nonstick cooking spray.
- Use your fingers to massage the unopened bags of cooked rice to break it up. In a large bowl, combine the rice, sour cream, green chiles, garlic powder, onion, powder, and salt.
- In a small bowl or on a cutting board, toss the shredded cheeses together to combine. Set aside.
- Spoon half of the rice mixture into the prepared baking dish. Layer half of the shredded cheese over the top. Spoon the remaining rice mixture over the top and top with the remaining cheese. Cover with foil (spray underside with nonstick cooking spray to avoid sticking to the melted cheese) and bake for 25 minutes. Remove the foil, top with the green onions, and bake for an additional 10 minutes or until heated through.
- Remove from the oven and let it rest for about 5 minutes before serving.
Notes
Nutrition
Nutrition information is automatically calculated using generic ingredients, and is an estimate not a guarantee. For more accurate results, please refer to the labels on your ingredients at home.
Like this? Please rate & comment below!
This post was originally published on July 13, 2013. It has been updated with new text and images.


Roasted our own fresh peppers and made fresh rice . will add less sour cream / greek yogurt and less cheese next time to better taste the peppers . yum recipe
Congrats for sending your last son to college! Haha. This dish looks great. I think I can just eat this as a meal, not just a side dish.
This casserole looks great, I’m going to be making this soon, maybe even add some meat to make it a main dish!
That is an excellent thing to do Pamela! Thanks for stopping by and I hope it works out for you 🙂
Thank you for fixing it where we can “PRINT” the recipe’s!!!
Hi Pam. My recipes have always been printable. Just scroll all the way down to the end of the post and you will see the feature. It is on all of my posts. Thanks!
I can’t believe you are sending off your 4th to college!! You must be so proud, yet it’s still so bittersweet.
This rice looks and sounds fantastic. I love the idea of turning it into a casserole with some ground turkey or shredded chicken too! Delicious!
I want to wrap this rice casserole with tortilla! Looks delicious! The campus is close to the beach…what an awesome place! You must be an expert sending kids to college, but I’m sure this time is different as he’s last one?
Oh I love this combination! I’d make a meal out of this very easily. What a great view from a dorm room. 🙂