
Create delicious, made from scratch pizza with this easy Homemade Pizza Crust recipe. This step by step tutorial will help you make perfect pizza dough at home.
This post may contain affiliate links. Please read our disclosure policy.
Those bags of pre-made pizza dough at the store can be tempting and honestly, they are a big timesaver. But, this easy pizza crust recipe yields a crust with better flavor and a fabulous soft and chewy texture. If you’ve never made pizza crust from scratch, I’m here to tell you that you can! It’s really quite easy.
We don’t always have time to whip up fresh pizza dough on an average day. Not a problem! I’ve included make-ahead and freezer directions so you can have fresh, homemade pizza dough on hand for a quick weeknight meal.

Ingredients for Homemade Pizza Crust
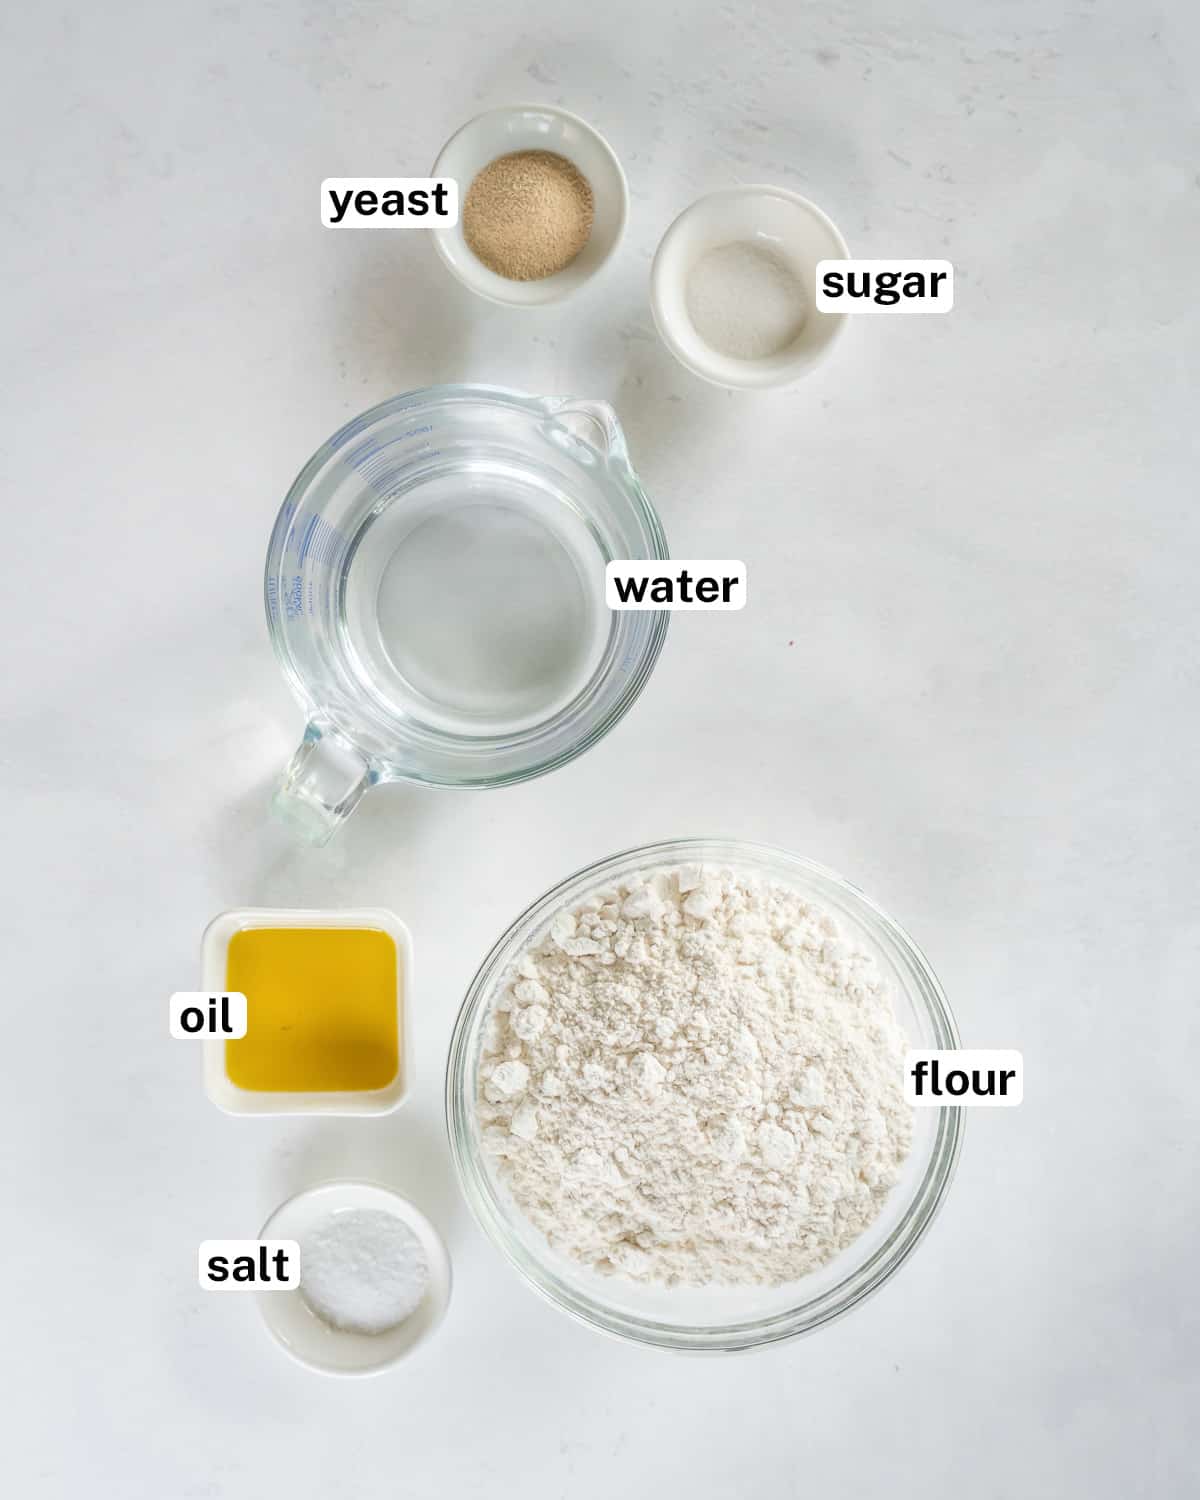
- Active dry yeast – You’ll need one packet of regular active dry yeast, not instant or rapid rise yeast.
- Granulated sugar – Just a touch of granulated sugar to help activate the yeast.
- Warm water – See my tips for proofing yeast below for more details on water temperature.
- Salt
- Extra virgin olive oil
- Flour – You can use either all-purpose or bread flour.
All-Purpose Flour or Bread Flour
Both all-purpose flour and bread flour will yield a wonderful pizza crust with this recipe. The main difference between the two is the protein content. Bread flour has more protein than all-purpose flour so a lot of bakers like to use it for things that need structure like breads and rolls. You can substitute bread flour for all-purpose flour but be sure not to overwork the dough or it could end up tough. I don’t usually have bread flour on hand so I almost always make my pizza dough with all-purpose flour.
Stand Mixer vs. Kneading by Hand
When I make homemade pizza crust or my Overnight Cinnamon Rolls, I always use my KitchenAid Stand Mixer. This fabulous kitchen tool was a gift from my mom ages ago. At the time, I was young and foolish and had no idea how much it could do. With the push of a lever, it mixes and kneads pizza dough while I attend to other tasks – such a luxury! Now, every time I reach for my KitchenAid, I feel like my mom is with me in the kitchen and this is a wonderful thing.
If you don’t have a stand mixer, you can knead the dough by hand. The recipe card at the bottom of this post includes instructions for how to make pizza crust without a mixer.
How to Make Pizza Crust
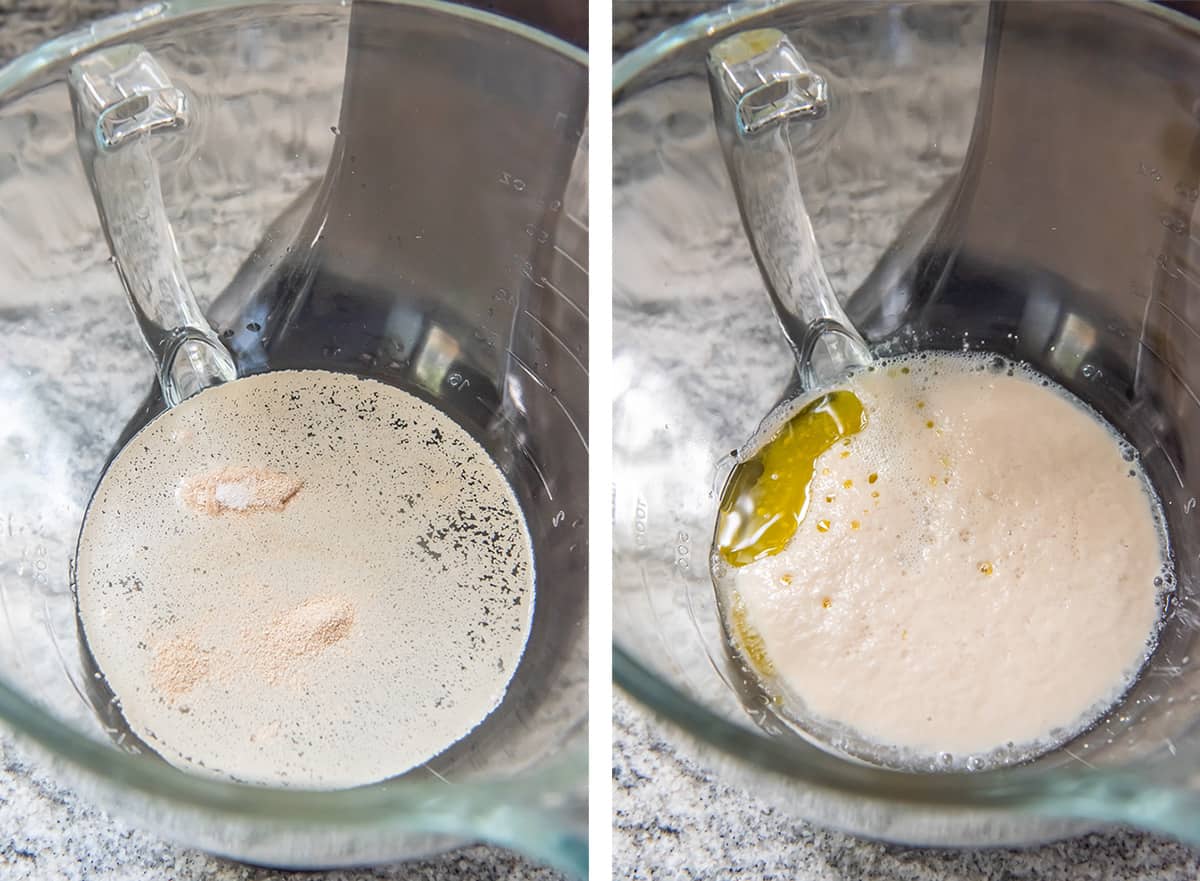
- Pour the warm water into the bowl of your stand mixer. Add the sugar and yeast and give it a little stir. Let it sit for 10 minutes to proof the yeast.
- Once the yeast activates, mix in the salt and oil on low to medium speed. You can use either the dough hook or paddle attachment up to this point (either works).
Tips for Proofing Yeast
Proofing yeast is the process of dissolving it in warm water with a little sugar. As the yeast dissolves, it will start feeding on the sugar and show “signs of life”. This can range from small bubbles on the surface of the water or it can grow and expand quite a bit. Anything in this range means that the yeast is alive and well and ready to do its job.
- Water temperature – Water that is too cold will not dissolve the yeast properly and if it is too hot, it can kill it. Experienced bakers can tell by touch when the water temperature is just right. You can use an instant read thermometer to make sure the water is in the ideal range of 105 degrees F to 115 degrees F.
- Time – It takes several minutes for the yeast to dissolve and several more minutes for it to begin to show signs of life. If after a total of 10 to 15 minutes you don’t see any bubbles or expansion, toss the mixture and try again with new yeast.
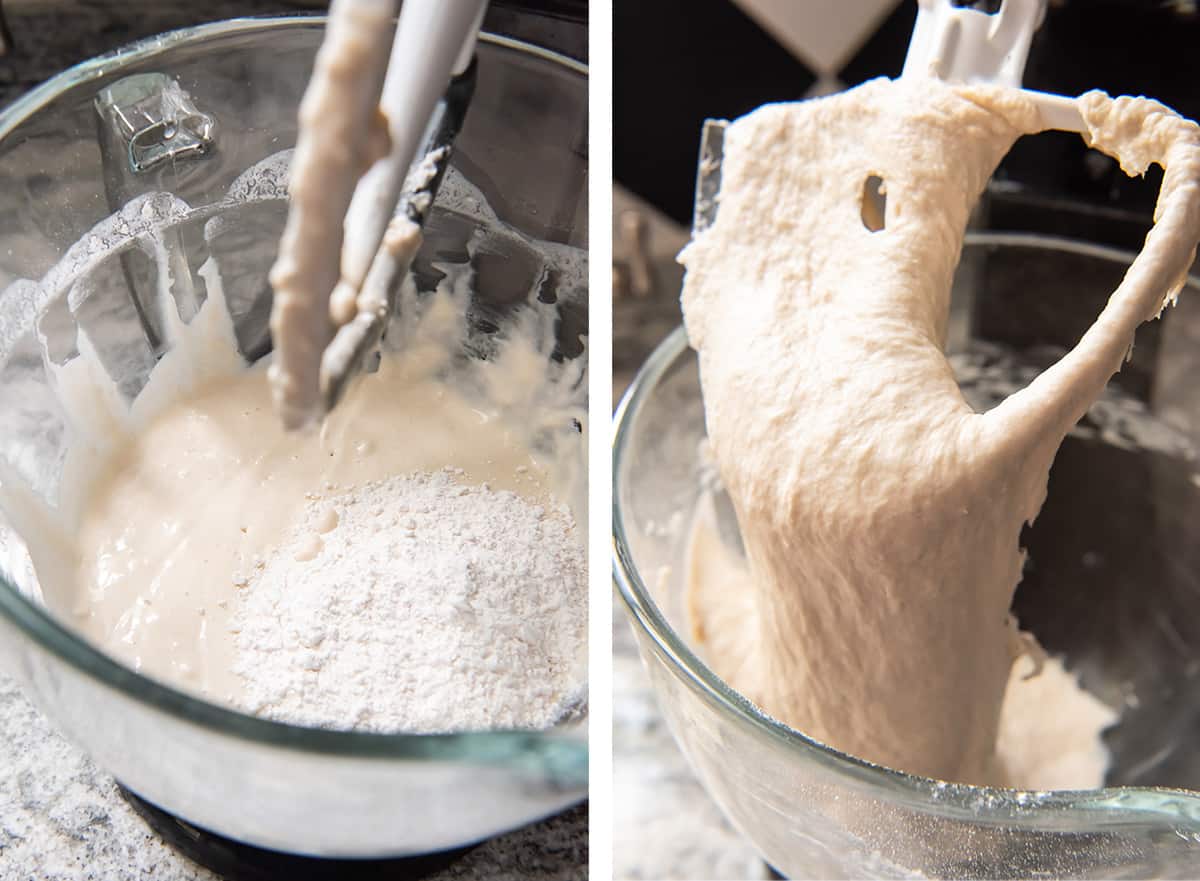
- Add in 2 ½ cups of the flour. Allow to mix completely and then add more flour in ¼ cup increments.
- Stop adding flour as soon as the dough is holding more to the hook than to the bowl. You may not need it all. It’s better to err on the side of the dough being too sticky because you can always add flour but you can’t take it out! Continue to mix the dough on speed 2 for another 2 or 3 minutes.

- Coat your hands with flour and remove the sticky dough from the bowl of the mixer.
- Shape it into a neat ball and place it in a well oiled mixing bowl. Flip the dough over to coat both sides with oil. Cover the bowl with plastic wrap or a clean dish towel and leave in a warm place. It should take about an hour for the dough to rise until it doubles in size.
Making Pizza Dough Rise
Let the dough rest, covered with plastic wrap or a clean kitchen towel in the warmest place in your kitchen. Some people find it works well to set the bowl on top of their refrigerator or water heater for a little added warmth. To speed things up, you can try one of the following shortcuts.
- Place a baking dish on the bottom rack of your oven and fill it with boiling water. Place the covered bowl of pizza dough on the rack above it and close the door. This provides an ideal warm, moist environment for the dough and it really works! This is by far my favorite method.
- Heat your conventional oven on the lowest possible temperature (no more than 200 degrees F.) for about 2 minutes and then shut it off. Crack the door and place the covered bowl of dough in the just barely warm oven.
How to Roll Out Pizza Dough
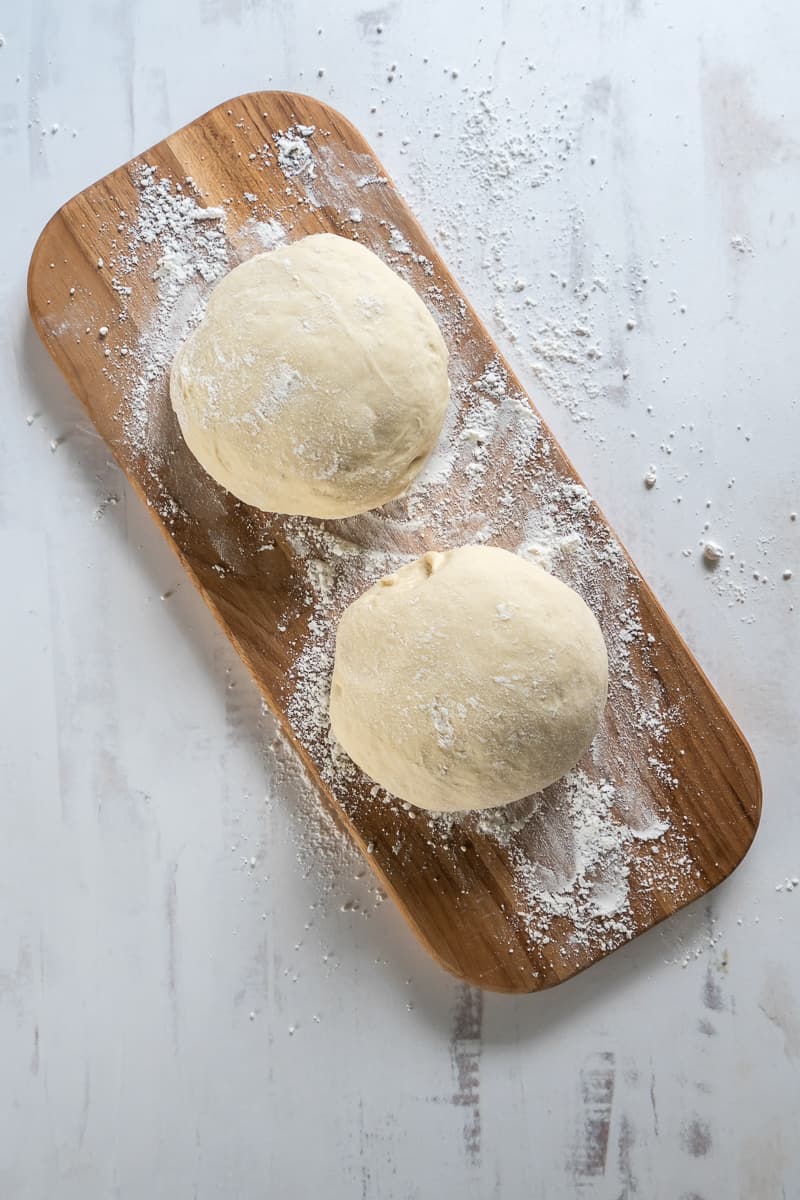
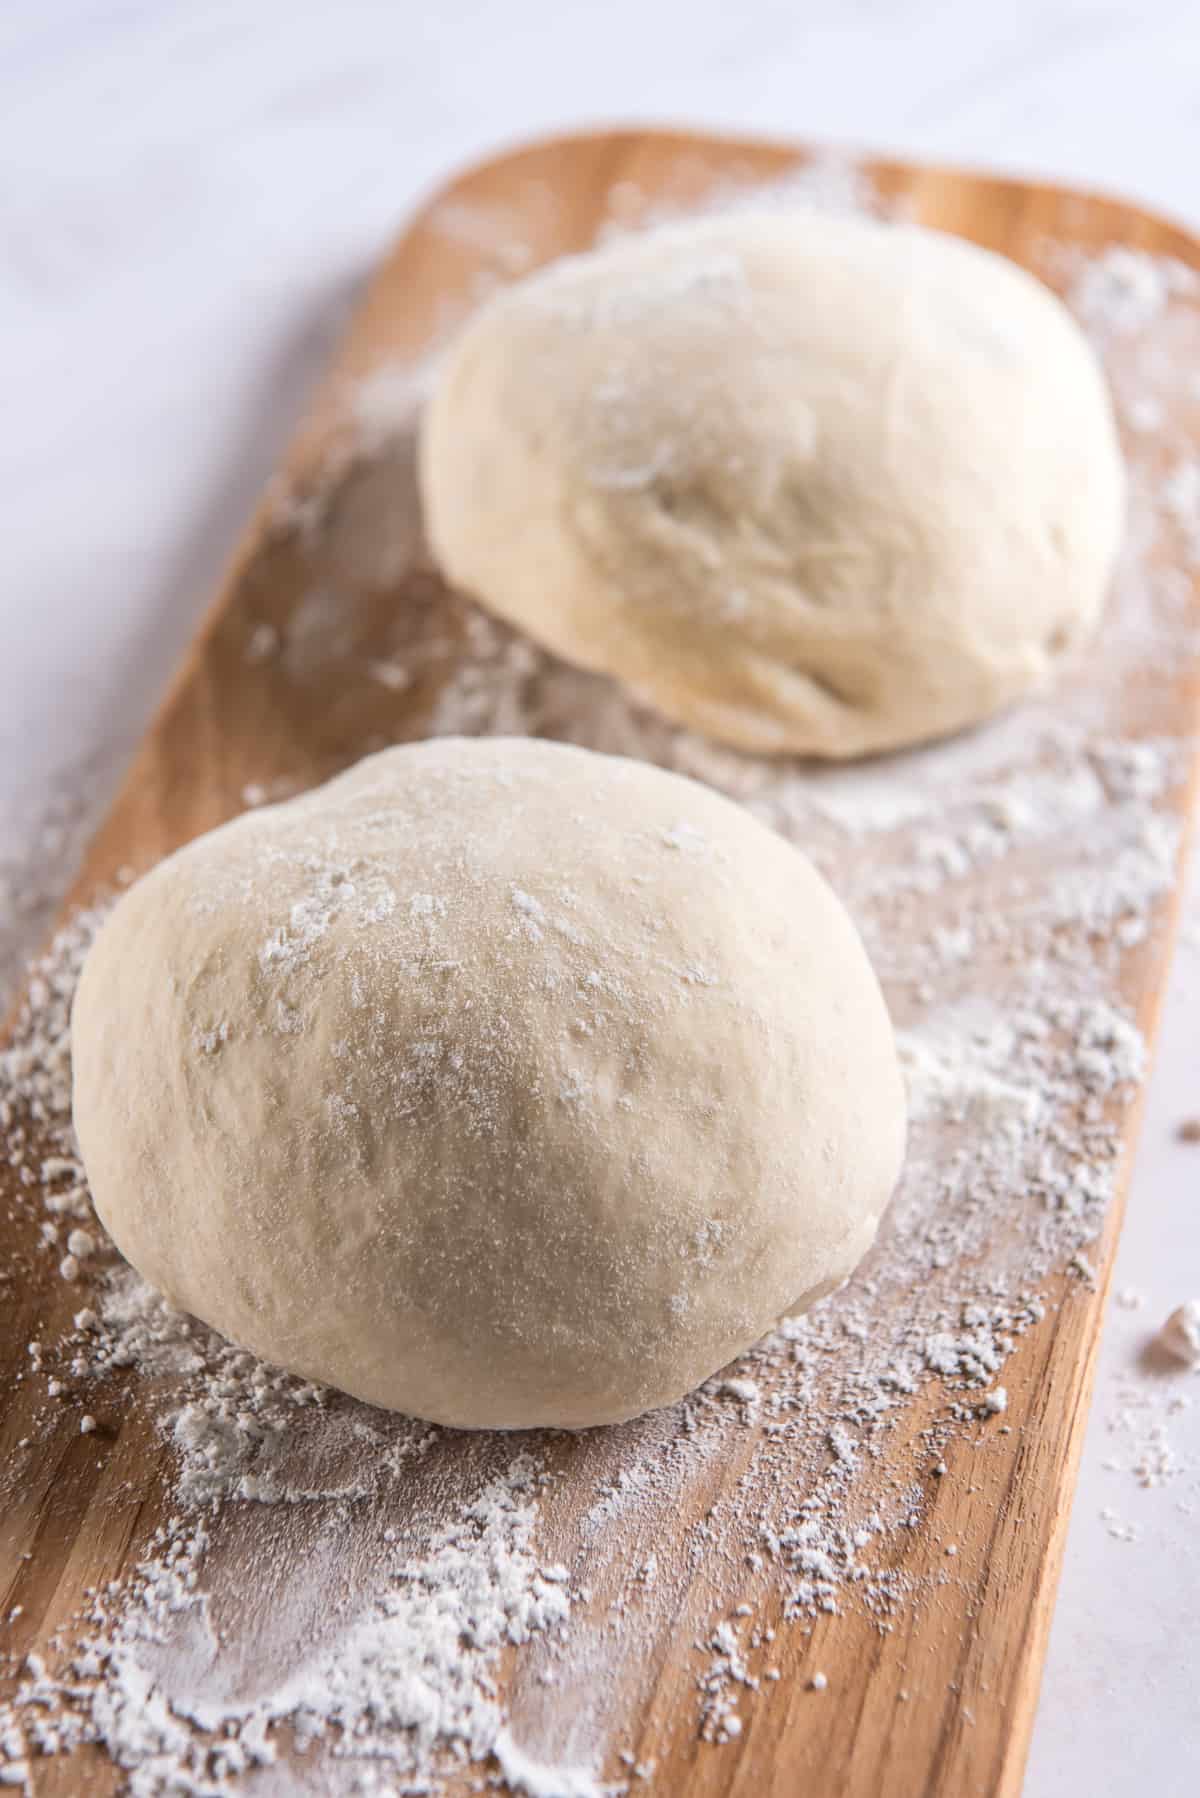
This recipe yields enough dough for two 10- to 12-inch round pizza crusts or one large pan style pizza.

- Punch down the dough to deflate it and form it into a tight ball.
- For two round pizzas, cut the dough in half with a knife or bench scraper. Allow the dough to relax for a minute.
- Use a rolling pin to flatten one of the balls of dough on a lightly floured board.
- Roll it out and finish shaping it with your hands, pressing it out from the inside working out. Stretch the sides until you reach the desired diameter, about 10-to 12-inches for a regular or thin crust pizza.
Tips for Stretching Pizza Dough
- If the dough is resistant or difficult to stretch, let it rest for a few minutes and try again.
- Hold up the edges of the dough with your fingers, letting the dough hang and stretch, while working around the edges of the dough.
- If a hole appears in your dough, place the dough on a floured surface and push the dough back together to seal the hole.
- Use your palm to flatten the edge of the dough where it is thicker. Pinch the edges if you want to form a lip.
Assemble and Bake the Pizza
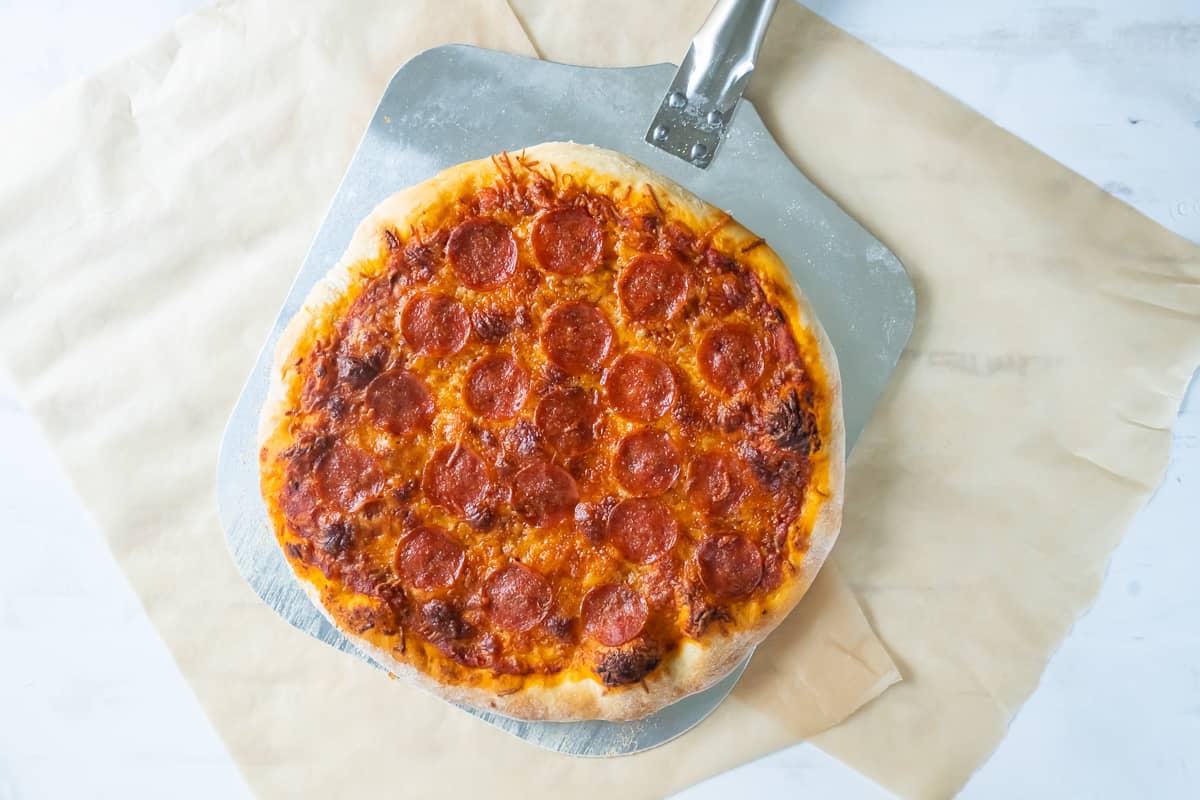
- Preheat the oven to 500 degrees F. with the oven rack in the lowest position.
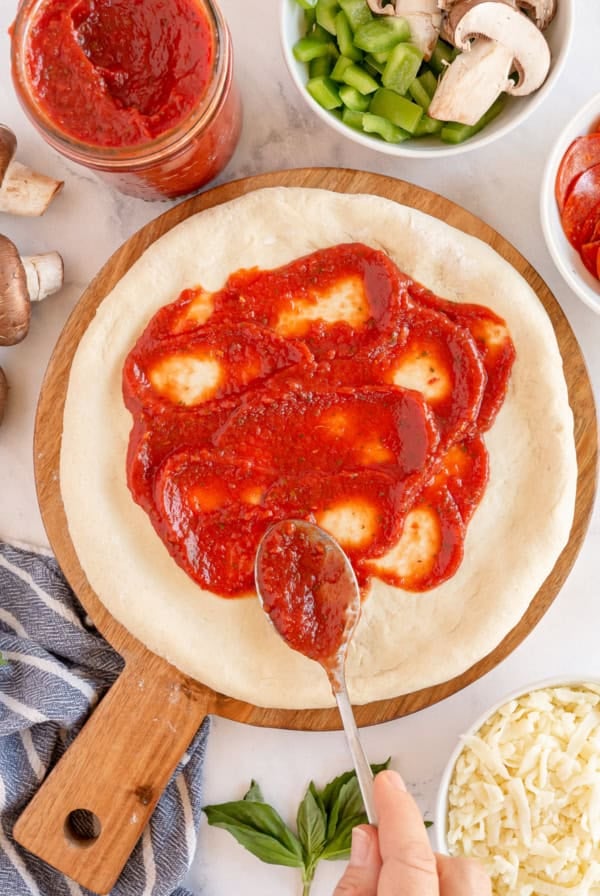
- Spread the dough with pizza sauce, cheese, and other desired toppings.
- Bake for 10 to 15 minutes (depending on the thickness of your crust), until the crust is nicely browned and the cheese is melted.
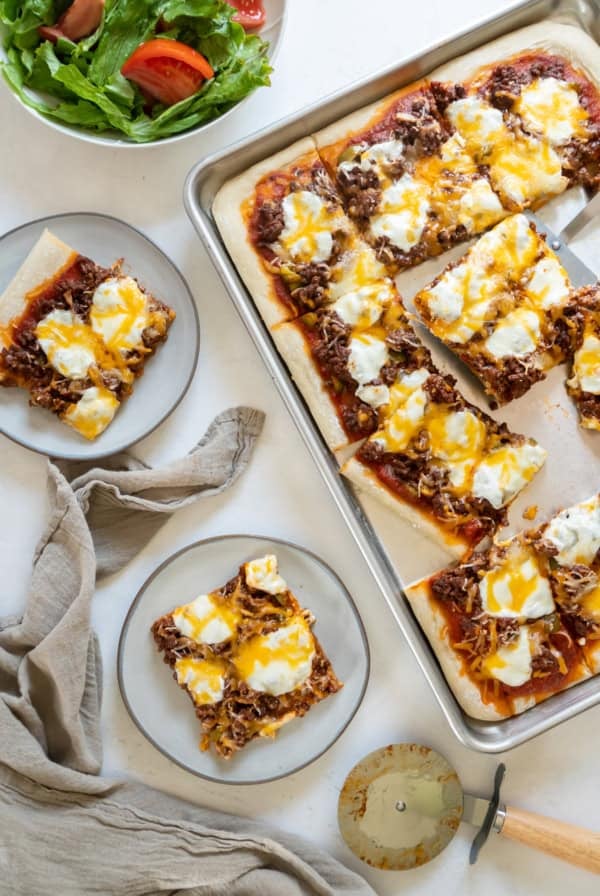
For Sheet Pan Pizza
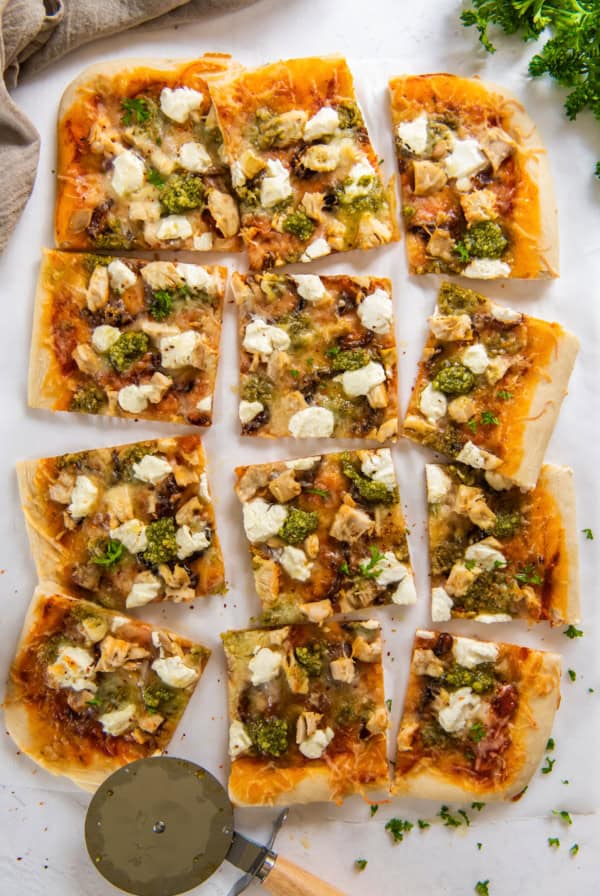
Instead of baking two round pizzas, you can use this pizza crust recipe to bake one large thick-crust pizza in a sheet pan. A great choice when you’re feeding a group! You can see how this works with my Cheeseburger Pan Pizza. It’s a good idea to par-bake the crust to give it a head start before adding the sauce and toppings.
- Preheat your oven to 450 degrees F. with the oven rack in the lowest positin. Coat a large rimmed baking sheet with olive oil or nonstick cooking spray.
- Roll out the pizza crust dough then pat it down into the pan, shaping it so that it fits right up to the edges. Lightly poke the top layer of the dough all over with a fork to help prevent air bubbles from forming.
- Par-bake the crust for 5 minutes.
- Remove the pan from the oven, top the crust with pizza sauce and your pizza toppings, and bake for an additional 15 minutes or until the cheese is melted and the edges of the crust are browned. Remove the pizza from the oven and allow it to rest for 5 minutes before slicing and serving.
Make-Ahead Pizza Crust
Instead of allowing the dough to rise immediately, cover the bowl with plastic wrap and place it in the refrigerator. You can do this one or two days ahead to save time on a busy day. Remove the bowl from fridge and let it rest while you are preparing the toppings. Then, proceed with shaping, topping, and baking the pizza as directed in the recipe.
Freezing Pizza Dough
Generously dust the ball of dough with flour and transfer it to a 1 gallon freezer-safe plastic storage bag. Pizza crust dough freezes well for up to one month. To use frozen dough, transfer the bag to the refrigerator the night before. Once fully thawed, let it rest on the counter for about an hour before assembling and baking the pizza.
Pizza Crust

Ingredients
- 1 ½ cups warm water, 105 degrees F. to 115 degrees F.
- ½ teaspoon sugar
- 1 package active dry yeast, 2 ¼ teaspoons
- 1 teaspoon salt
- 2 tablespoons olive oil
- 3 to 3 ½ cups all-purpose flour or bread flour, divided and as needed
- cornmeal, as needed
Instructions
- Pour the warm water into the bowl of your stand mixer. Add the sugar and yeast and give it a little stir. Let it sit for 10 minutes to proof the yeast
- When yeast has come alive, using either the dough hook or paddle attachment (either works), mix the salt and oil into the yeast solution on a low to medium speed (speed 2 or 4 with the KitchenAid). Add in 2 ½ cups of the flour. Mix well and then add more flour in ¼ cup increments. Stop as soon as the dough is holding more to the hook than to the bowl. It is better to err on the side of it being too sticky because you can always add more but you can’t take it out! Continue to mix the dough on speed 2 for another 2 or 3 minutes.
- Use olive oil to coat a medium mixing bowl. Using floured hands, remove the dough from bowl of mixer and shape into a ball. Place the dough into the well-oiled mixing bowl. Flip the dough over a couple times to coat both sides with oil. Cover the bowl with plastic wrap or a clean kitchen towel, and leave in a warm place to rise for 1 hour or until doubled in volume.
- Punch down the dough and form a tight ball. Cut the the ball of dough in half with a knife. Allow the dough to relax for a minute before shaping.
Shape the Pizza Dough
- Use a rolling pin to flatten one of the balls of dough on a lightly floured board. Set the rolling pin aside and finish shaping it with your hands, pressing it out from the inside working out. Stretch the sides until you reach the desired diameter – about 10- to 12-inches. If the dough is resistant or difficult to stretch, let it rest for a few minutes and try again.
- You can also hold up the edges of the dough with your fingers, letting the dough hang and stretch, while working around the edges of the dough. If a hole appears in your dough, place the dough on a floured surface and push the dough back together to seal the hole.
- Use your palm to flatten the edge of the dough where it is thicker. Pinch the edges if you want to form a lip.
Assemble and Bake the Pizza
- Preheat the oven to 500 degrees F. with the oven rack in the lowest position.
- Spread the dough with pizza sauce, cheese, and other desired toppings.
- Bake for 10 to 15 minutes (depending on the thickness of your crust), until the crust is nicely browned and the cheese is melted.
Notes
- After proofing the yeast, add 2 ½ cups of the flour and use a wooden spoon to mix well. Add all the remaining flour except ½ cup and mix it well with your hands.
- Transfer the dough to a lightly floured board and knead it for at least 5 to 7 minutes, adding additional flour only if necessary to form a smooth, elastic dough. Follow the remaining instructions as directed in the recipe.
- Preheat your oven to 450 degrees F. with the oven rack in the lowest position. Coat a 12- x 17-inch rimmed baking sheet with olive oil or nonstick cooking spray.
- Roll out the pizza crust dough then pat it down into the pan, shaping it so that it fits right up to the edges. Lightly poke the top layer of the dough all over with a fork to help prevent air bubbles from forming.
- Par-bake the crust for 5 minutes.
- Remove the pan from the oven, top the crust with pizza sauce and your pizza toppings, and bake for an additional 15 minutes or until the cheese is melted and the edges of the crust are browned. Remove the pizza from the oven and allow it to rest for 5 minutes before slicing and serving.
- Refrigerator – Instead of allowing the dough to rise immediately, cover the bowl with plastic wrap and place it in the fridge until needed. You can do this one or two days ahead to save time on a busy day. Remove the bowl from fridge and let it rest while you are preparing the toppings. Then, proceed with shaping, topping, and baking as directed in the recipe.
- Freezer – Before rising, generously dust the ball of dough with flour and transfer it to a 1 gallon freezer-safe plastic storage bag. Pizza crust dough freezes well for up to one month. To use frozen dough, transfer the bag to the refrigerator the night before. Once fully thawed, let it rest on the counter for about an hour before assembling and baking the pizza. Proceed with shaping, topping, and baking the pizza as instructed in the recipe.
Nutrition
Nutrition information is automatically calculated using generic ingredients, and is an estimate not a guarantee. For more accurate results, please refer to the labels on your ingredients at home.
Like this? Please rate & comment below!
This post was originally published August 20, 2011. It has been updated with new text and images.


Could I make this in my bread machine?
Can you eliminate the salt in this dough ? Or maybe cut in half. My husband is on a low sodium diet.
Yes! The salt doesn’t aid the yeast activation but it does add flavor. It could be a bit bland but the result should still be the same.
Valerie, we have tried many of your recipes, and they are all delicious and simple. I was wondering if you have a recipe for Philly cheese steak pizza or Pappadia Philly cheese steak. Thank you 😊
Hi Gergana. Thank you for being a loyal reader 🙂 I don’t have a recipe for either but, yum! I do have a recipe for Philly Cheesesteaks with Peppers and Onions but the pizza idea sounds delicious.
Thank you Shelby! I’m so glad you found me. It is still a work in progress so check back soon. I really enjoy your blog posts.
Valerie! Welcome to the food blog world 🙂 I just happened to be looking at who “liked” my page as other pages and yours popped up! It is great to see you and I will look forward to following your blog!