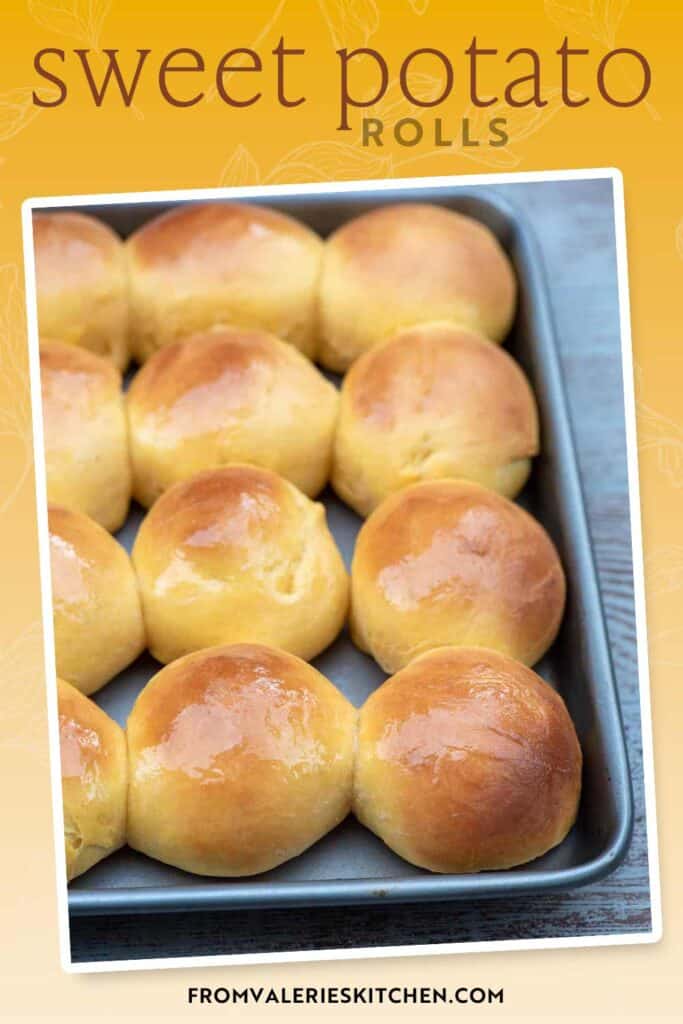
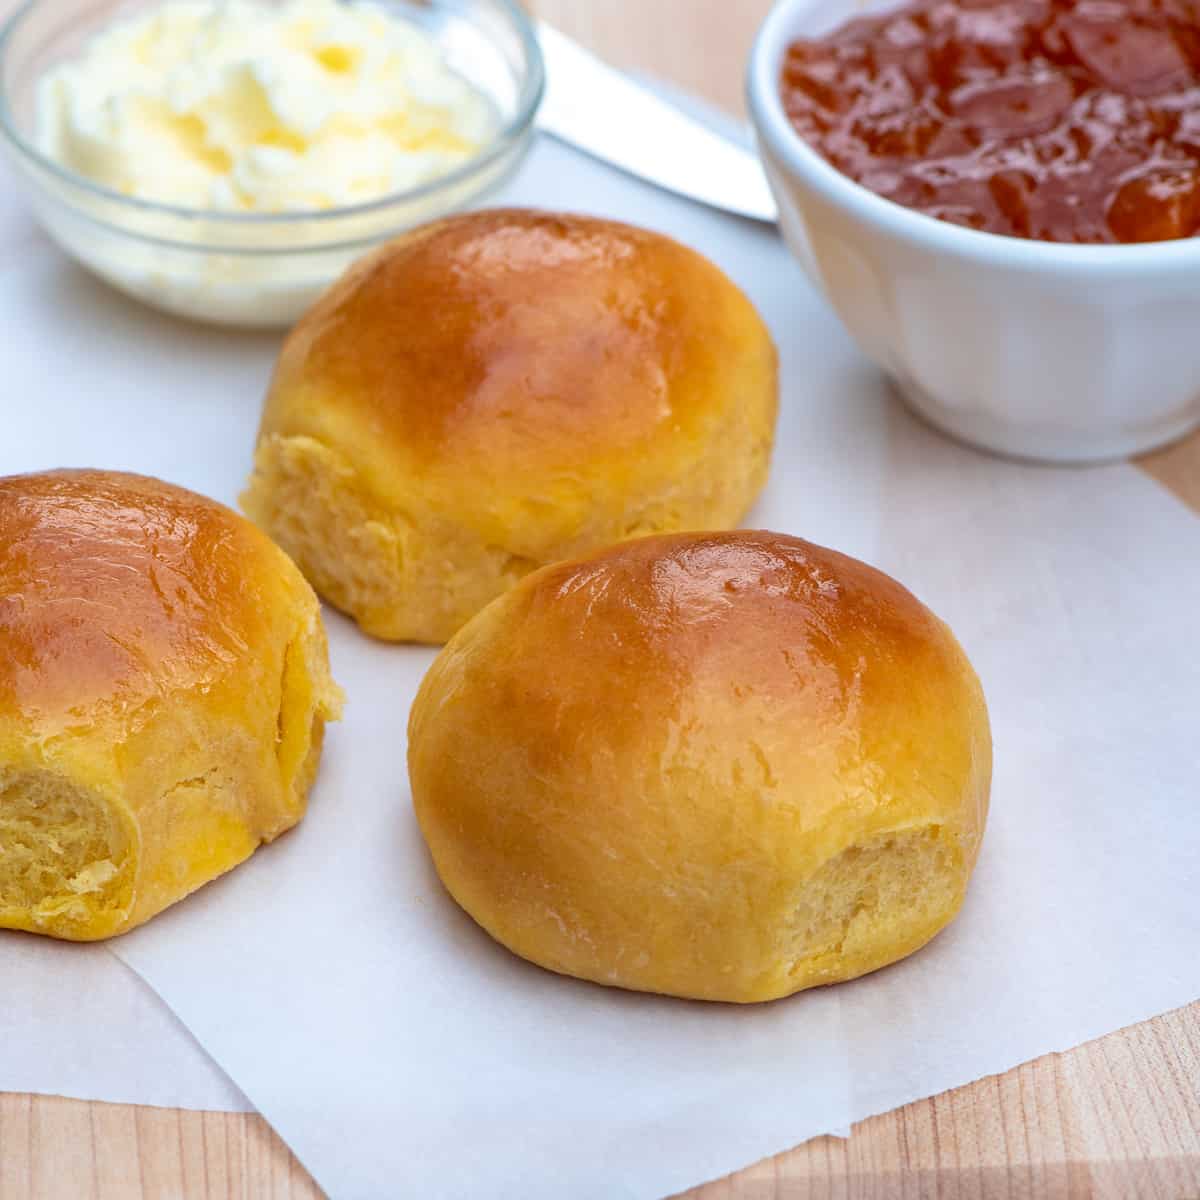
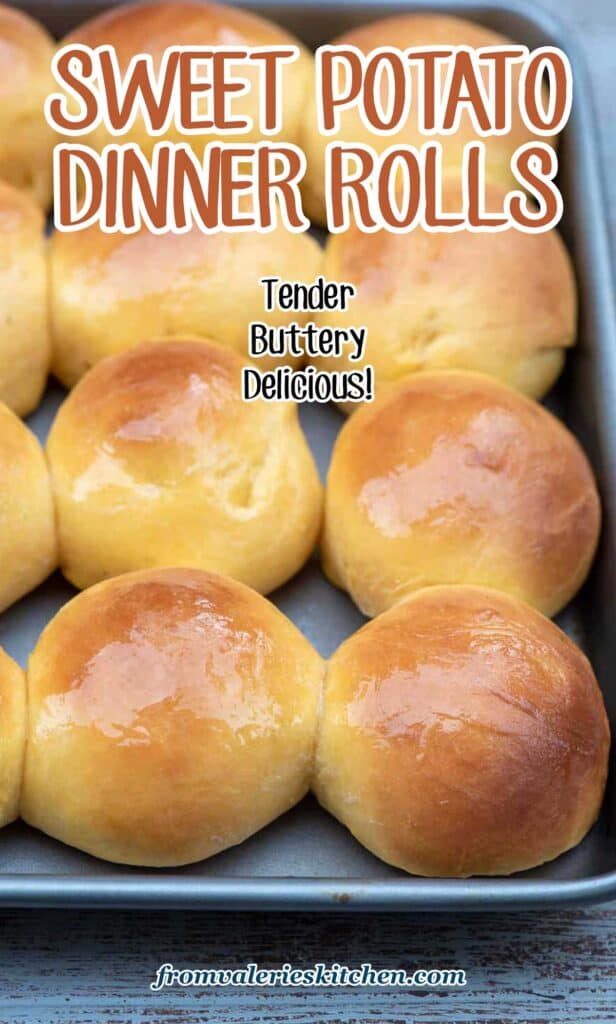
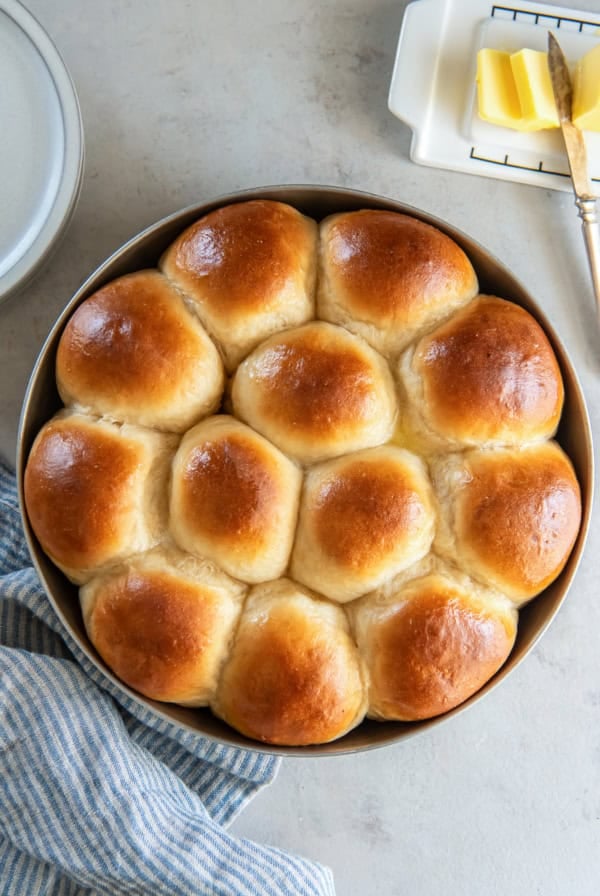
These perfectly tender and buttery Sweet Potato Rolls will add a special touch to your holiday menu. Adding sweet potato to yeast dough creates these fluffy dinner rolls with gorgeous golden color.
This post may contain affiliate links. Please read our disclosure policy.
I’ve always had trouble determining whether it was the made from scratch yeast rolls or the Crock Pot Stuffing I love most about the Thanksgiving meal. My mom did them both in spectacular fashion.
These golden-hued beauties are old-fashioned, two rise yeast rolls. Precisely the kind I love to bake for the holidays.
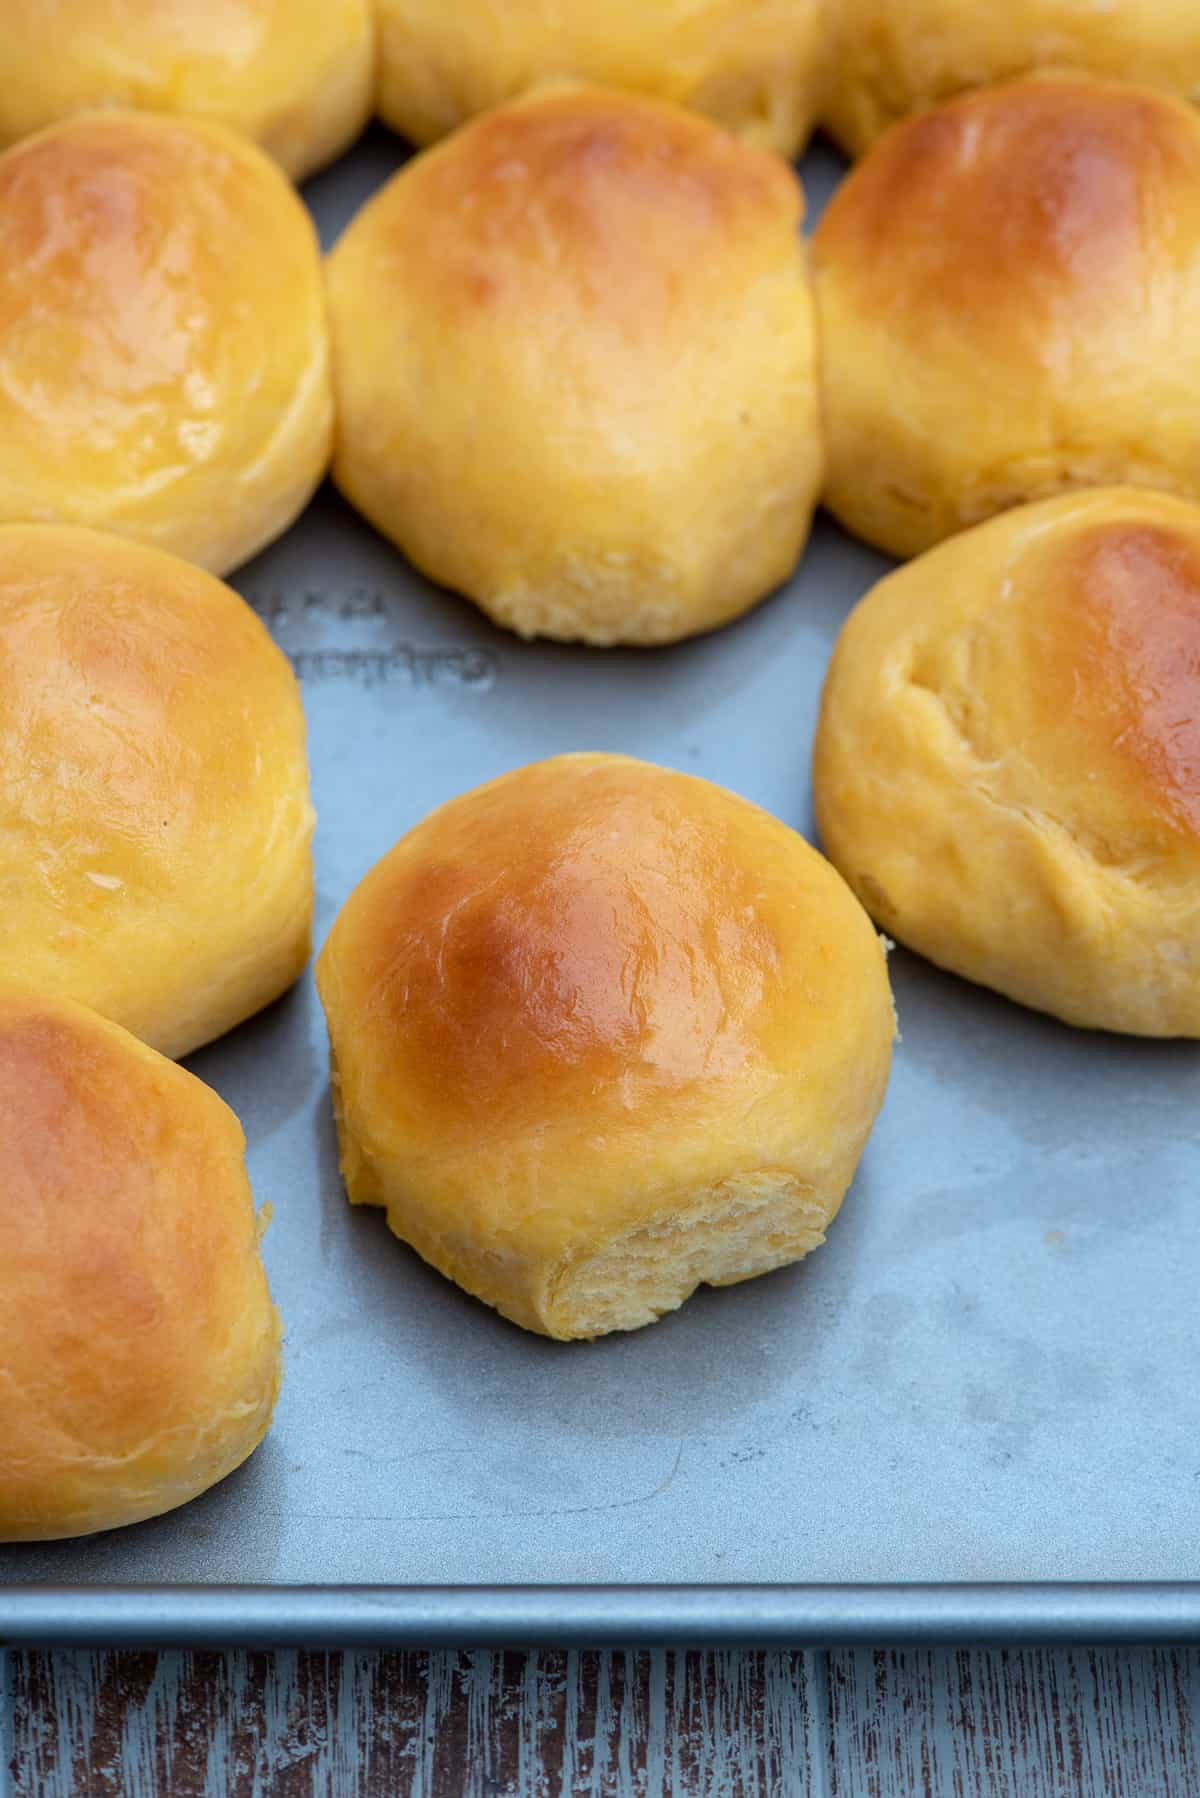
The texture of Sweet Potato Rolls is incredible and they could not be more perfect for your Thanksgiving menu.
If you’ve eaten homemade yeast rolls while they are still warm from the oven, then like me, I’m sure that memory lingers somewhere in a deep place in your soul. The place that holds those warm, fuzzy food memories that never leave you no matter how much time passes. Just the aroma of homemade rolls baking in the oven completely changes my state of mind.
It has been one of my life goals to create a big bank of those food memories for my boys because this is the good stuff, friends. And, these Sweet Potato Rolls are sure to do the trick for your loved ones.
There is a bit of time and effort involved in making dinner rolls from scratch, but let me tell you, it is so worth it. Especially for the holidays.
Table of contents
Tips for the Best Sweet Potato Rolls
There are a few tips for success when making yeast breads and rolls. Once you become familiar with these tips, they can be applied to most other yeast bread recipes for a great result.
The Right Yeast
Yeast dough recipes will call for either Active Dry Yeast or Rapid Rise Yeast and it is vital you have the correct one as the methods for baking with each is very different. These Sweet Potato Rolls require Active Dry Yeast and will rise twice before baking.
How to Proof Yeast
The first step in the recipe is to “proof” the yeast which is basically taking it from it’s granular state to a foamy, bubbly state that will make your dough rise. If you do this step properly you’ve won half the battle.
To proof properly, Active Dry Yeast requires warm water and a little sugar. You can use water straight from the tap that feels warm to the touch. If it is too hot it can actually kill the yeast so if you are new to bread baking, break out your instant read thermometer and be sure the water registers no more than 115 F and you are good to go.
For this recipe you will combine one yeast packet with ¼ cup of warm water and ½ teaspoon of sugar. Stir it until it is combined and then let it rest until it comes alive, which should take about 5 minutes.
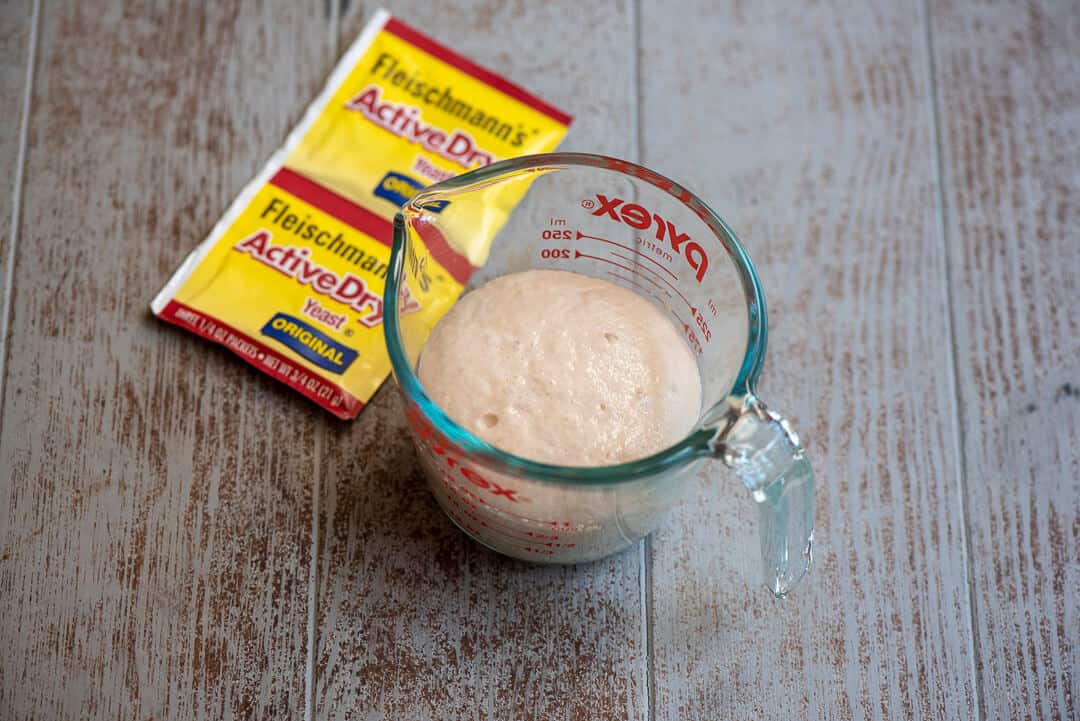
The picture above is what your very happy proofed yeast should look like. Now, you’re ready to get mixing.
How to Make Sweet Potato Dinner Rolls
The easiest, fuss-free way to create perfect yeast dough is to use a stand mixer. This is the method I will be describing here but if you want to do it all by hand, King Arthur Flour has a great resource on this.
The precise measurements are included on the recipe card at the end of this post but I’m including step by step photos as well because I think it will help take some of the guesswork out of the process.
Mixing the Dough
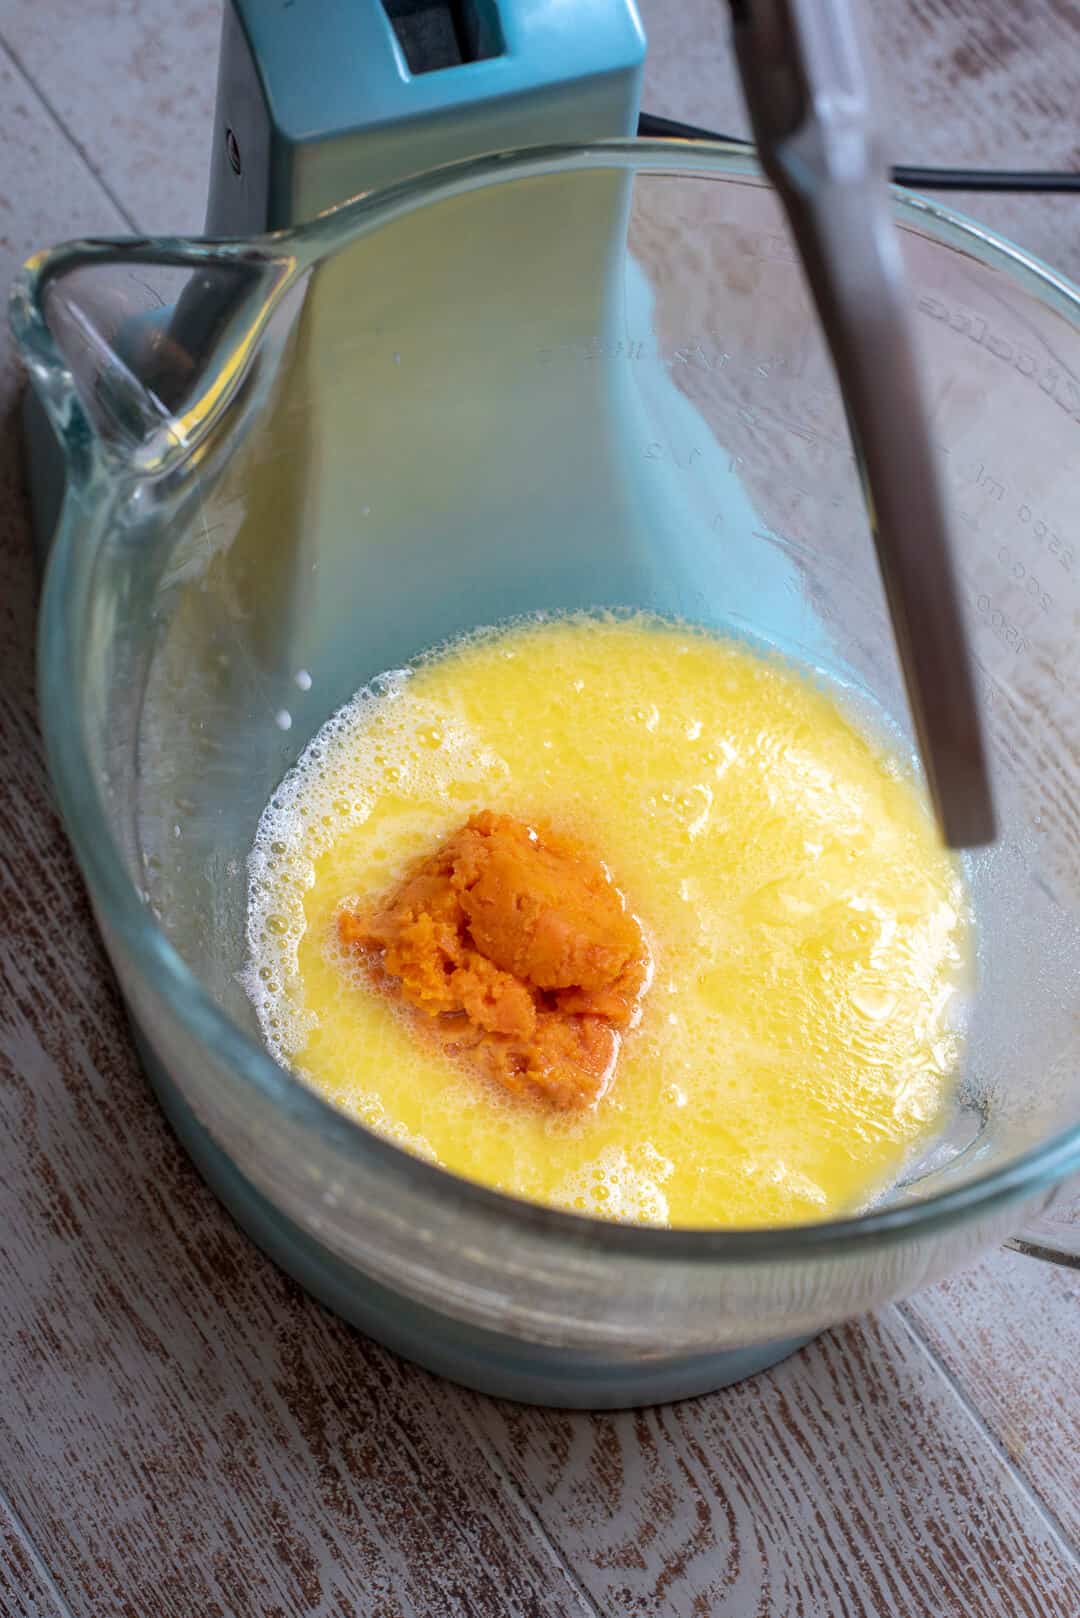
- Add warmed milk, melted butter, granulated sugar, cooked and mashed sweet potato, and salt to your stand mixer and using your paddle attachment, mix on low speed to combine.
- Add 2 cups of flour (only 2 cups!) and mix again until well combined.

- Now it’s time to add a couple of lightly beaten eggs and that happy yeast mixture.
- Mix on medium for a couple of minutes until smooth.
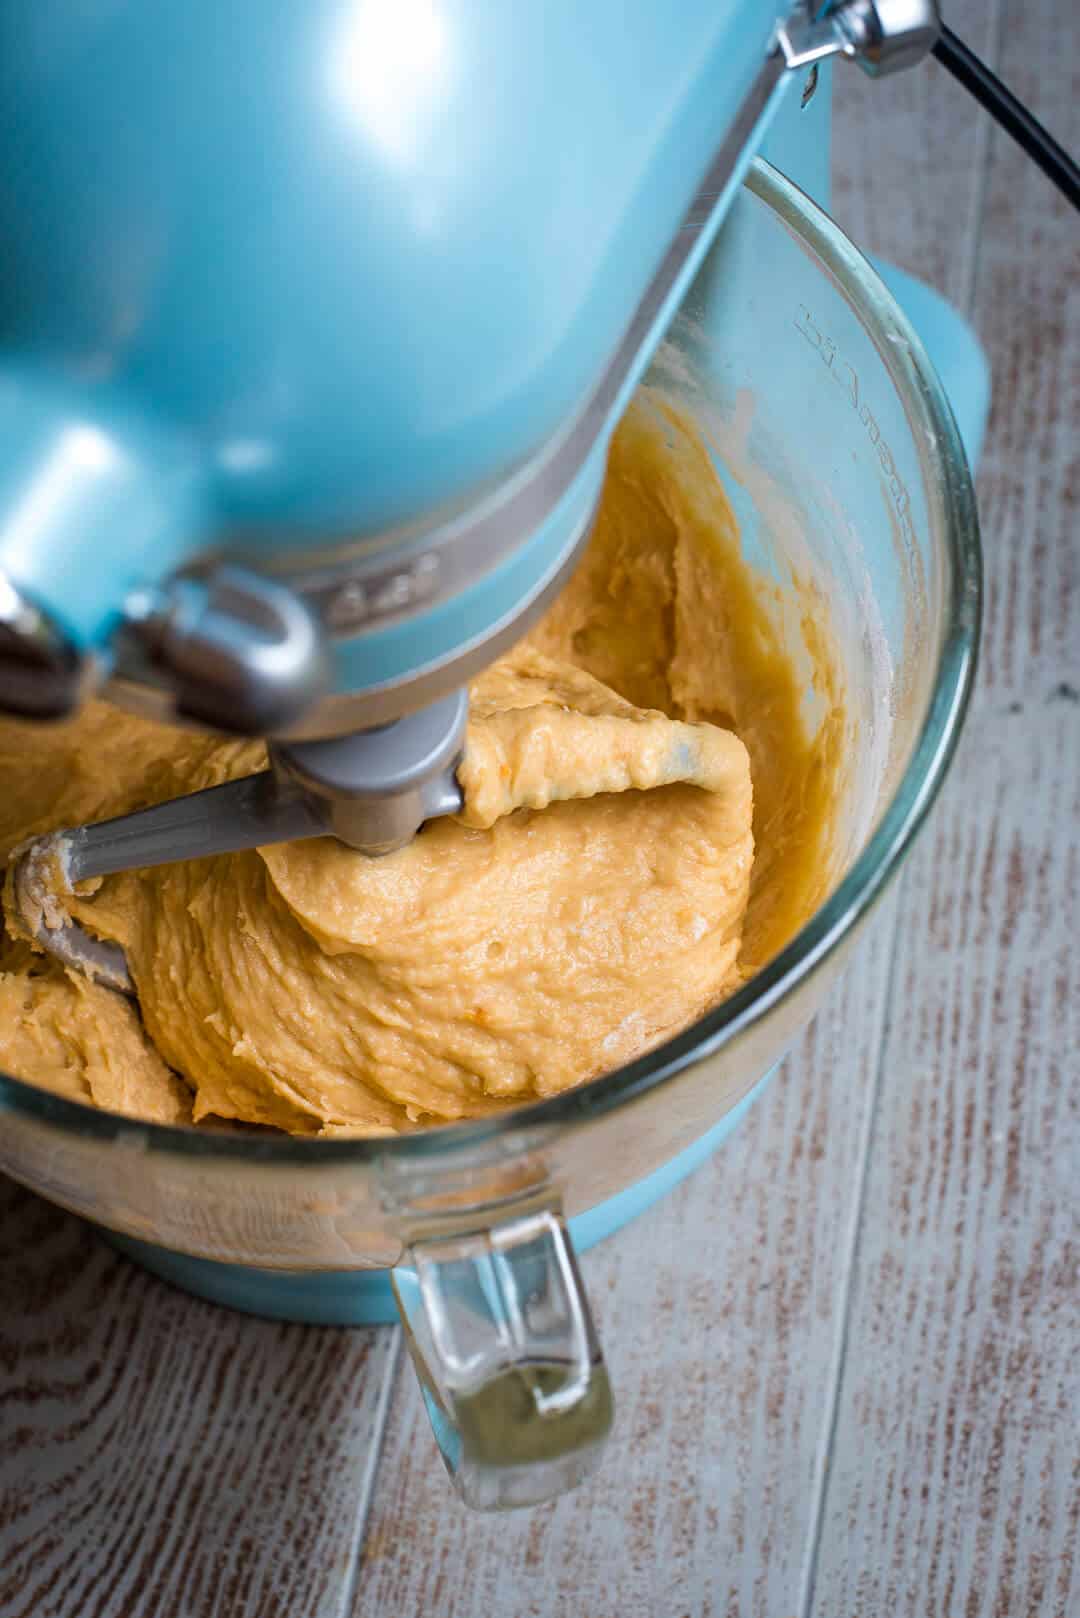
- Next, add in just enough additional flour so that the dough begins to come together and cling on to the paddle attachment. You want to add the flour in small increments, being sure not to add too much. The dough will be very thin and sticky as shown in the photo above.
Yeast dough recipes typically call for a pretty generous range in the amount of flour called for because many variables can affect how much you will need. Never add all of the flour at once – you can and will add more flour when you take the dough out of the mixing bowl but you cannot take flour out once it has been added.
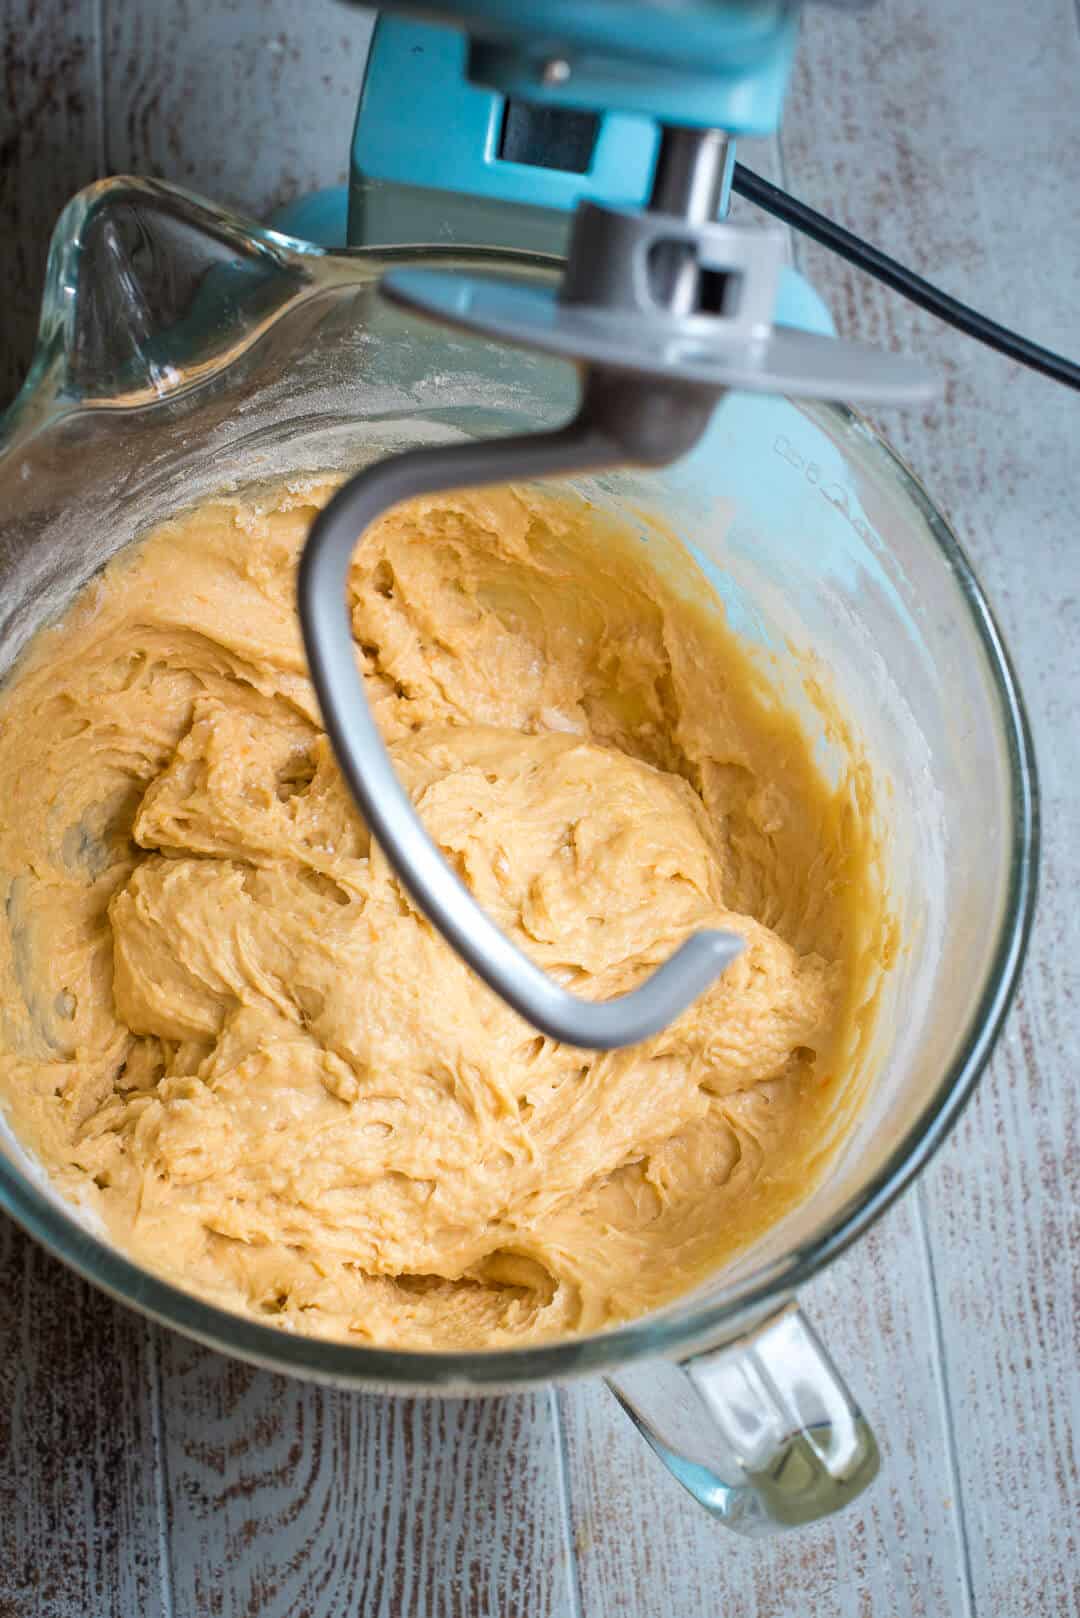
- At this point you’ll swap out the paddle attachment for the dough hook and mix the dough on low speed for 3 to 4 minutes. A good portion of the dough should begin to cling to the dough hook. If it needs a little help, add very small amounts of the remaining flour.
The dough hook is kneading the dough for you, eliminating the need for you to do this by hand which is one of the many reasons I love this appliance with all of my heart.
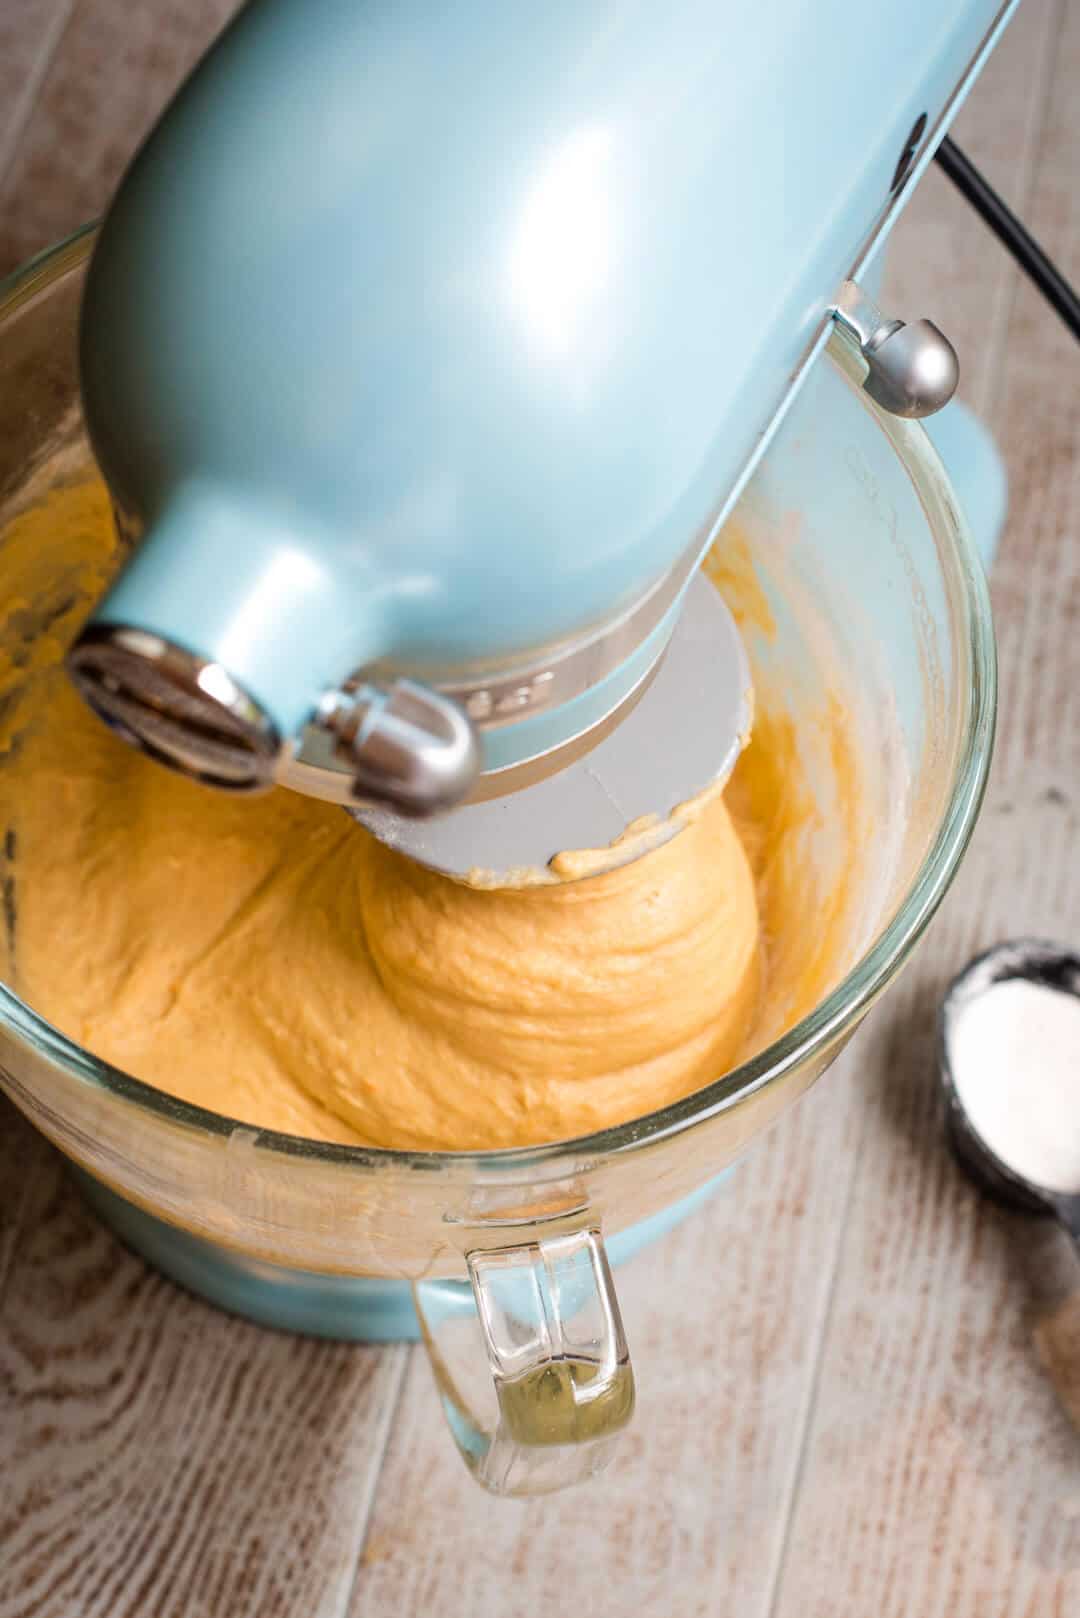
- You will probably feel like the dough is too sticky but once it begins to hold on to the dough hook and pull away from the bowl, do not add any additional flour (have I warned you enough about adding too much flour?).
The First Rise
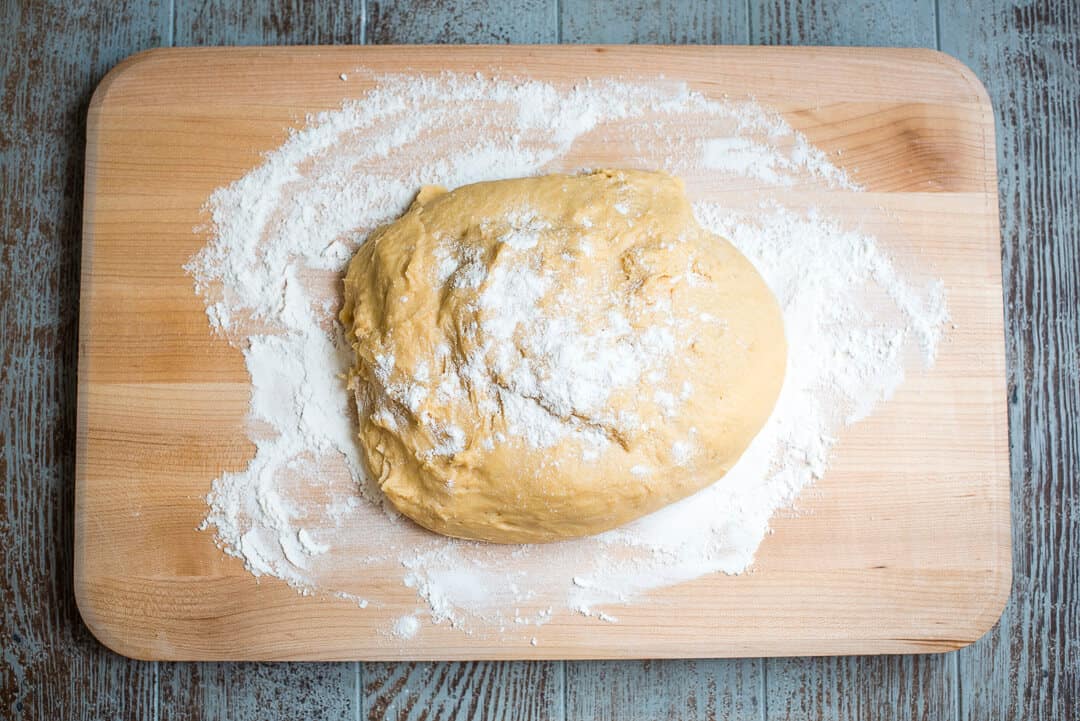
Use floured hands to scoop the sticky dough out of the bowl and transfer it to a lightly floured board. Work it with your hands to form it into a ball. If it doesn’t come together, sprinkle a very small amount of flour on the dough and work it in with your hands.
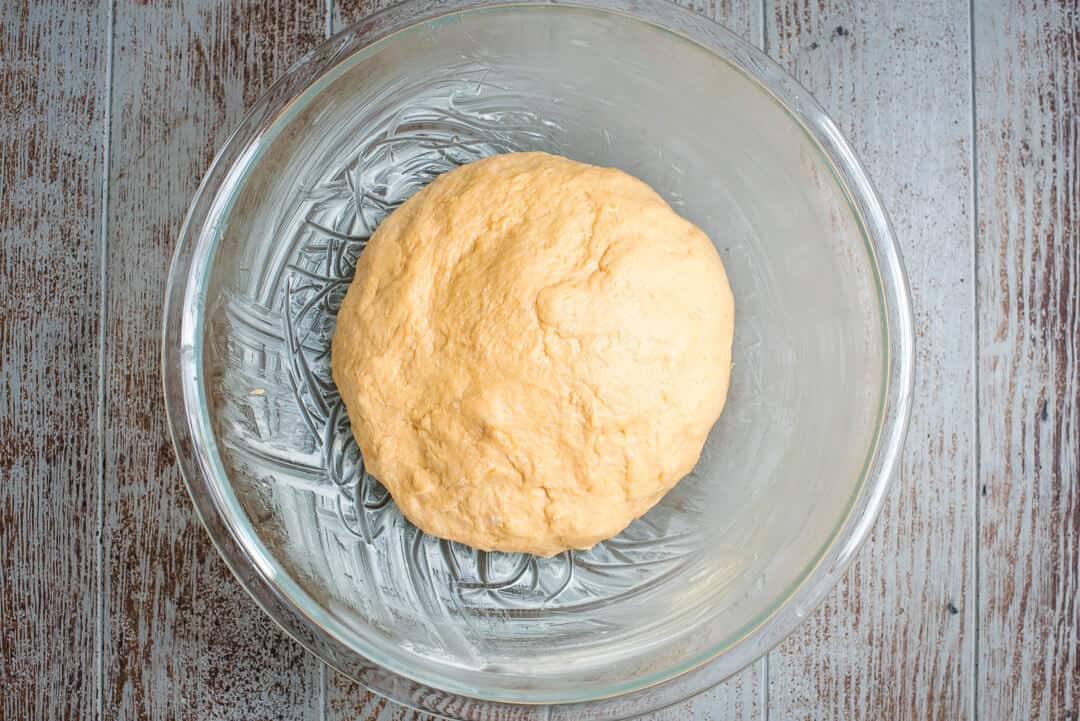
Once it comes together into a soft ball, transfer it to a greased bowl, cover it with a clean kitchen towel, and set it in a warm place in your kitchen to rise.
Forming the Dinner Rolls
After the first rise, punch the dough down a few times with your fist to deflate it and then it’s time to form your rolls. You want to form 24 even sized balls of dough and I find the easiest way to do this is to use a very sharp knife to slice the ball of dough into even quarters and then tear off 6 pieces from each quarter to form 24 balls that are approximately the same size.
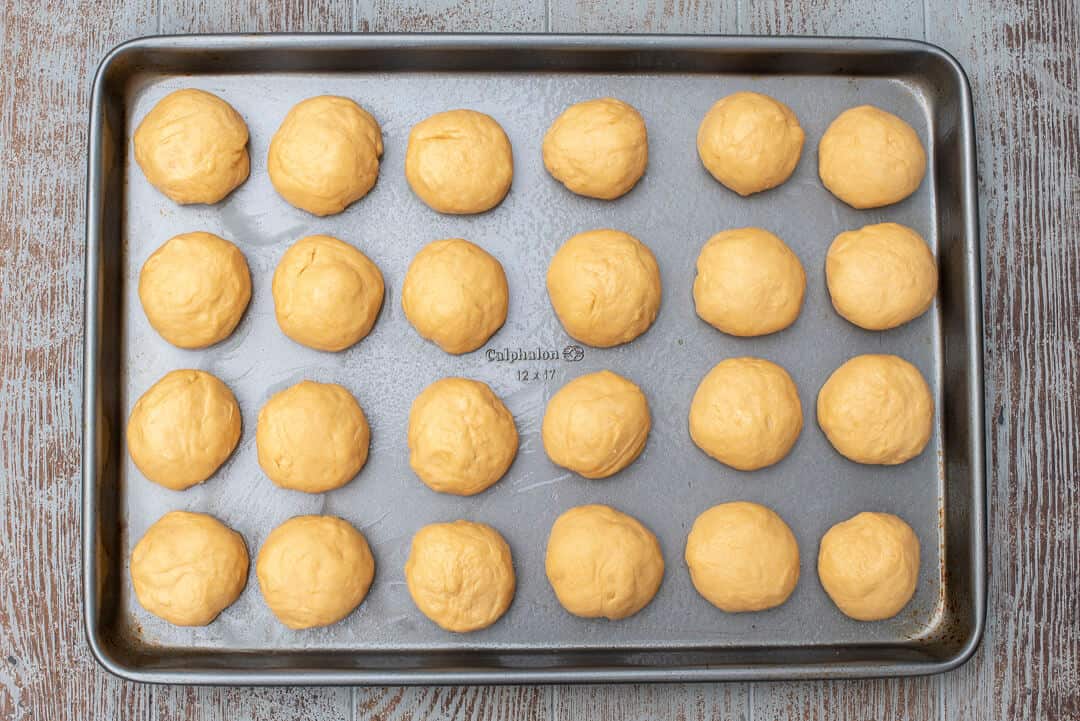
Roll each piece into a smooth ball and place them on a greased large rimmed baking sheet.
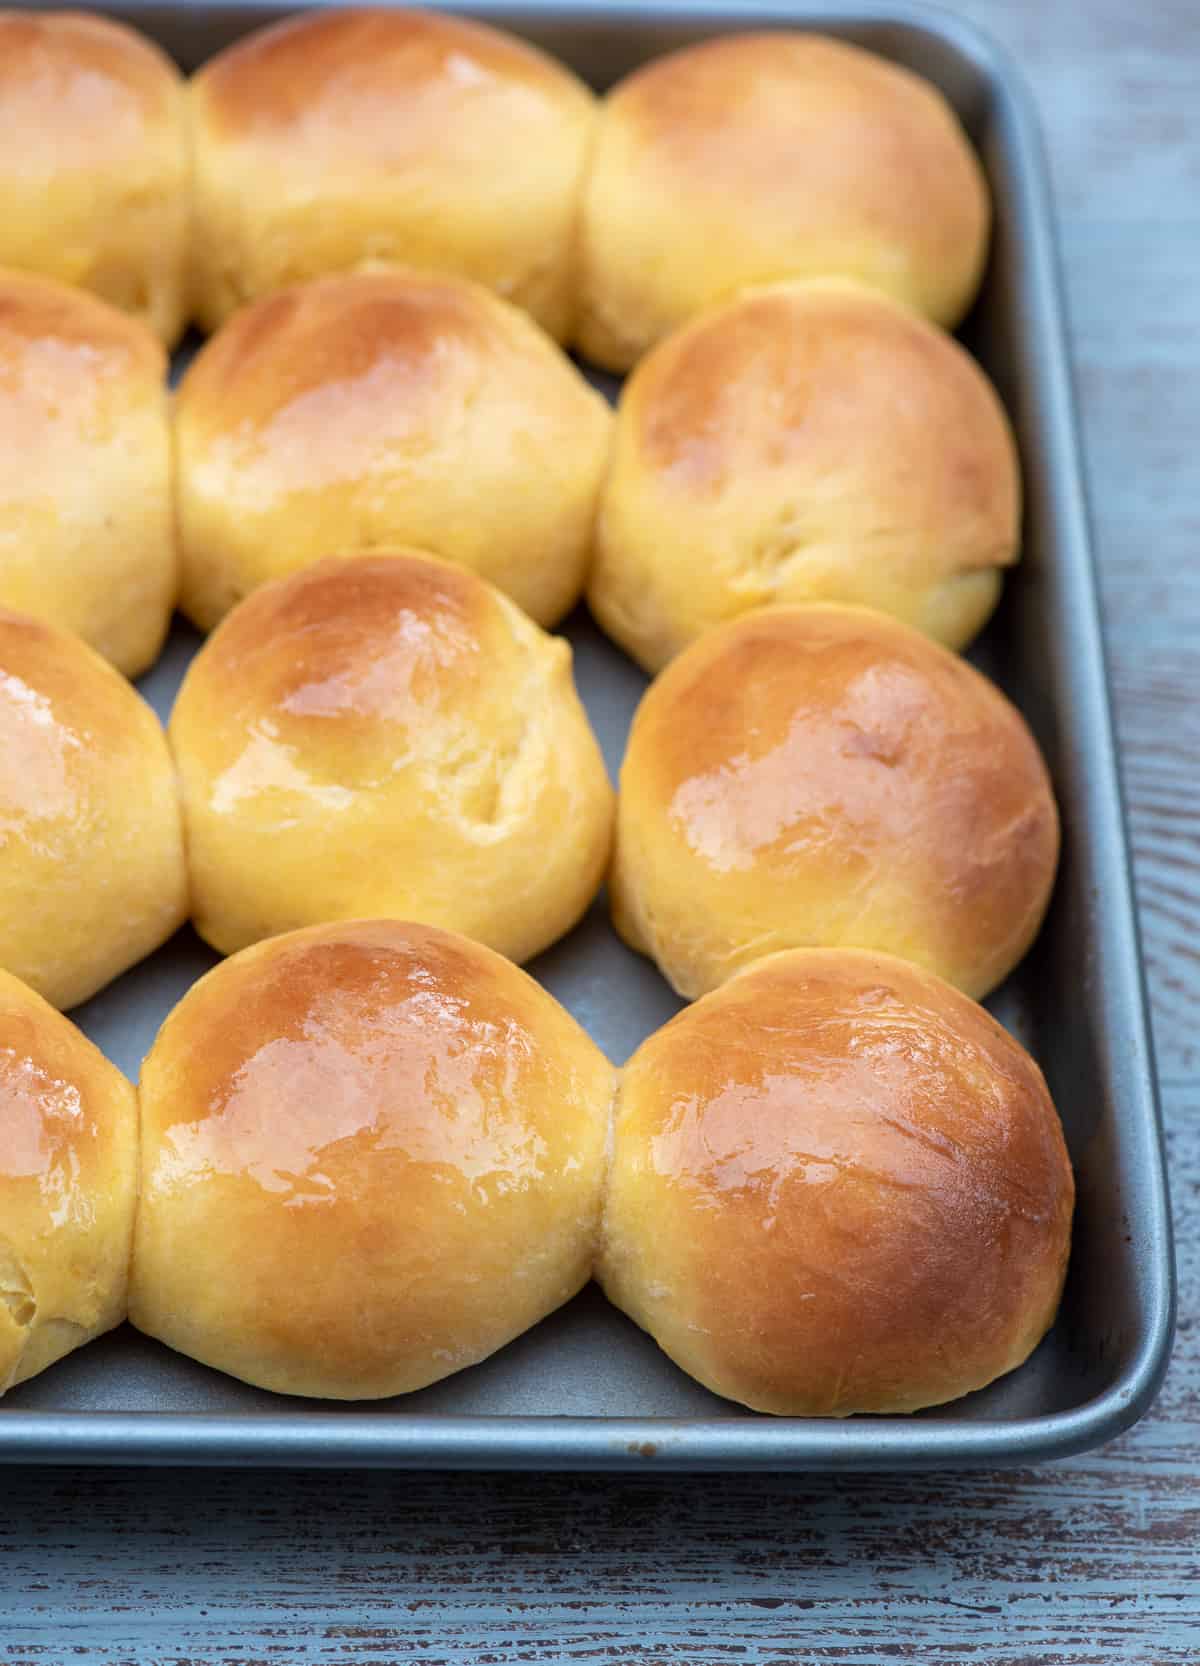
The Second Rise and Baking the Rolls
Let the rolls rest and rise, covered with a clean kitchen towel, for an hour or so and then it’s off to the oven they go. All of these details including the make-ahead overnight method are included in the recipe card below.
I want you to have success at this! It feels like such an accomplishment to bake rolls from scratch and the people you feed will love you for it!
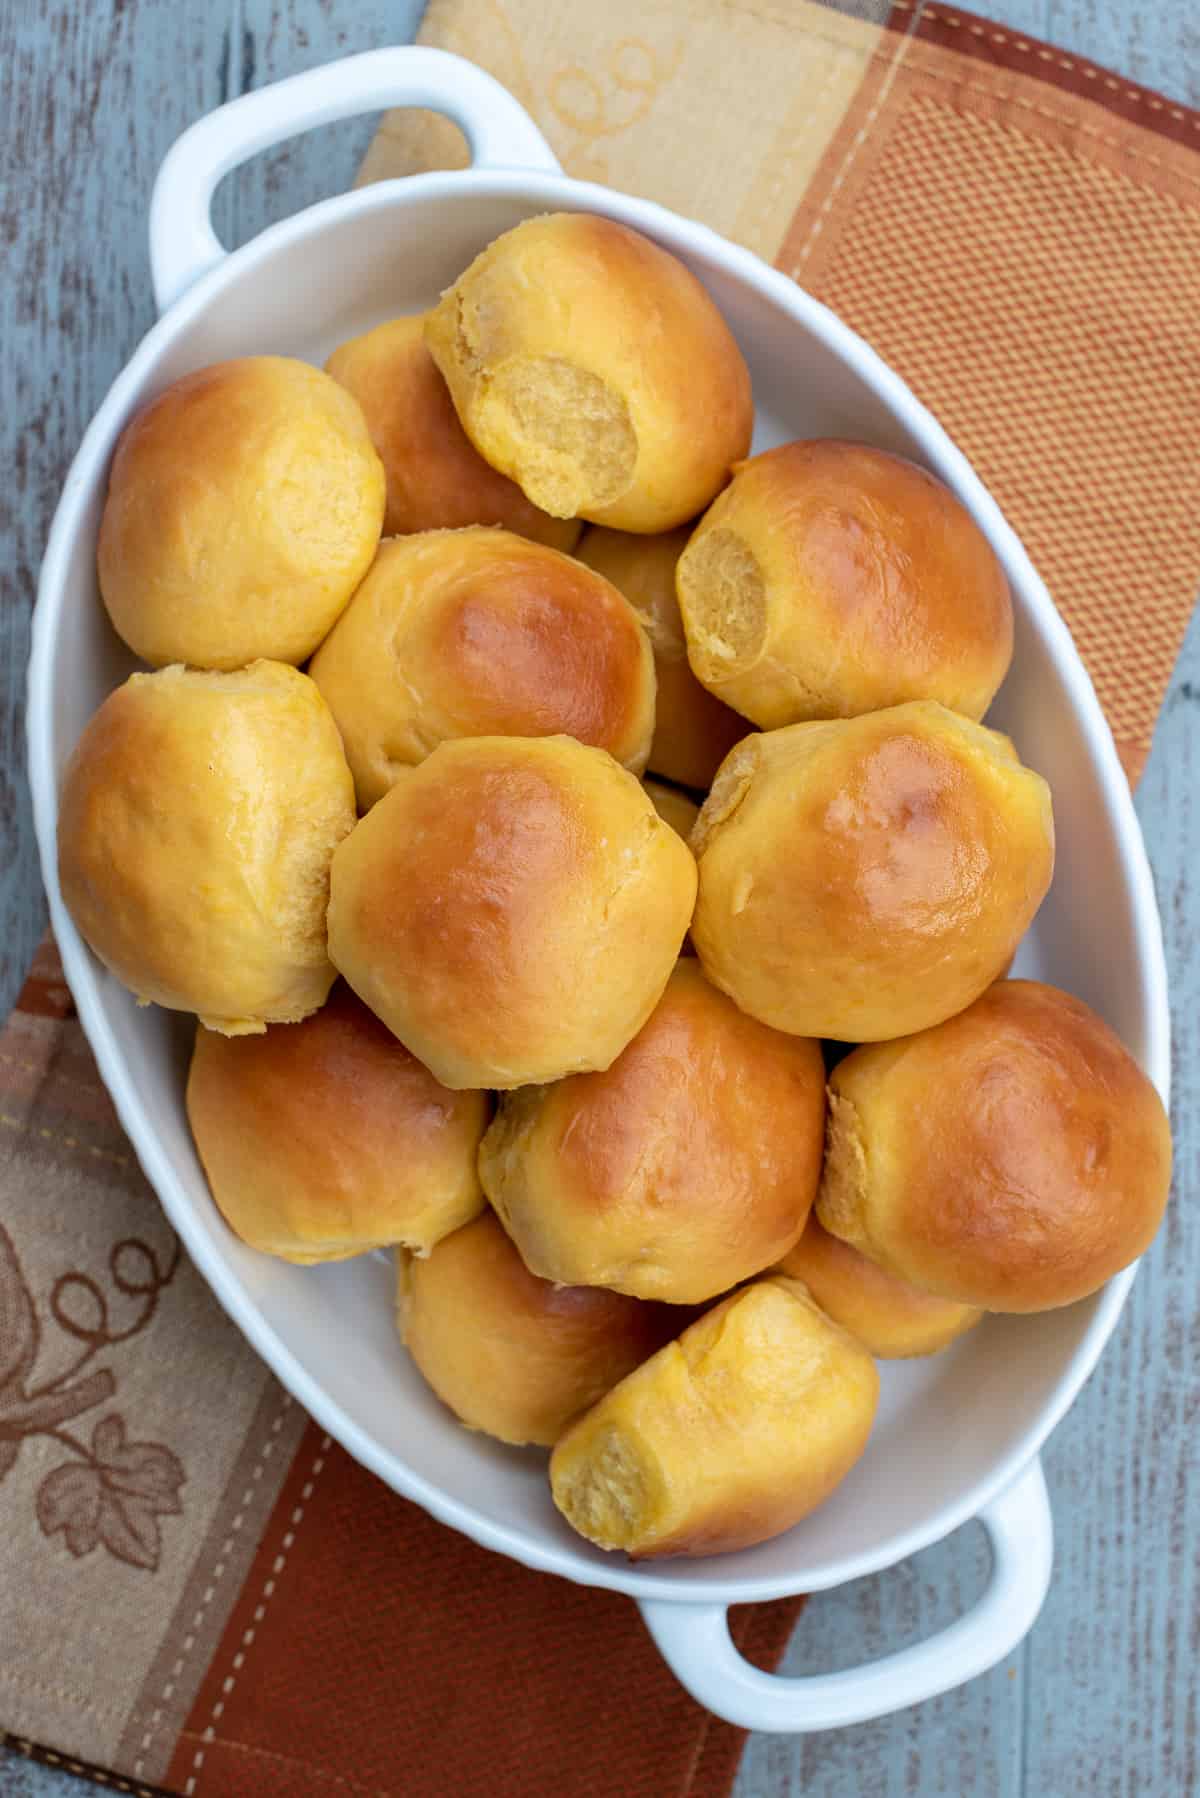
The recipe makes two dozen Sweet Potato Rolls which you may think is more than you need but trust me, you won’t have any trouble polishing them off. I need a big batch like this to ensure I’ll have some the next day so we can use them to make mini leftover turkey cranberry sandwiches. Heavenly!

Or, you can just slather them with butter and jam the next morning. We did!
Now go forth and bake rolls!
Sweet Potato Rolls

Ingredients
- 1 (.25) ounce packet active dry yeast , (not rapid rise)
- ¼ cup warm water, (between 95 F and 115 F)
- ½ cup plus ½ teaspoon sugar, divided
- 1 cup warm milk
- ½ cup plus 2 tablespoons melted butter, divided
- ½ cup cooked mashed sweet potato
- 1 teaspoon salt
- 4 ½ to 4 ¾ cups all-purpose flour, divided
- 2 eggs, lightly beaten
Instructions
Proof the Yeast
- Combine the yeast with warm water (95F to 115F) and ½ teaspoon sugar in a small bowl and stir to combine. Let it stand for 15 minutes or until the yeast has proofed and is bubbly.
Mix the Dough
- Add the warm milk, ½ cup melted butter, remaining ½ cup sugar, sweet potato, and 1 teaspoon of salt to the bowl of a stand mixer. Mix for a minute or two on LOW speed (speed 2 on the KitchenAid) until well combined. Add 2 cups of flour and mix again to combine. Add the lightly beaten eggs and the proofed yeast mixture and beat on MEDIUM speed (speed 4 on the KitchenAid) for a couple of minutes until smooth. Add in just enough of the remaining 2 ½ to 2 ¾ cups flour, until the dough comes together but is still very thin and sticky.
- Replace the paddle attachment with the dough hook and set the mixer on LOW speed and continue to mix for 3 to 4 minutes, until smooth. A good portion of the dough should begin to cling to the dough hook. If it is too thin, add a very small amount of flour, in increments, until it does. Some of the dough will still be at the bottom of the bowl.
- Pull the sticky dough together with floured hands and transfer it to a floured board. Work in just enough of the remaining flour until the dough is smooth and elastic and you are able to form it into a soft ball. It will still be quite sticky.
The First Rise
- Place the dough ball in a large bowl that you've greased with softened butter or nonstick cooking spray and turn once to grease the surface of the dough. Cover and let rise in a warm place until doubled in size (about 1 hour).
- Meanwhile, coat a 12- x 17-inch rimmed baking sheet or two 13- x 9-inch baking dishes with nonstick cooking spray. If your baking sheet is dark I highly recommend lining it with parchment paper instead to avoid over-browning the rolls.
Shape the Rolls and Rise Again
- Punch the dough down to deflate it and transfer it to a floured cutting board. Use a sharp knife to divide the dough into 4 equal pieces, pinch off 6 equal sized pieces from each quarter of dough (for 24 rolls in total), roll them into smooth balls, and transfer them to the prepared rimmed baking sheet (or baking dishes).
- Cover with clean kitchen towel(s) and allow the rolls to rest in a warm place for about an hour for their second rise.
Bake the Rolls
- Preheat oven to 375 degrees F. Bake the rolls for about 16 to 18 minutes or until golden brown. If you are using a metal baking sheet I recommend rotating it halfway through the baking time to ensure even browning. Remove from oven and brush with the remaining 2 tablespoons melted butter. Serve warm.
Overnight Method
- Once the dough has risen for the first time, punch it down to deflate it as directed above and then cover the bowl with plastic wrap and refrigerate overnight.
- The next morning, remove the bowl from the refrigerator and allow the dough to rest on your kitchen counter for 30 minutes or so, just to take the chill off. Remove the plastic wrap, punch down the dough once more (it will have risen again while chilling in the fridge) and proceed with shaping the rolls and follow the remaining recipe as directed.
Notes
Nutrition
Nutrition information is automatically calculated using generic ingredients, and is an estimate not a guarantee. For more accurate results, please refer to the labels on your ingredients at home.
Like this? Please rate & comment below!


Should I assume the 1/cup melted butter goes into the dough mixture and the 2 tablespoons is for brushing the rolls? Interesting recipe… will have to try it!
Yes, that’s right! I’ve updated the recipe card so that hopefully this is more clear. Thanks, Doug!
I am eager to try this recipe it looks great but is it possible to use less sugar.And if so what’s the least amount I can put without compromising the taste and texture?
I wouldn’t recommend reducing it below 1/3 cup for the best result. I haven’t tested this recipe with less sugar so if you try it, be sure to let me know how it works out for you.
Any chance I can use almond flour? And replace the sugar with substitutes like monk fruit?
Hi Ann. I’m afraid that without testing, I can’t guide you on those substitutions.
These were awesome. The Kitchen Aid mixer was the best part! I used a cup of cooked sweet potatoes and love the over night part. Your tips taught me something about proofing the yeast. Thank you, big shout out to you! Stay well and dage
Just a quick edit. You’ve listed 1/2 cup of sugar twice. Fist time is 1/2 C + 1/2 tsp sugar. Then a few rows down 1/2 C sugar is listed again:
SEE MORE
INGREDIENTS
1 (.25) ounce packet active dry yeast (not rapid rise)
1/4 cup warm water (between 95 F and 115 F)
1/2 cup plus 1/2 teaspoon sugar, divided
1 cup warm milk
1/2 cup plus 2 tablespoons melted butter, divided
1/2 cup granulated sugar
1/2 cup cooked, mashed sweet potato
1 teaspoon salt
4-1/2 to 4-3/4 cups all-purpose flour, divided
2 eggs, lightly beaten
Thanks for the catch! Recipe has been updated.
How can I do it in a bread machine?
Made these today! Rolls taste great(my husband said they taste like croissants) but I had to add a lot more flour then the recipe called for to get them to hold a shape resembling a roll lol
Thanks for the recipe. These were good — light and airy and tasty. Excellent the next day, toasted.
I used the overnight method. It rose a lot in the fridge, to the point where I think I slightly overproofed the dough. If I were doing it again, I’d use half the yeast for the overnight method (I used active dry like the recipe says), or just let the first rise be in the fridge. Also, I ended up adding more flour despite the author’s warnings. The dough was so wet after adding the prescribed amount of flour that forming it into anything close to a ball was impossible. After the overnight rise, the dough was easier to handle.