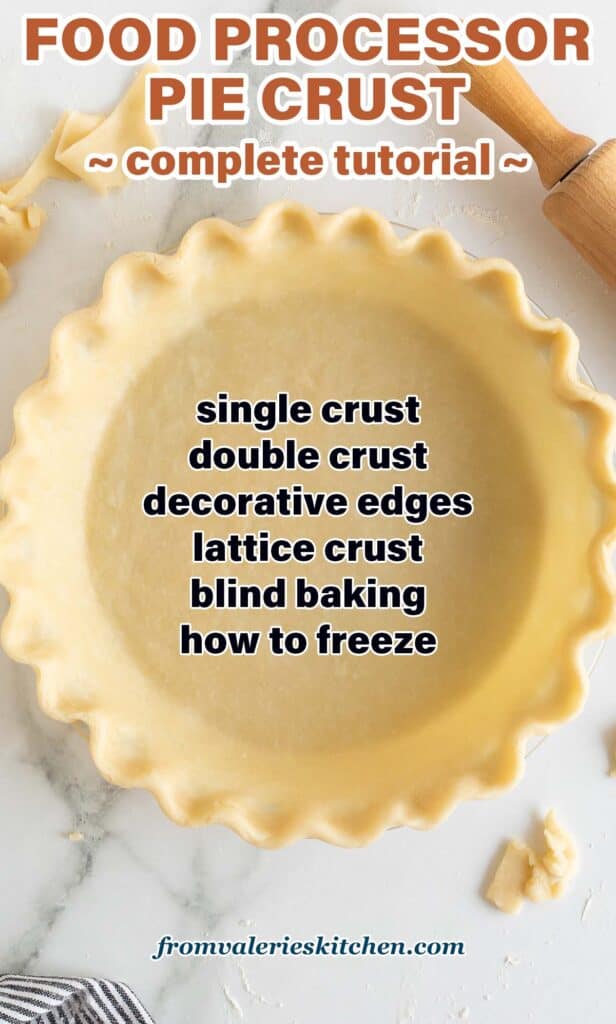
This Easy Food Processor Pie Crust recipe is a quick method that will save you precious time and effort during the holiday baking season. This tried and true method results in a perfect flaky pie crust every time!
This tutorial covers everything from making and shaping pie crust, blind baking, freezing, and creating a pretty lattice crust. You’ll want to bookmark this post so you can easily find it each holiday!
This post may contain affiliate links. Please read our disclosure policy.
As we close in on the holidays it’s time to start thinking about pie. A good pie MUST start with a good crust. Easy as it may be, the ready made variety available at the grocery store is not going to yield the best result.
This Easy Food Processor Pie Crust recipe was inspired from a variety of sources, most importantly my mom, who was an accomplished baker. Another important resource for me has been The Pie and Pastry Bible (especially the flaky pie crust recipe) and years and years of baking pies for my family of pie lovers.
Homemade pie crust gets a bad rap as being difficult to make when it’s actually so simple. I’ve found that using a food processor to make pie crust is the quickest and easiest method. You can get your pie crusts made in advance and resting comfortably in your refrigerator or freezer in nothing flat.
Table of contents
Ingredient Notes
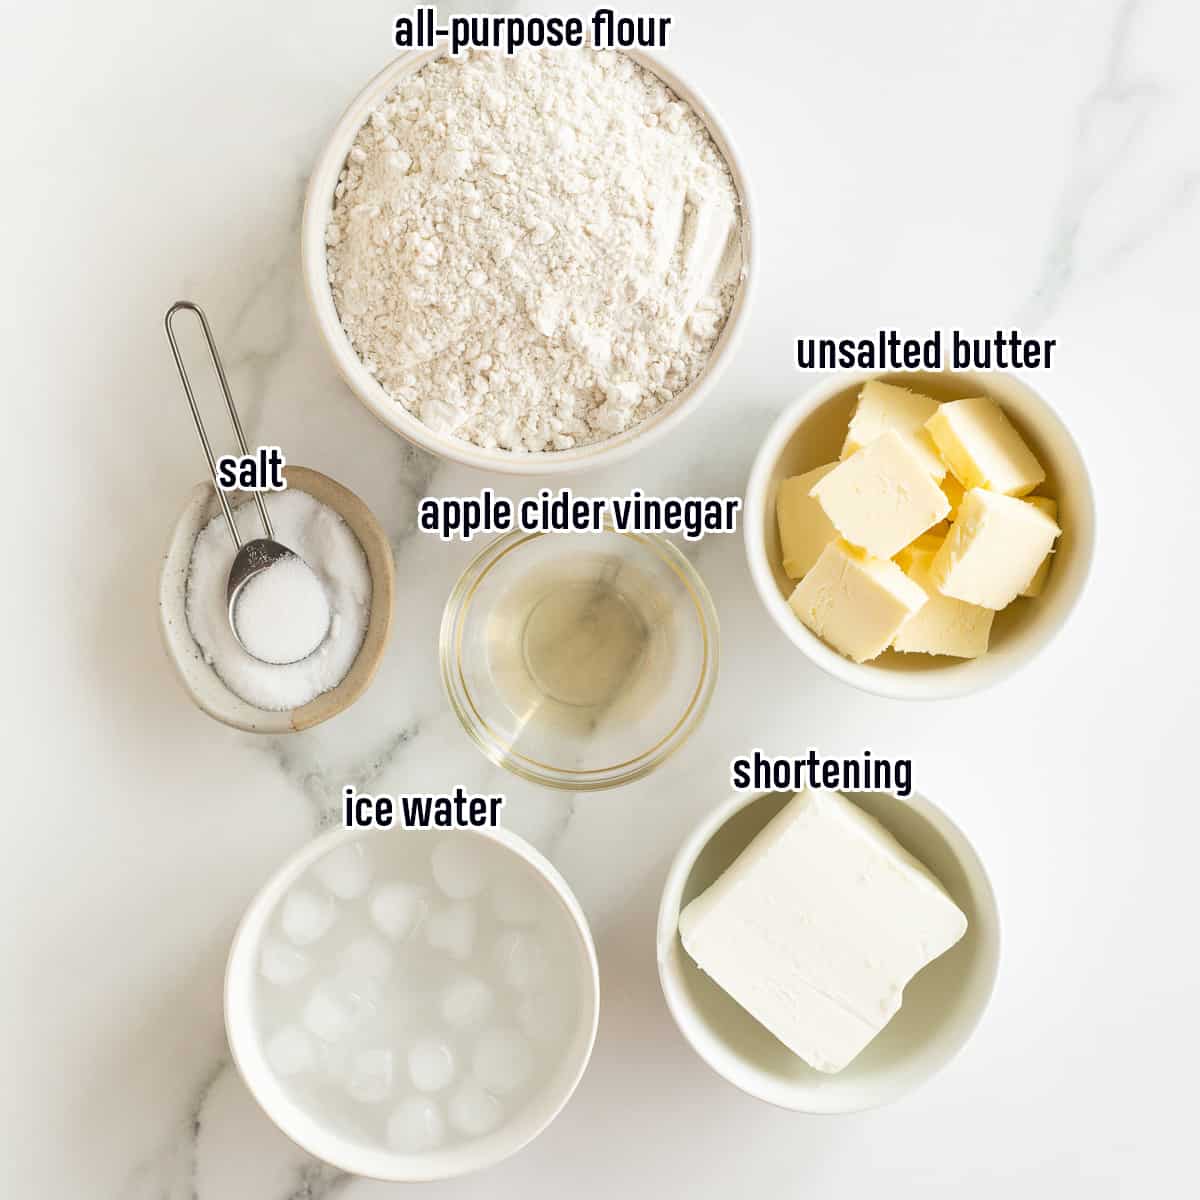
- Dry ingredients: All-purpose flour and salt.
- Fat: Unsalted butter and vegetable shortening. See more details below.
- Apple cider vinegar: There is a complex scientific explanation about how the acid in the apple cider vinegar works with the gluten strands in the flour to produce a flaky crust. But, the bottom line is that it doesn’t affect the flavor of the crust but does enhance the texture.
- Ice water: Get your water nice and cold with a few ice cubes.
Butter vs. Shortening
Pie crust recipes will call for either butter or shortening and you might be wondering which is best. I’ve come to a compromise in my recipe and use both.
- Butter is vital to creating a flavorful, flaky crust. Always go with unsalted butter so that you can more easily control the salt level and flavor in the finished recipe.
- Shortening helps a crust hold its shape while baking. Look for Crisco Shortening Baking Sticks in the oil section in the grocery store. They are packaged like butter and are easy to measure out for recipes.
How to Make Pie Crust in a Food Processor

- Dry ingredients: Place the flour and salt in the bowl of a food processor and pulse 4 or 5 times until combined.
- Add fat: Cut your cold, firm butter and shortening into small pieces and add them to the food processor.
- Process: Process about 10 seconds or until the mixture resembles coarse crumbs.
- Add liquid: Add 1 tablespoon of cider vinegar and 4 tablespoons of very cold water and pulse. If the mixture still appears a bit dry and is not holding together, add an additional tablespoon of water and pulse again.
Only add enough water until the pie dough holds together and sticks to the side of the food processor bowl. The amount of water needed can vary but I never need more than 5 tablespoons. This might be different for you so always start with less and add more, as needed.
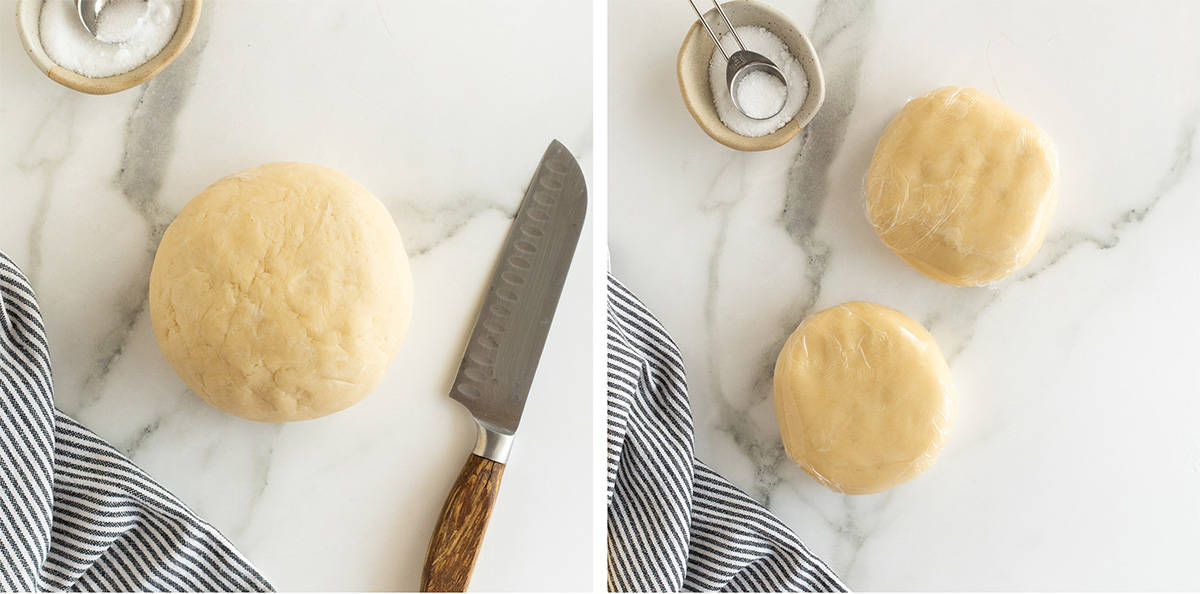
- Form into a ball: Pull the pastry out of the food processor and form it into a neat ball.
- Wrap and refrigerate: Use a sharp knife to cut the ball in half and form the dough into two balls. Wrap the balls of pie dough in plastic wrap and flatten them slightly, into discs. The dough will be easier to roll out if flattened out this way. Refrigerate the wrapped dough for at least one hour or for up to two days before rolling out.
How to Roll Out Pie Crust
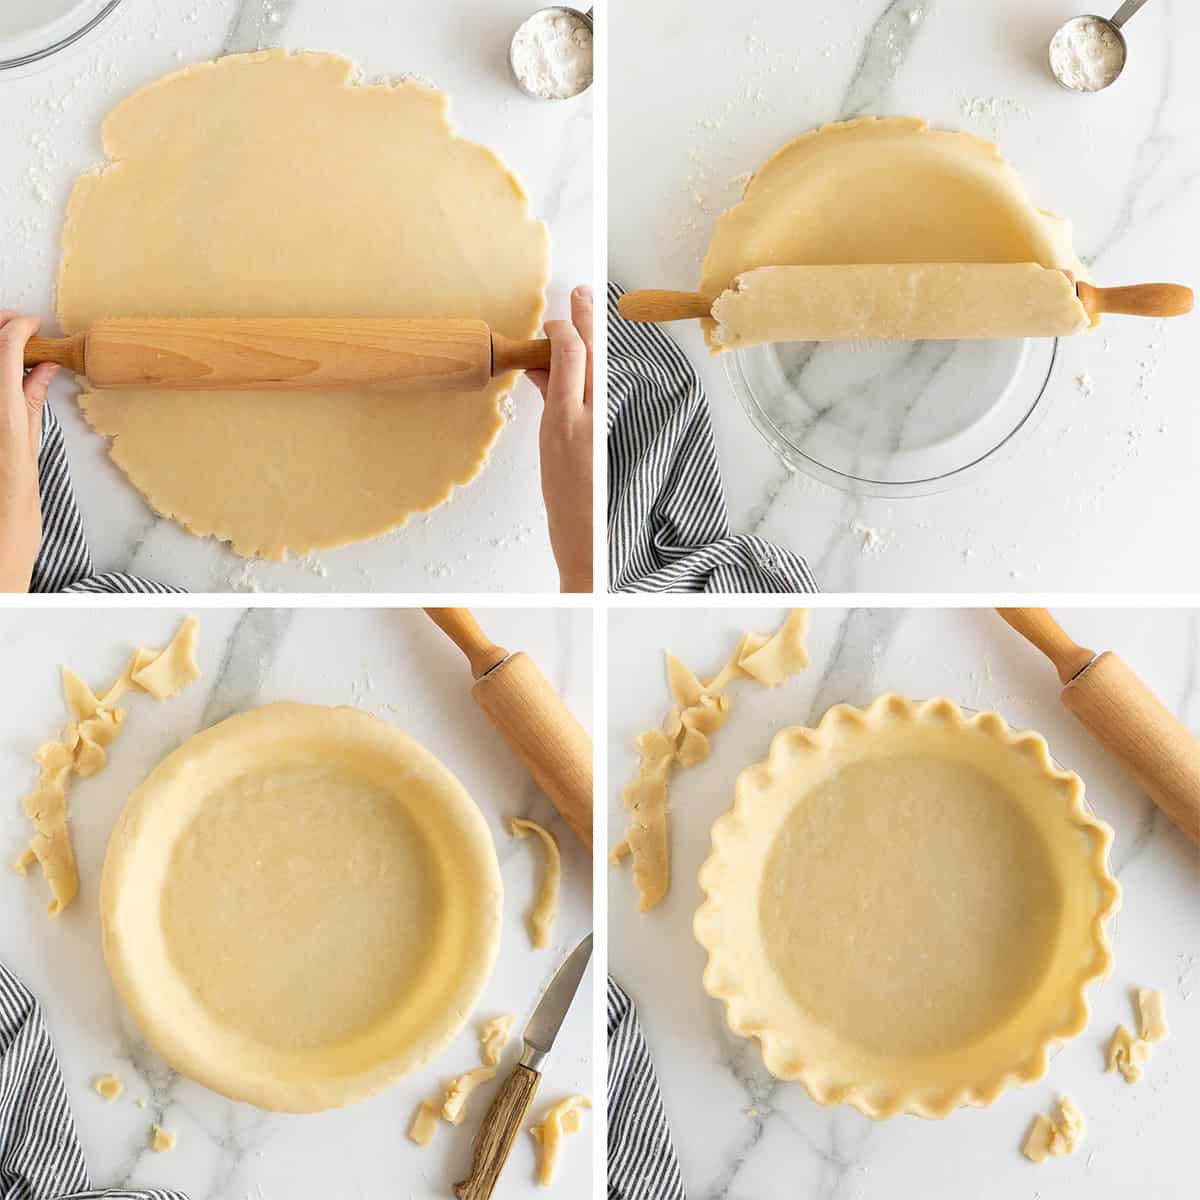
- Roll out: Use a rolling pin to roll it out on a lightly floured board. I still use my very old classic style rolling pin but a French rolling pin is also a great choice. You may need to sprinkle a bit of flour on the top of the crust to prevent it from sticking to the rolling pin. Using your pie dish as a guide, be sure it is rolled out large enough to fit in the dish with a little overhang.
- Rolling pin hack: Place your rolling pin at one end of the crust and lift the crust up and over the rolling pin. Use your hands to push the rolling pin, wrapping the crust around it until the entire crust is rolled on to the rolling pin.
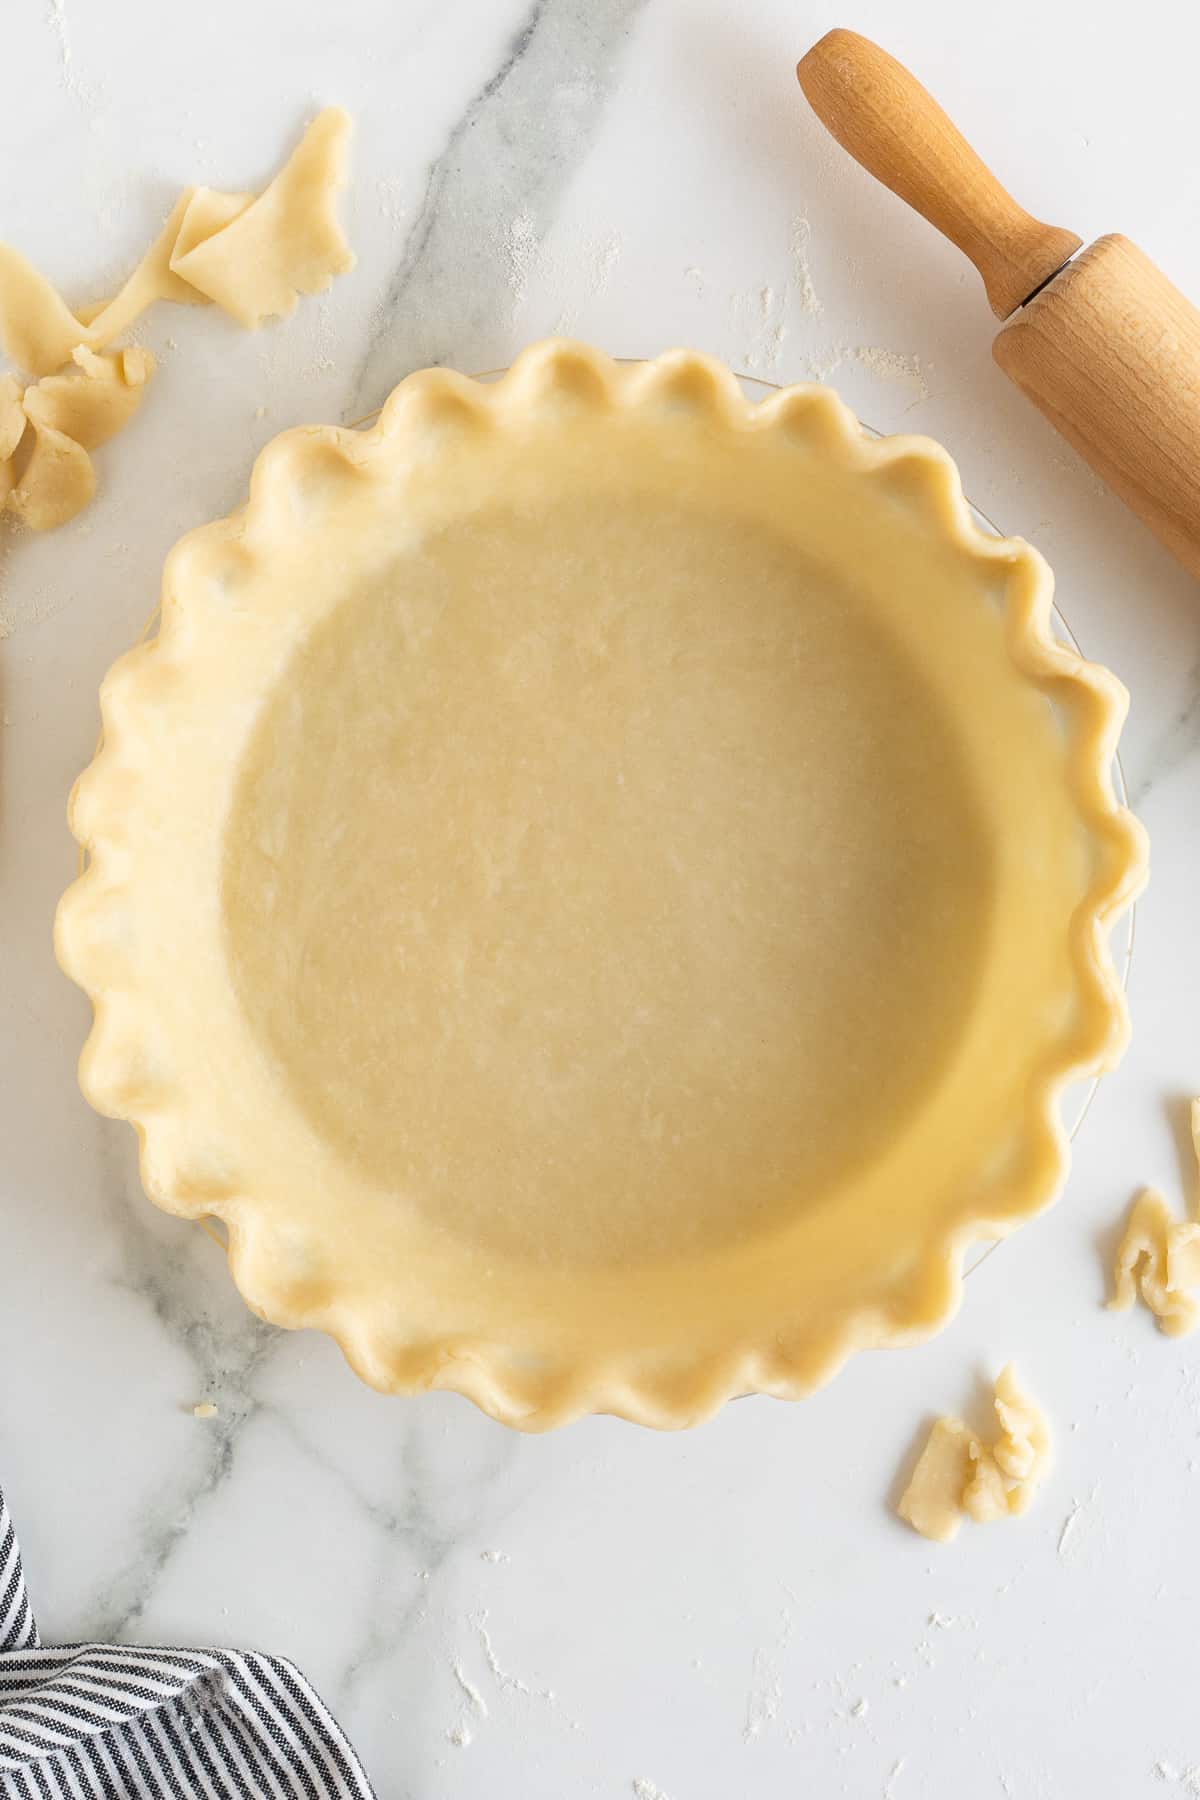
- Transfer the crust: Lift the rolling pin and move it over to your pie dish. Carefully unroll the crust right in to the pie dish. Use a sharp knife to trim the edges of the crust to within about 1-inch of the top edge of the dish. Fold the top edge of the crust over to create a thicker border and flute or crimp, as desired. The crust is ready to be filled and baked according to your pie recipe directions.
- Finish edge: Finish the edge of the pie crust (see more on this below).
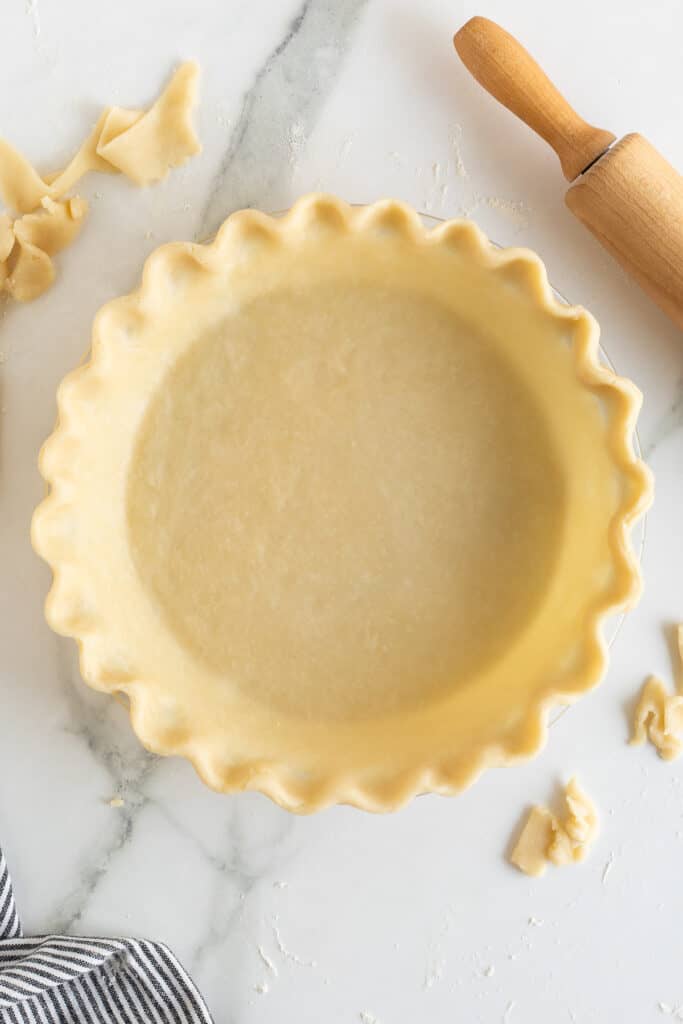
Finishing the Edge
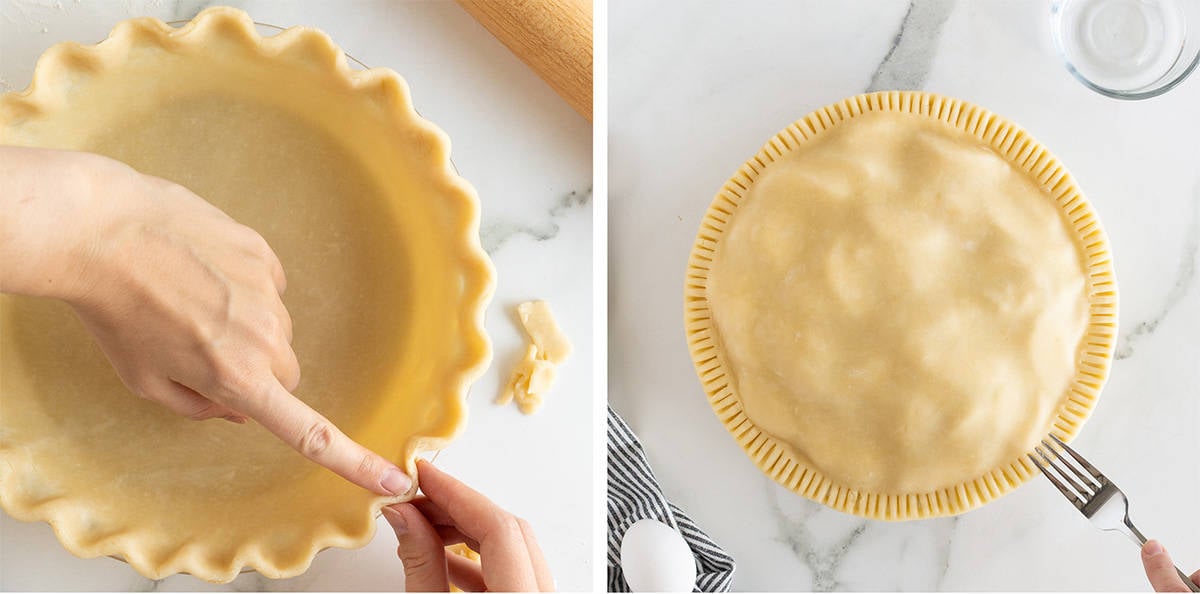
Fluted
- Tuck the top edges under so that the crust is flush with the top of the dish.
- One hand will work on the inside edge of the crust and the other on the outside.
- Use the index finger on the inside hand to press the dough between the thumb and index finger on the outside hand to create the pretty wavy effect you see here.
Crimped
- For a single crust pie, tuck the edges under as described above and press the tines of a fork along the outer edge to create a crimped pattern.
- For a double crust pie, trim both crusts evenly to within about ½-inch of the top edge of the dish. Then, pressing the two crusts together, crimp all along the edges with a fork.
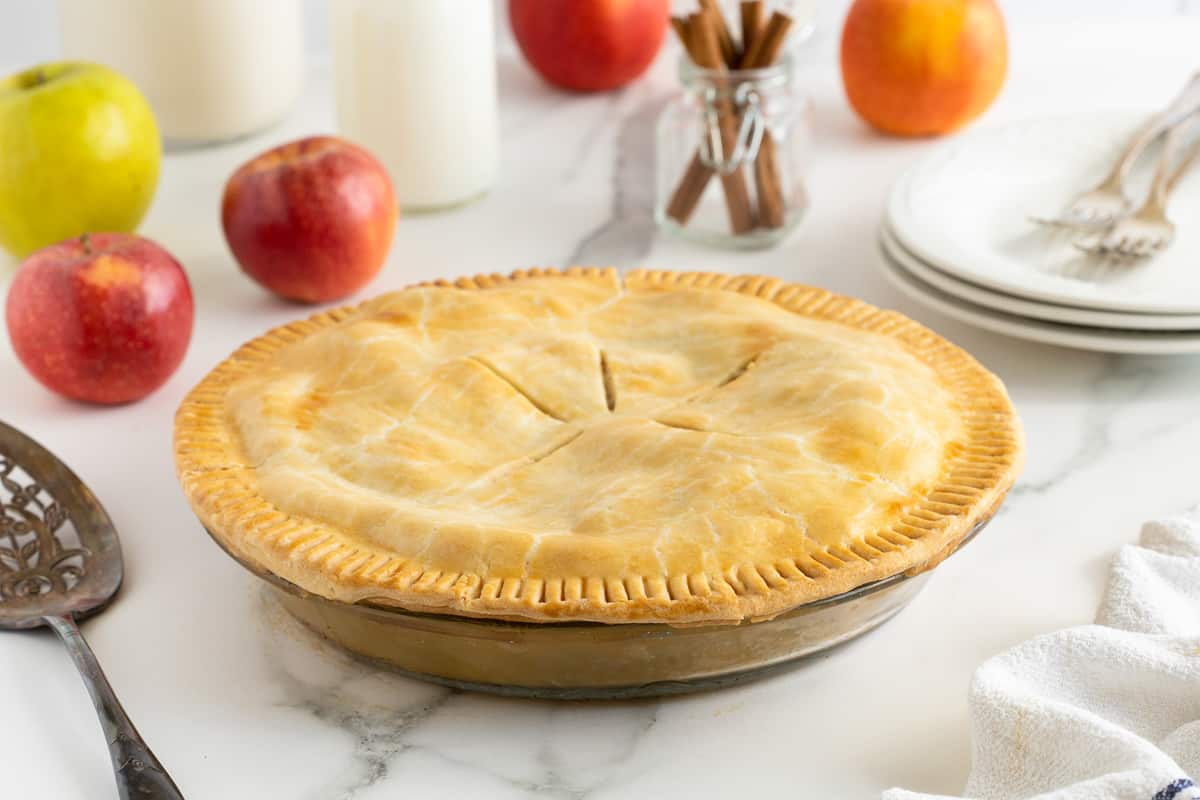
Double Crust Pie

- Fill: Roll out and place the bottom crust in the pie plate and add your filling.
- Top crust: Roll out and transfer the top crust to your pie. Trim both crusts evenly to within about ½ -inch of the top edge of the dish and flute or crimp, as desired.
- Vents: Use the tip of a sharp knife to cut 5 to 6 vents about 2-inches long in the top of the crust – starting about 1-inch out from the center and working your way out.
- Egg wash: Coat the top crust with an egg wash and sprinkle with sugar, if desired.
Lattice Crust
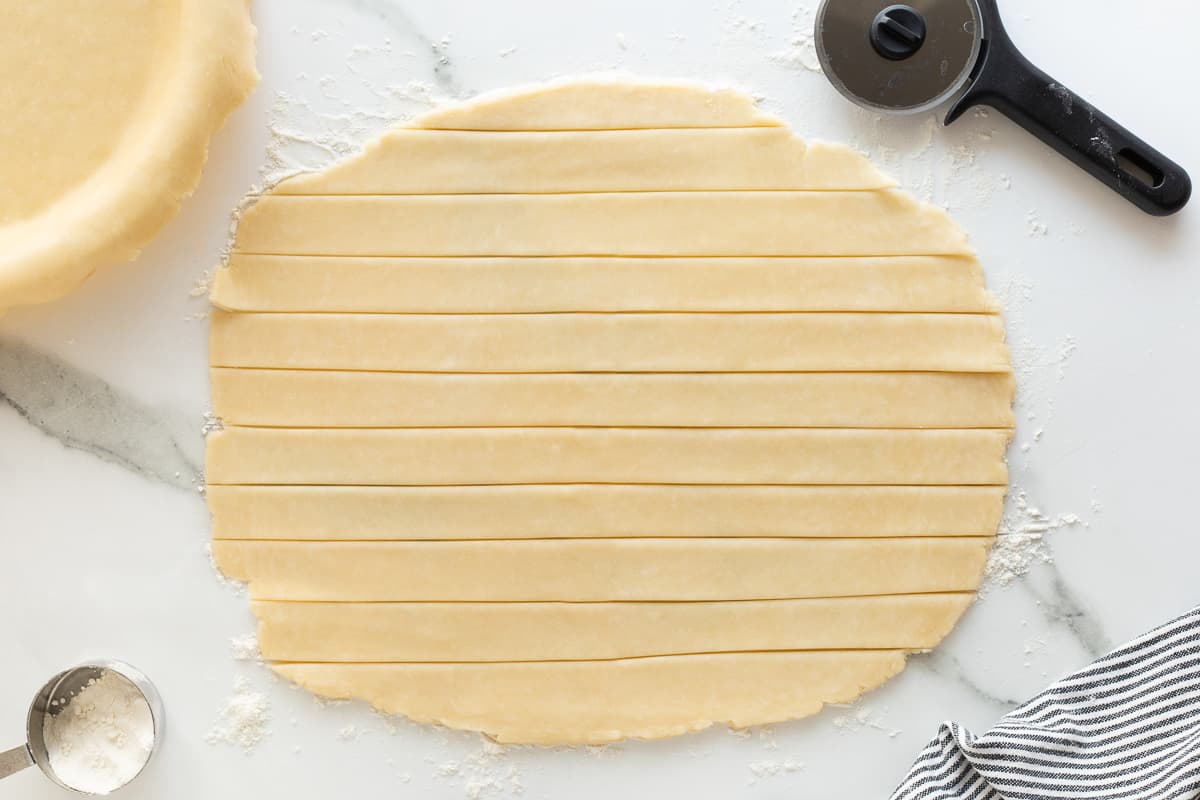
- For the lattice strips, roll one crust out to an oval about 10-inches long by 8-inches wide.
- Use a pizza cutter to slice 10 1-inch thick strips.
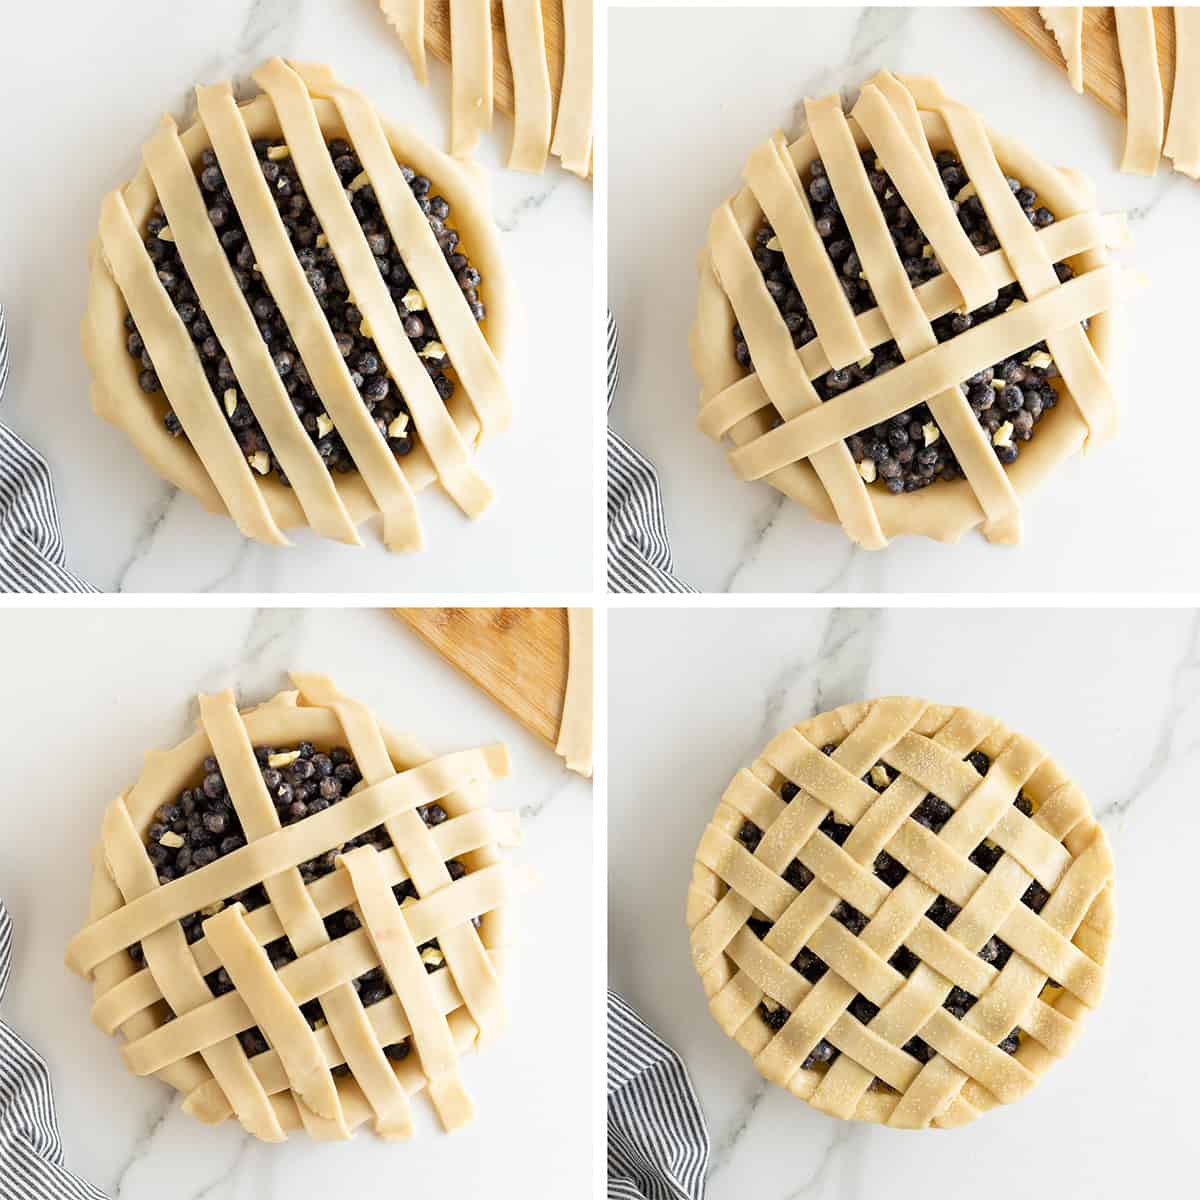
- Fill and place half the strips: Roll the bottom crust and place in in your pie plate, leaving ½-inch of overhang, and add your filling. Arrange 5 of the strips evenly over the pie filling.
- Finish one side: Gently fold back every other strip a little past the center and place another strip perpendicular on top. Replace the folded strips so they lie flat on top of the perpendicular strip. Working the same direction, fold back the strips that weren’t done previously. Lay a 2nd perpendicular strip on top and unfold the strips. Continue with the third perpendicular strip.
- Finish other side: Apply the remaining 2 strips to the other side of the pie, starting toward the center and working in the opposite direction toward the edge. Remember always to alternate the strips that are folded back so that the strips weave in and out.
- Trim and finish edge: Use sharp kitchen shears or a knife to trim the strips to a ½-inch overhang. Moisten the dough under the tip of each strip overhang with egg wash or water and tuck the overhang under the bottom crust border, pressing down to make it adhere. Leave plain or crimp as desired.
Refrigerate the unbaked pie for 30 to 60 minutes prior to baking to chill the dough so it will hold it’s shape better when baking.

- Optional egg wash and sugar: Coat the lattice strips with an egg wash and sprinkle with sugar, if desired.
- Bake: Bake the pie according to the recipe directions.
How to Blind Bake a Pie Crust
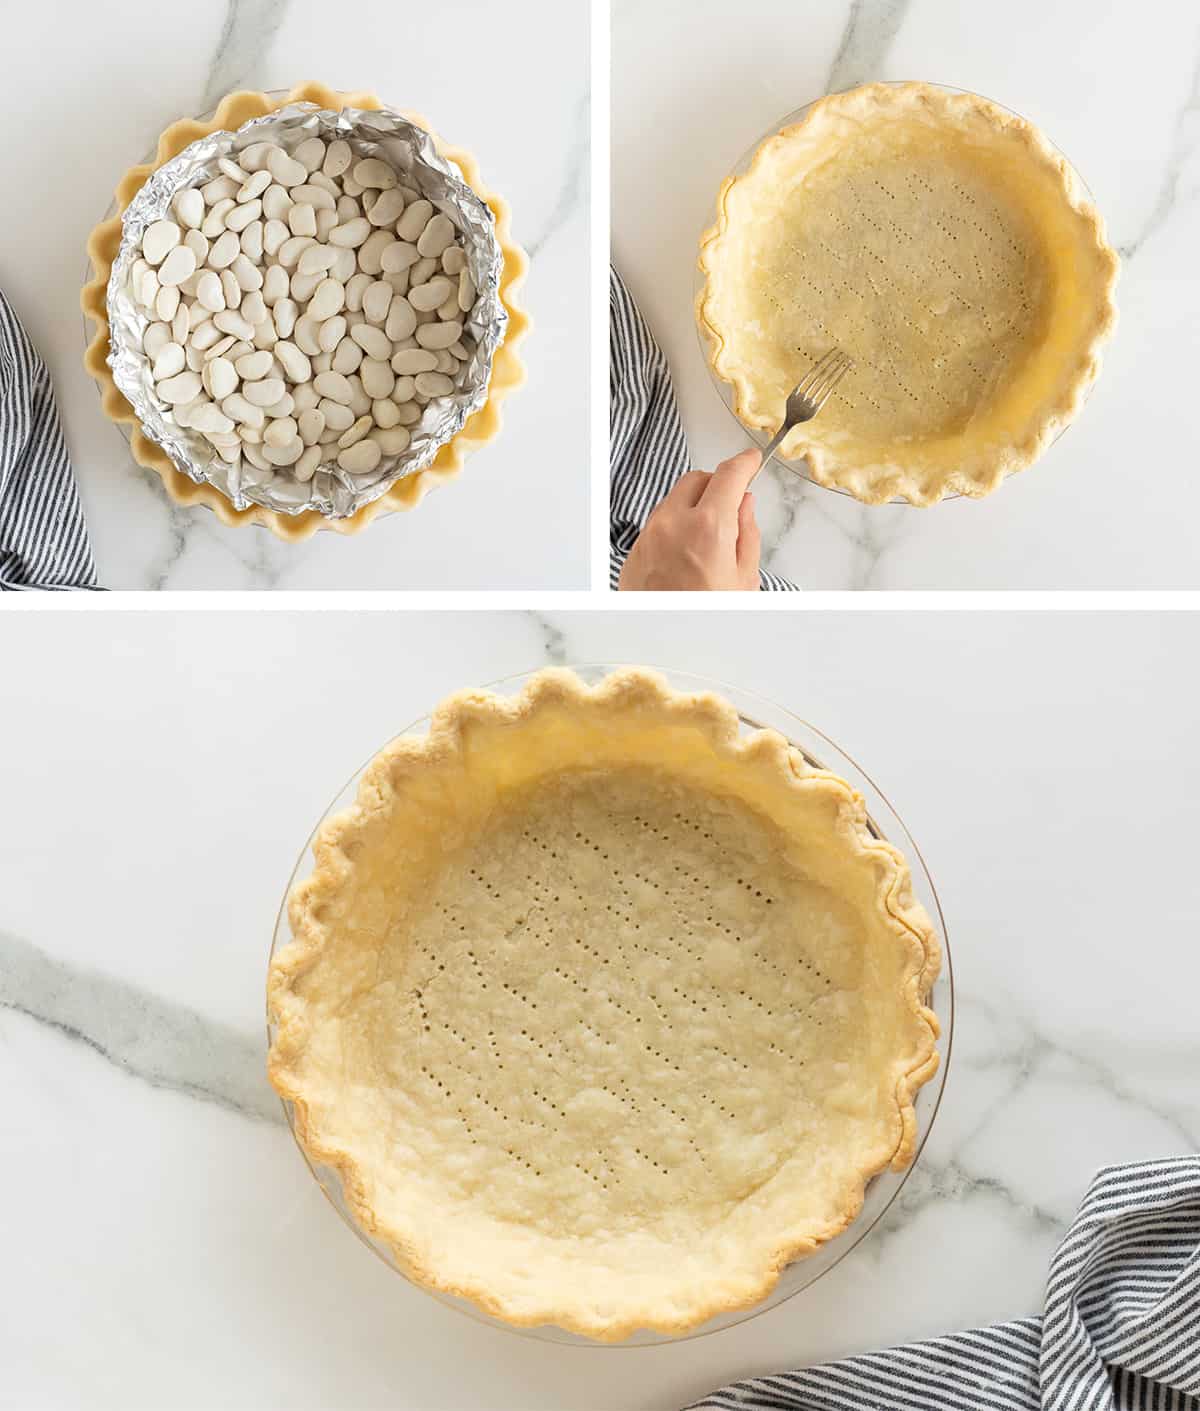
- Place and trim: Press the pastry gently down into the plate and then evenly trim the edges to about ½ -inch of the top edge of the pan with a sharp knife. Tuck the top edge of crust over and under and crimp or flute the edges.
- Chill: Transfer the pie plate to the freezer for 20 minutes (no more) while you preheat the oven.
- Weight the crust: Line the pie pastry with foil, pressing it down lightly. Fill it with pie weights.
- Bake and dock: Bake the weighted pie crust for 20 minutes at 400 degrees F. Remove the foil and pie weights and use a fork to dock the bottom surface of the crust all over (just poke it with the tines of a fork). Reduce the oven temperature to 375 degrees F, and bake the crust for an additional 10 to 15 minutes or until the entire crust is golden brown. Remove from the oven and allow the crust to cool completely before filling.
Freezing Pie Crust
Unbaked pie crust can be frozen for up to two to three months. This is a task you can get done well ahead of the holidays and check off your list.
Discs: Wrap your flattened balls of pie pastry dough in plastic wrap and place them in a freezer-safe zippered food storage bag.
Rolled out crusts: Stack rolled-out crusts in between layers of waxed or parchment paper and transfer to a freezer-safe zippered food storage bag.
Tips for the Best Pie Crust
Cold Ingredients: The key to a tender and flaky pie crust is using cold fat (butter and shortening). When cold/firm butter is mixed with the flour, it forms small pockets within the dough. When it bakes, these pockets of fat melt, creating space and separation between the layers of dough, resulting in a flaky, tender texture. Using very cold ice water ensures that it will not melt the fat.
Control the Moisture: Add the apple cider vinegar before you start adding water, Then, only add as much water as needed to bring the pie dough together so you can control the moisture of the crust.
Chilled Pie Dough: Don’t be tempted to skip the step of refrigerating the pie dough. This is a task you can check off your list a day or two ahead of the day you plan to bake your pies. And, if baking a double crust pie, keep the second crust refrigerated until you’re ready to roll it out.
Let it Rest: If your pie dough has been chilling for more than two hours, you may need to let it rest on the counter for about 10 to 15 minutes before it will have enough give to roll out.
Patching Pie Crust: If a crack develops in the center of the dough, cut off a little piece from the edge and place it over the crack. Dust it lightly with flour, cover, with a small sheet of plastic wrap, and roll it into the dough. When placing the dough in the pie plate, set it patched side down so tht smooth perfect side shows.
Use a Pizza Stone: To reduce the chance of a soggy bottom crust, preheat your oven with a pizza stone on a rack in the lower third of your oven. Setting the pie down on a hot surface that retains heat throughout the cooking process does a lot to ensure the bottom crust will cook through.
Pie Weights: For blind baking, pick up some pie weights or keep a bag or two of dry beans in your pantry to use for this purpose. You can reuse the same dry beans over and over again to weight pie crusts.
Sign up for my free newsletter for all the latest recipes and join me on Facebook, Instagram and Pinterest for more cooking inspiration!
Food Processor Pie Crust
Ingredients
- 2½ cups all-purpose flour
- 1 teaspoon salt
- ½ cup unsalted butter, very cold
- ½ cup vegetable shortening, like Crisco sticks, very cold
- 1 tablespoon cider vinegar
- 5 to 7 tablespoons ice water, divided
Optional Egg Wash/Sugared Top Crust
- 1 large egg
- 1 tablespoon water
- 1 tablespoon coarse sugar or granulated sugar
Instructions
- Place the flour and salt in the bowl of a food processor and pulse 4 or 5 times until combined.
- Cut the cold butter and shortening into small pieces (slice each about 6 or 7 times and then cut slices in half). Add to the food processor with the flour mixture and process for about 10 to 15 seconds or until the mixture resembles coarse crumbs.
- Add the vinegar and 4 tablespoons water and pulse about 6 times. Add additional water 1 teaspoon at a time and pulse until mixture is mostly holding together with some pieces at the bottom of the food processor. You may not need to use all the water.
- Remove the pastry from the food processor and using your hands, form it into a neat ball. Slice the ball in half and reshape them into balls. Wrap each ball in plastic wrap, pressing down to form a disc. Refrigerate for at least 2 hours or up to two days.
Rolling and Shaping the Crust
- Rest: When ready to roll it out, move the crust from the refrigerator and let it rest on the counter for about 10 to 15 minutes (only if it has refrigerated longer than 2 hours). If baking a double crust pie, keep the second crust refrigerated until you're ready to roll it out.
- Roll: Lightly flour a large board and using a rolling pin, roll the dough out, starting in the center and working your way out. Lift and turn the dough ocassionally to be sure it isn’t sticking to the board. Scatter a little additional flour underneath, if necessary. I like to use my hands to shape the edges to prevent it from becoming misshapen as I work. It’s not going to be a perfect circle with perfect edges and that’s just fine because you’ll trim the edges. Continue rolling the dough into a 12-inch circle (or as close as possible), which is large enough to fit your pie plate, leaving about a 1- to 2-inch overhang.
- Transfer to pie plate: Set your rolling pin on top of the dough circle towards one end. Lift the end of the dough over the rolling pin and carefully turn the rolling pin to wrap the pastry around it. Place the rolling pin over your pie dish and roll it the opposite way to release the dough. Press the crust gently down into the plate.
- Finish: Follow the directions below or a single or double crust pie to trim, flute, or crimp the edges.
Single Crust Pie
- Use a sharp knife to trim the edges of the crust to within about 1-inch of the top edge of the dish. Fold the top edge of the crust over to create a thicker border and flute or crimp, as desired. The crust is ready to be filled and baked according to your pie recipe directions.
Double Crust Pie
- Bottom crust: Roll out and place crust in the pie plate as directed above. Add your filling to the bottom crust.
- Top crust: Repeat the process to roll out and transfer the top crust to your pie.
- Trim and finish: Trim both crusts evenly to within about ½ -inch of the top edge of the dish. Then, pressing the two crusts together, flute with your fingers or crimp with a fork, as desired.
- Optional egg wash/sugared top: Whisk the egg and water in a small bowl. Using a pastry brush, lightly coat the crust, including the edges (there will be far more than you need for 1 pie). For a sugared top crust, sprinkle 1 tablespoon coarse or granulated sugar evenly over the top.
- Vents: Finally, use the tip of a sharp knife to cut 5 to 6 vents about 2-inches long in the top of the crust – starting about 1-inch out from the center and working your way out. Bake your pie according to the recipe directions.
Lattice Crust
- Prep crusts: Roll the bottom crust as directed for the double crust pie and place it in a 9-inch pie plate. Roll the second/lattice crust out to an oval about 10-inches long by 8-inches wide (not all the strips need to be 10-inches long – as you get closer to the edes of the pan, they will be shorter). Use a pizza cutter to slice 10 1-inch thick strips.
- Place lattice strips: Arrange half the strips evenly over the pie filling Gently fold back every other strip a little past the center and place another strip perpendicular on top. Replace the folded strips so they lie flat on top of the perpendicular strip. Working the same direction, fold back the strips that weren't done previously. Lay a 2nd perpendicular strip on top and unfold the strips. Continue with the third perpendicular strip. Apply the remaining 2 strips to the other side of the pie, starting toward the center and working in the opposite direction toward the edge. Remember always to alternate the strips that are folded back so that the strips weave in and out.
- Trim and finish: Use sharp kitchen shears or a knife to trim the strips to a ½-inch overhang. Moisten the dough under the tip of each strip overhang with egg wash or water and tuck the overhang under the bottom crust border, pressing down to make it adhere. Leave plain or crimp as desired.
- Chill: Refrigerate unbaked pie for 30 to 60 minutes prior to baking to chill the dough so it will hold it's shape better when baking.
- Optional egg wash/sugared top: Whisk the egg and water in a small bowl. Using a pastry brush, lightly coat the lattice strips with an egg wash and sprinkle with sugar, if desired. Bake according to the recipe directions.
Blind Bake Crust
- Place and trim: Press the pastry gently down into the plate and then evenly trim the edges to about ½ -inch of the top edge of the pan with a sharp knife. Tuck the top edge of crust over and under and crimp or flute the edges.
- Chill: Transfer the pie plate to the freezer for 20 minutes (no more) while you preheat the oven.
- Weight the crust: Line the pie pastry with foil. Regular aluminum foil is more pliable and easier to shape into the unbaked pie crust than heavy duty foil or parchment paper. Press the foil down lightly and fill it with pie weights.
- Bake: Preheat oven to 400 degrees F. Bake the weighted pie crust for 20 minutes.
- Dock and bake: Remove the crust from the oven. Remove the foil and pie weights and use a fork to dock the bottom surface of the crust all over (just poke it with the tines of a fork). Reduce the oven temperature to 375 degrees F, and bake the crust for an additional 10 to 15 minutes or until the entire crust is golden brown. Remove from the oven and allow the crust to cool completely before filling.
Notes
Nutrition
Nutrition information is automatically calculated using generic ingredients, and is an estimate not a guarantee. For more accurate results, please refer to the labels on your ingredients at home.
Like this? Please rate & comment below!
This post was originally published on November 23, 2011. It has been updated with new text and images.


This is a very good recipe. Very similar to my Great Grandmother’s recipe for pie crust. That lady cooked on a wood stove and made fabulous pies.
The ingredients in Crisco shortening have changed and I am no longer achieving a flakey, tender crust like Zi used to and I use the exact same recipe I have used for over 30 years. Curious if you notice the difference? I wonder if there is another shortening that will give the old results. I am always disappointed now and many baker friends are saying the same thing. I love homemade pie do it’s a real bummer.
I have not noticed this, GG but you have me curious now. I’ll be on the lookout for information about this.
This pie crust is the best easy and tender crust. I love it
Question: What do you mean by “shortening” – Crisco?
Never mind, just read the introduction.
Never realized how easy pie crust was until I made it in a food processor! Great recipe, mine needed a little extra water though.