
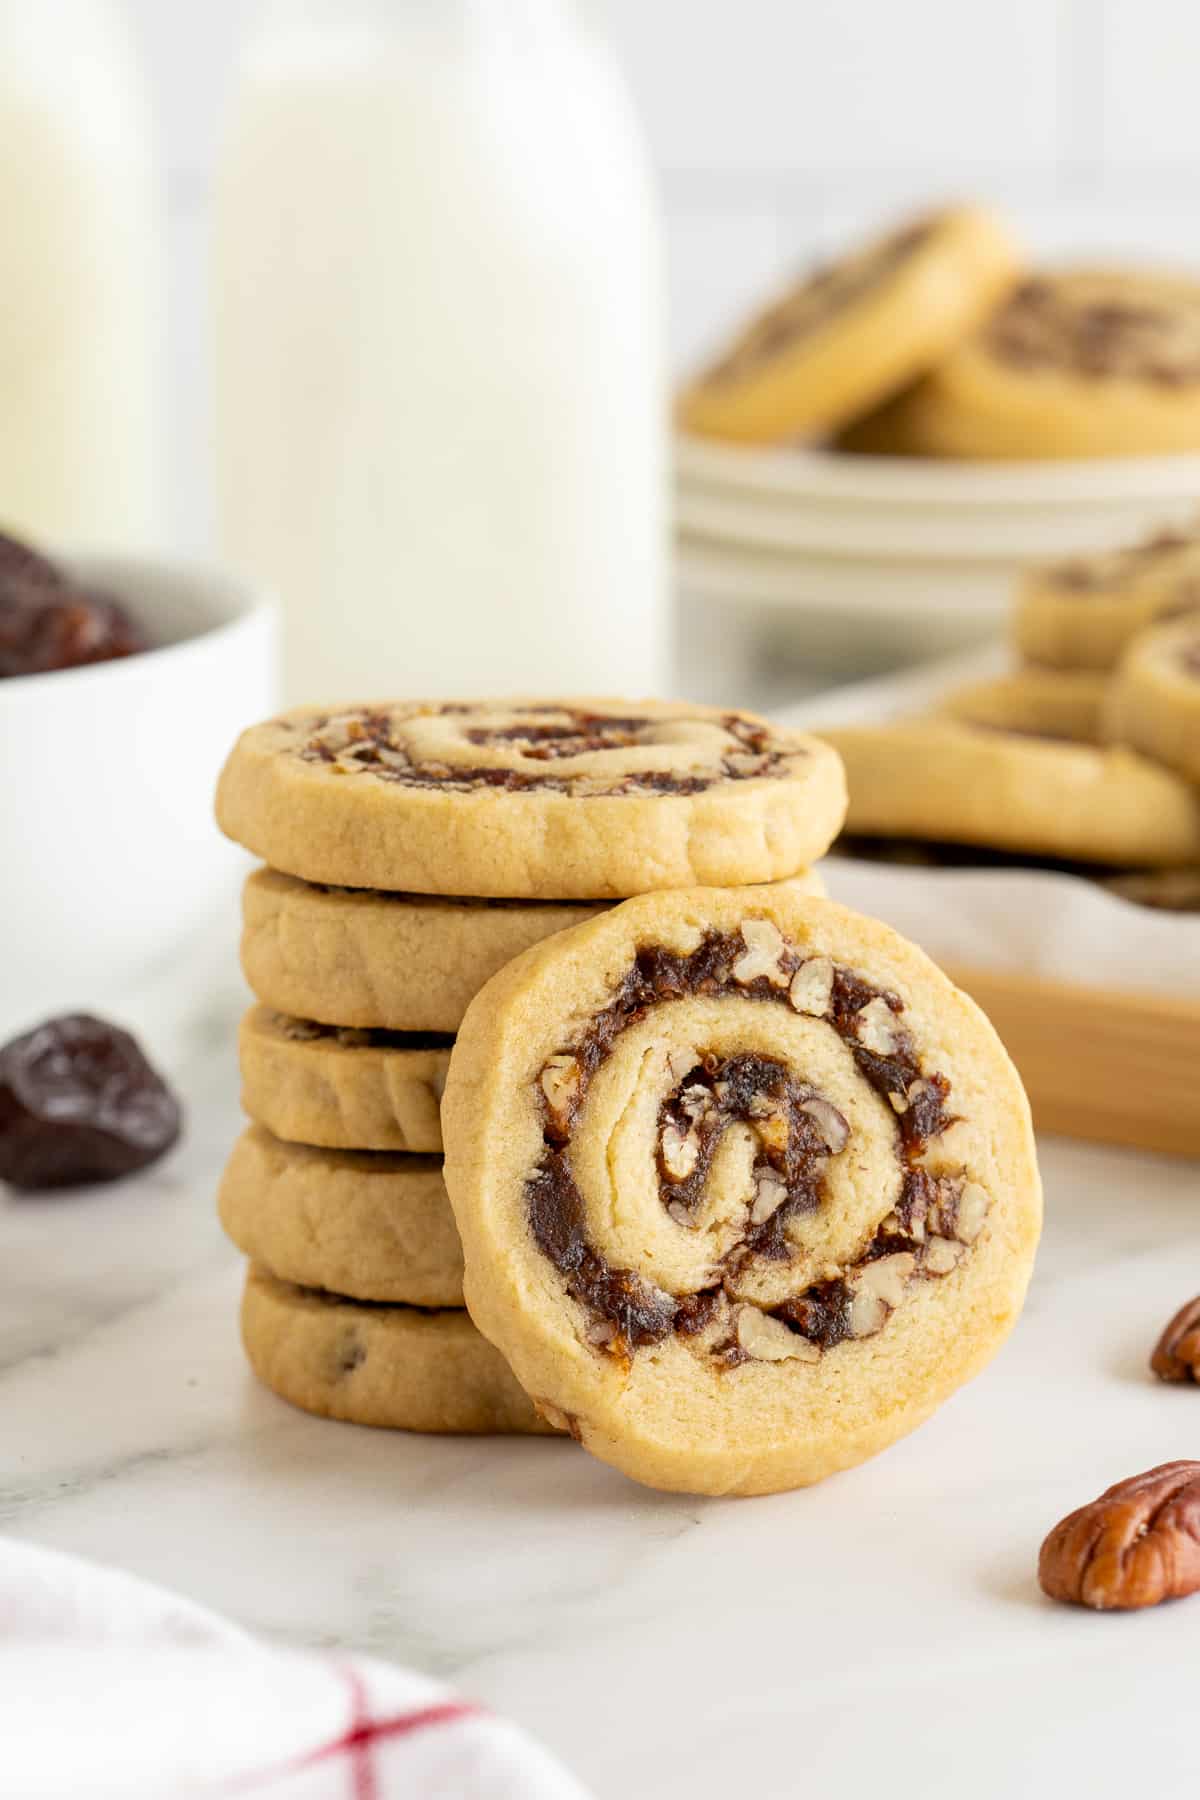
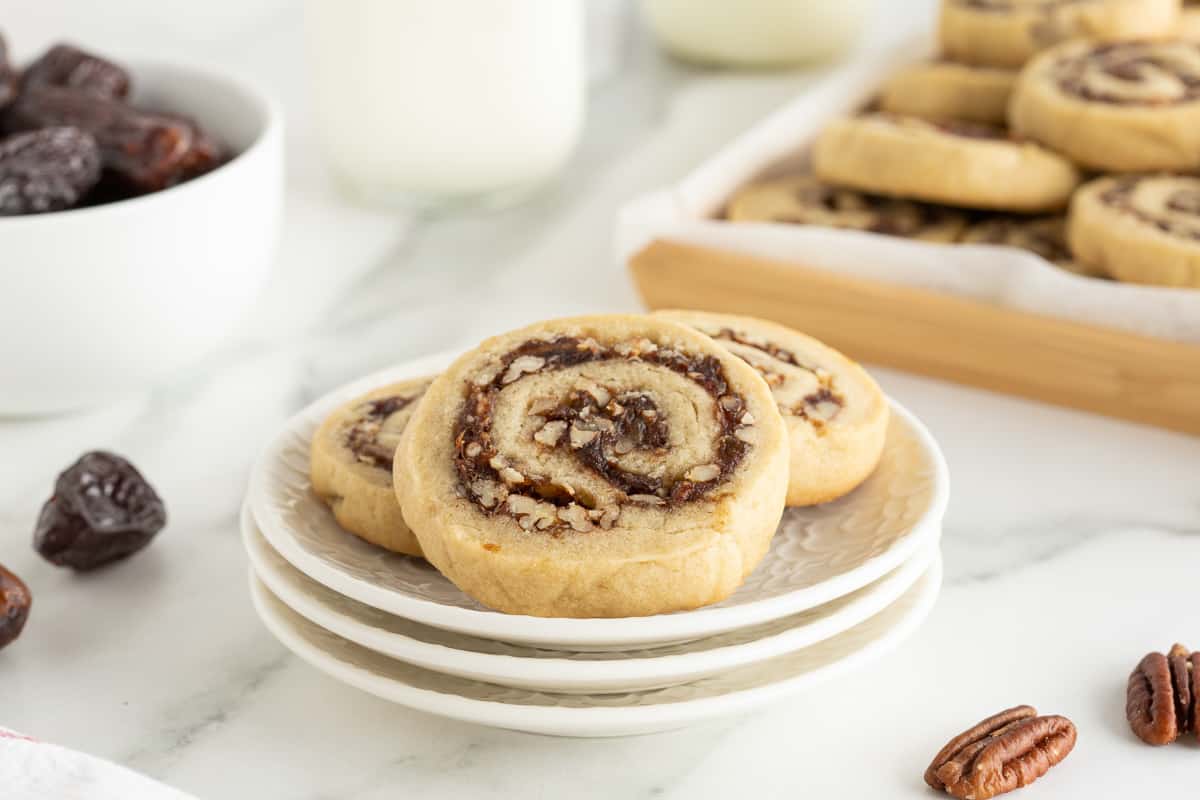
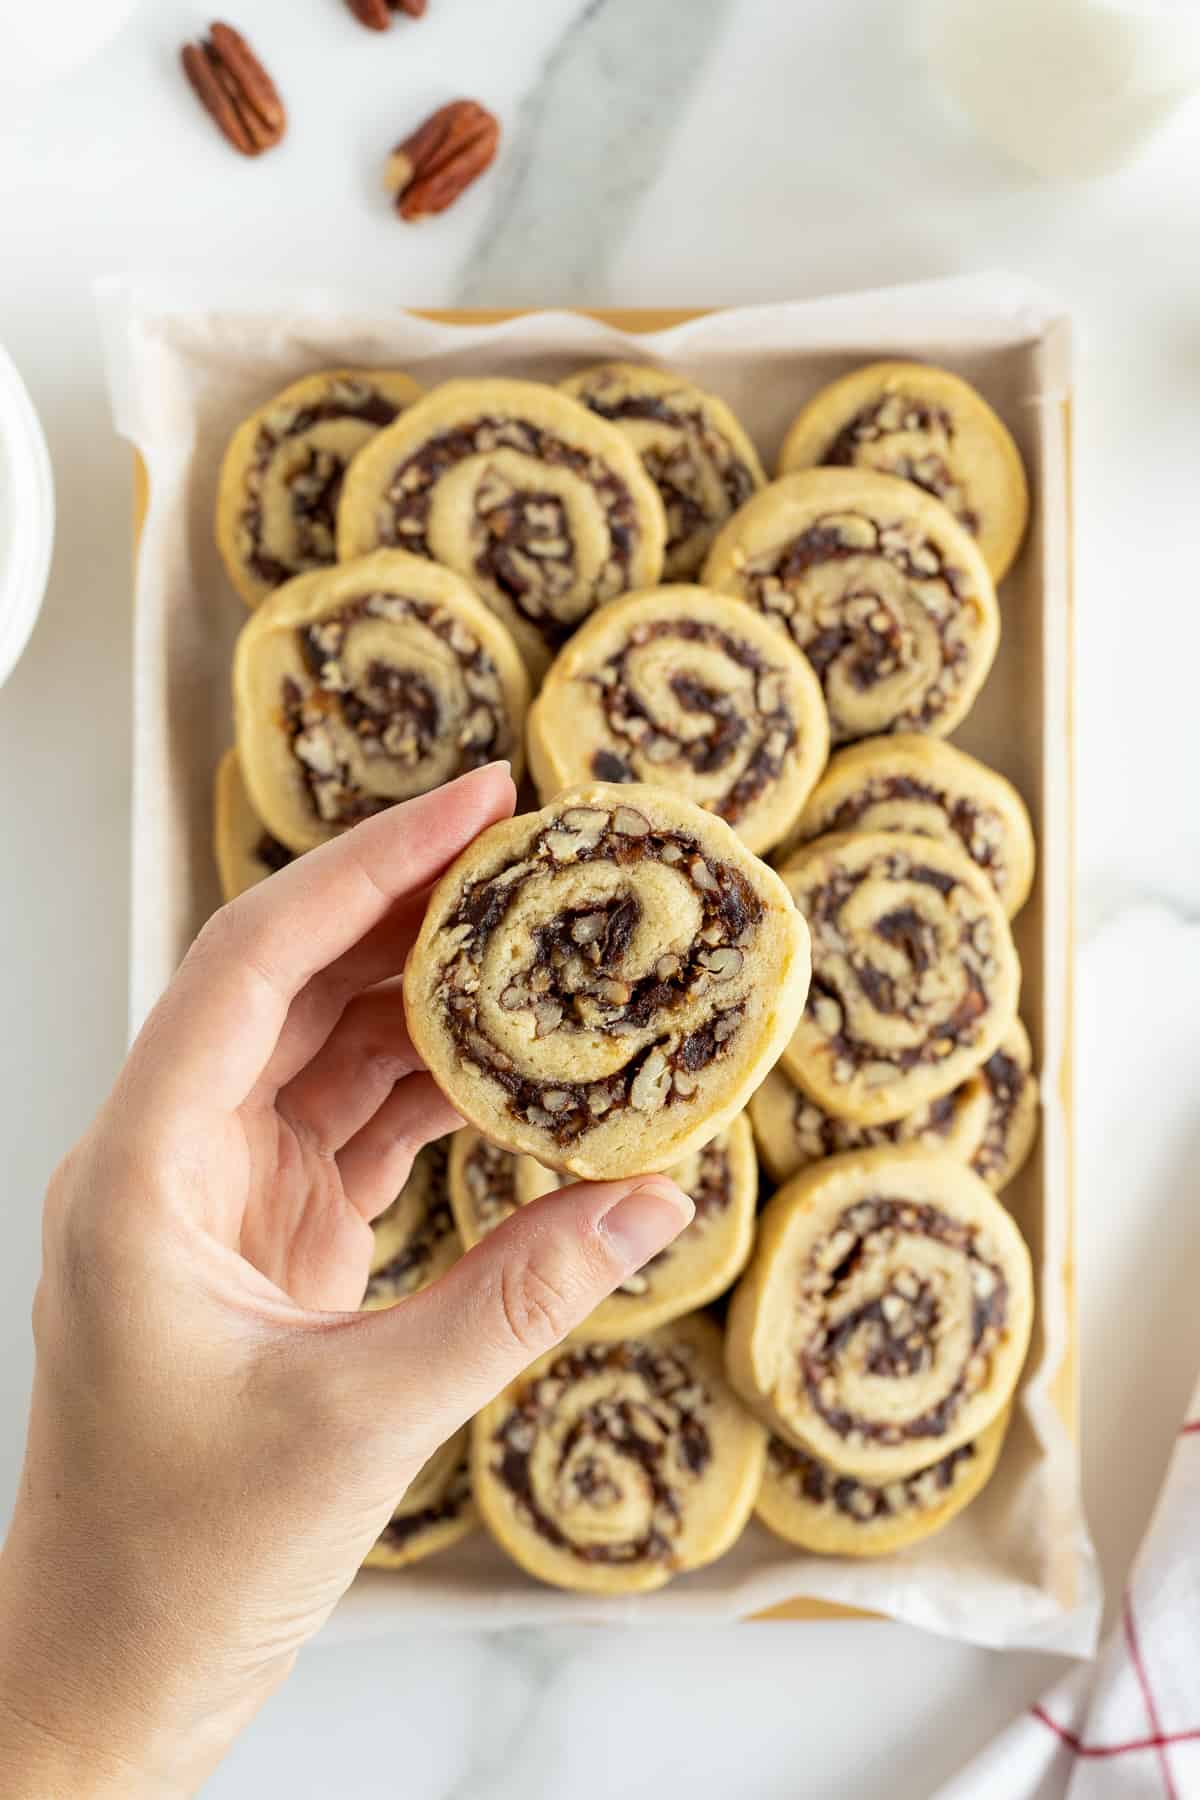
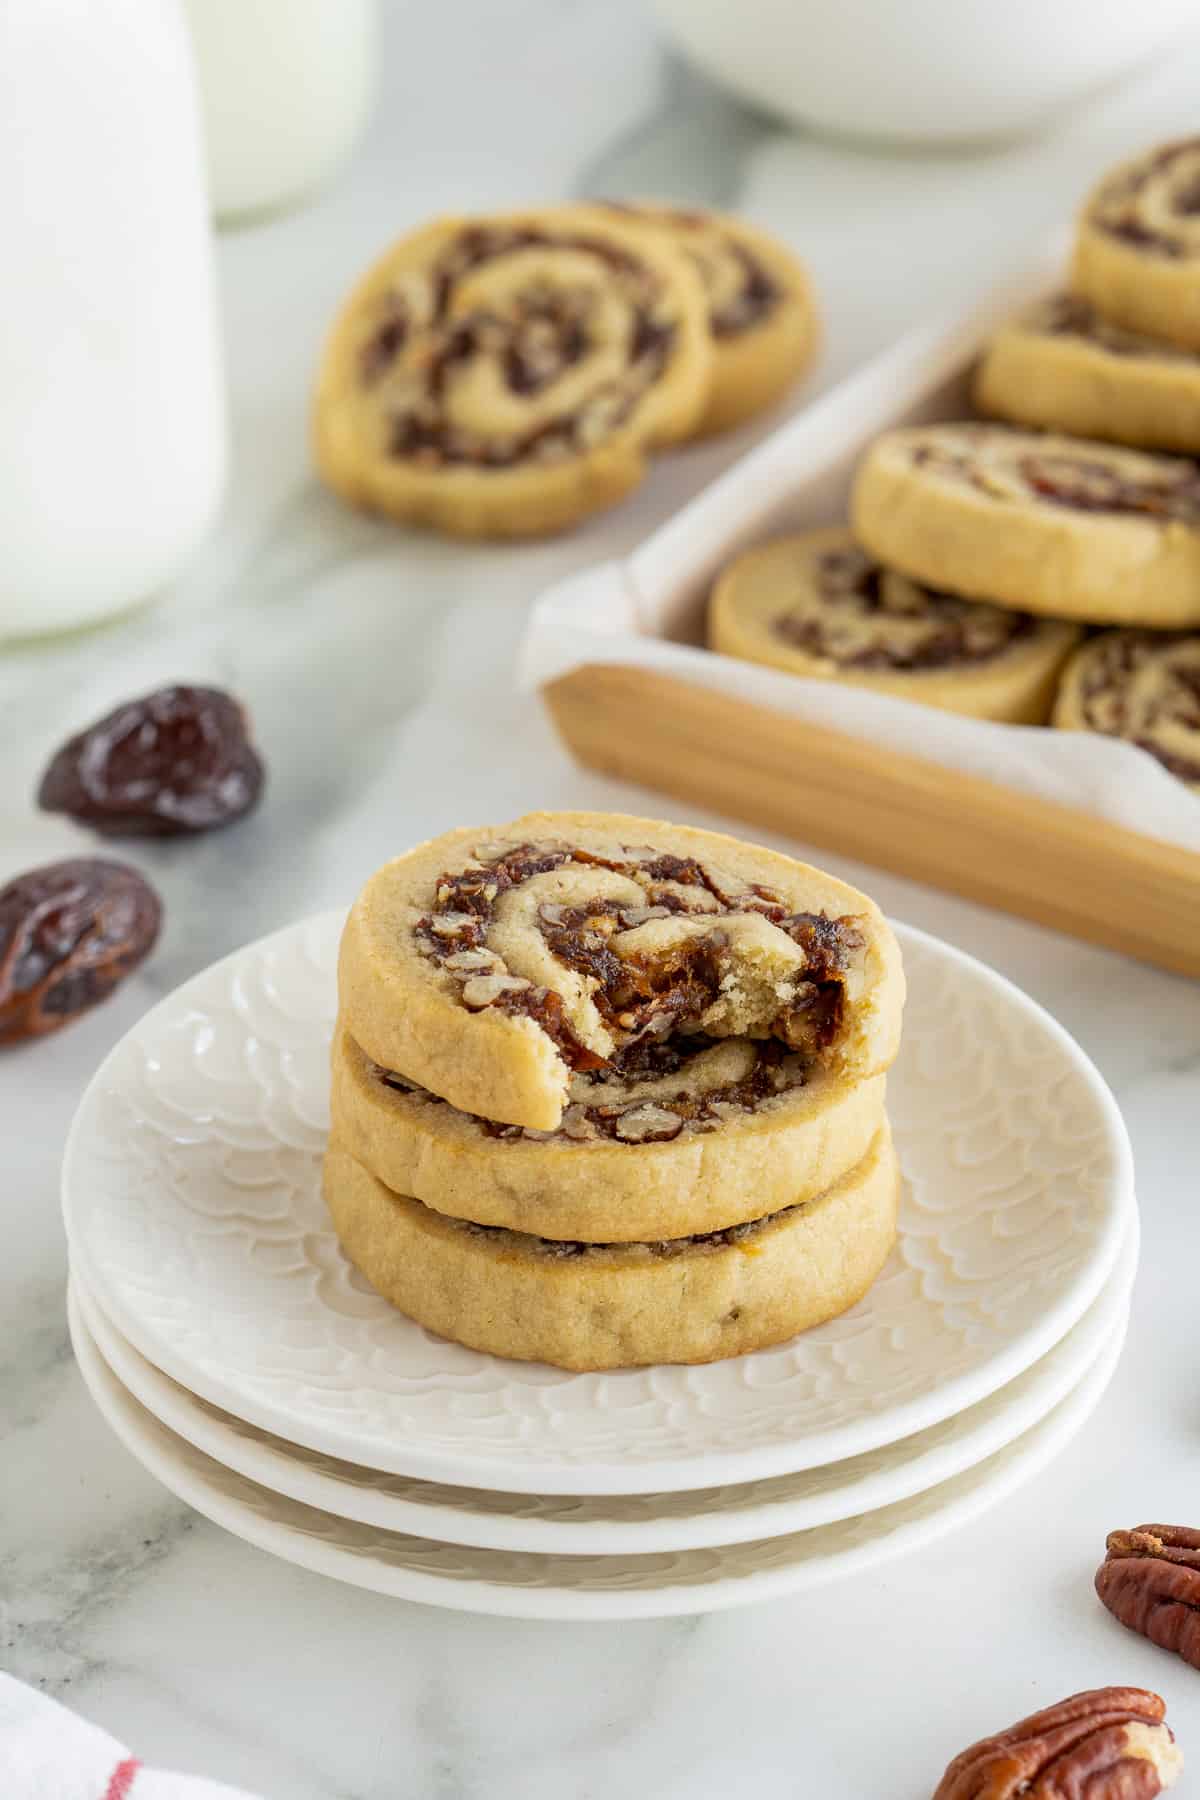
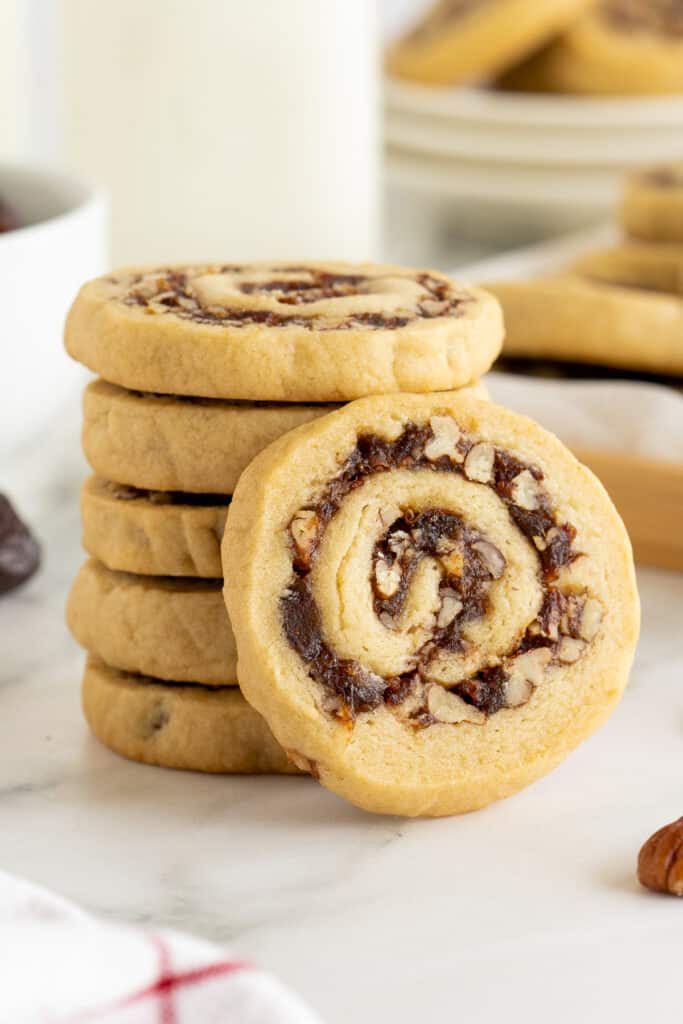
These vintage Date Pinwheel Cookies are a nostalgic choice for your holiday cookie trays. Cookie dough is rolled with a sweet date filling to create these delicious treats.
Love baking with dates? Be sure to try my Oatmeal Date Cookies too!
This post may contain affiliate links. Please read our disclosure policy.
My mom had a knack for cooking from memory and it was rare that she would actually pull out a recipe and follow along. Thankfully, she did take time record her most beloved recipes on recipe cards including this Date Pinwheel Cookie recipe. She stored them all in a large photo album along with magazine and newspaper clippings and her handwritten notes.
Her notes didn’t include what was obvious to her. She didn’t need to remind herself of the order to mix ingredients together, what thickness to roll the dough out, or to what consistency to cook things. She had all of that in her head. Over the years, I’ve been filling in the blanks and publishing many of her recipes so we can all recreate these truly special recipes in our own kitchens.
Along with Mom’s Lemon Bars, Pecan Sandies, and Gingerbread Cake, these Date Pinwheel Cookies were a holiday tradition in our house. I honestly didn’t have a strong memory of them until I pulled a batch out of the oven and popped one in my mouth. The flavor of this cookie takes me back to our small living room, filled with Christmas lights, Mom is in the kitchen and the entire house smells of Christmas cookies. They are absolutely delightful.
Table of contents
Ingredient Notes
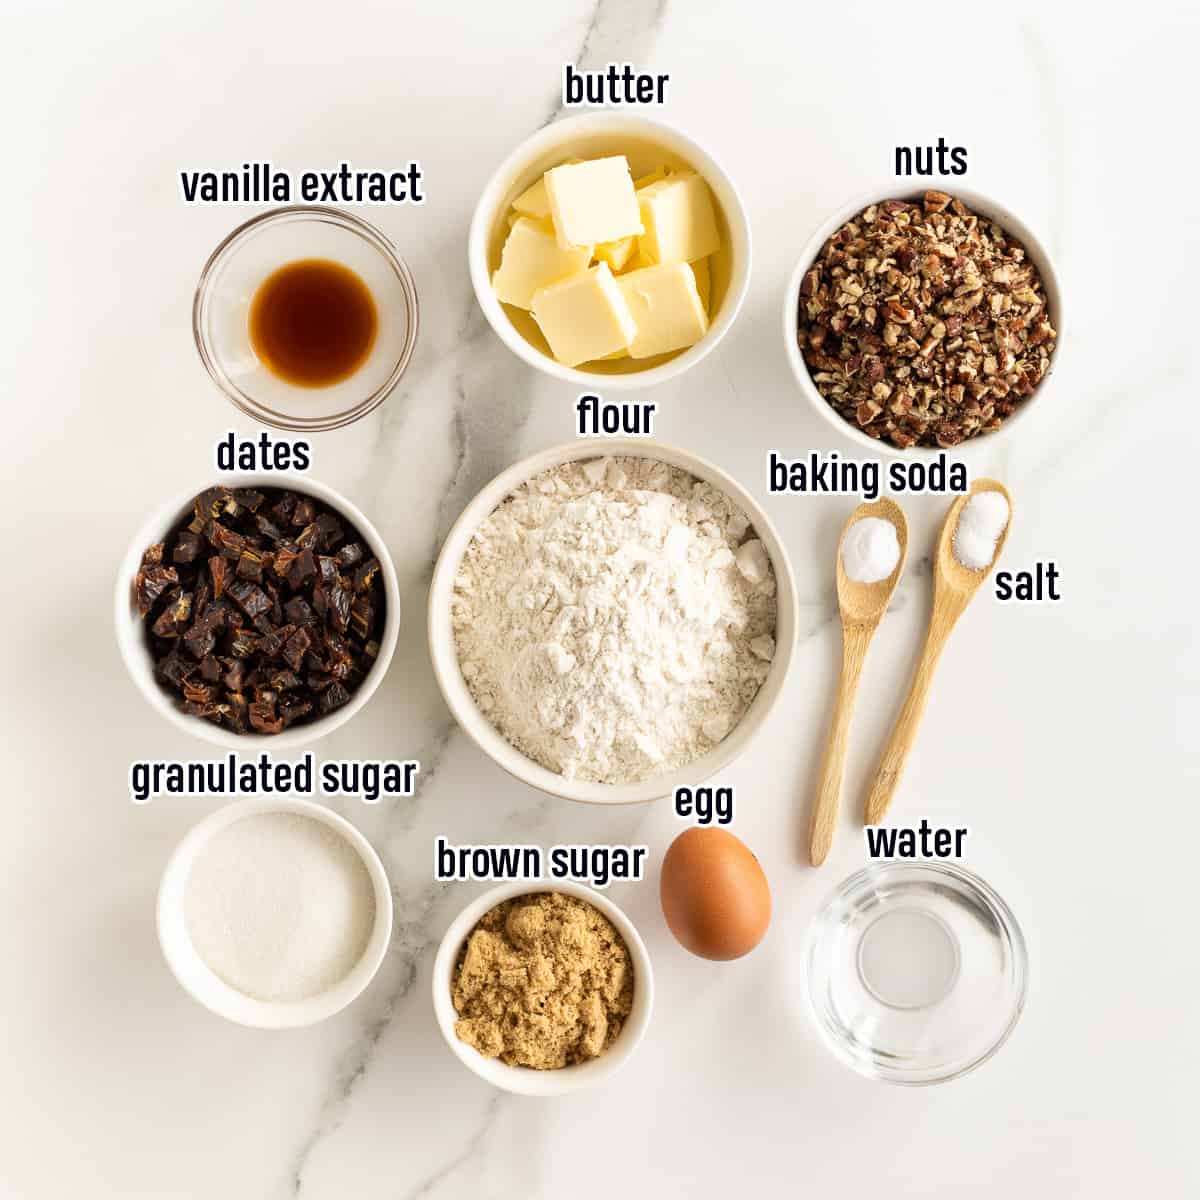
Dry ingredients: All-purpose flour, salt, and baking soda.
Wet ingredients: Softened butter, light brown sugar, pure vanilla extract, and an egg.
Date filling: Chopped fresh dates, granulated sugar, water, and chopped nuts. I love the flavor of pecans with dates but you can use walnuts, if you’d like.
How to Make Date Pinwheel Cookies
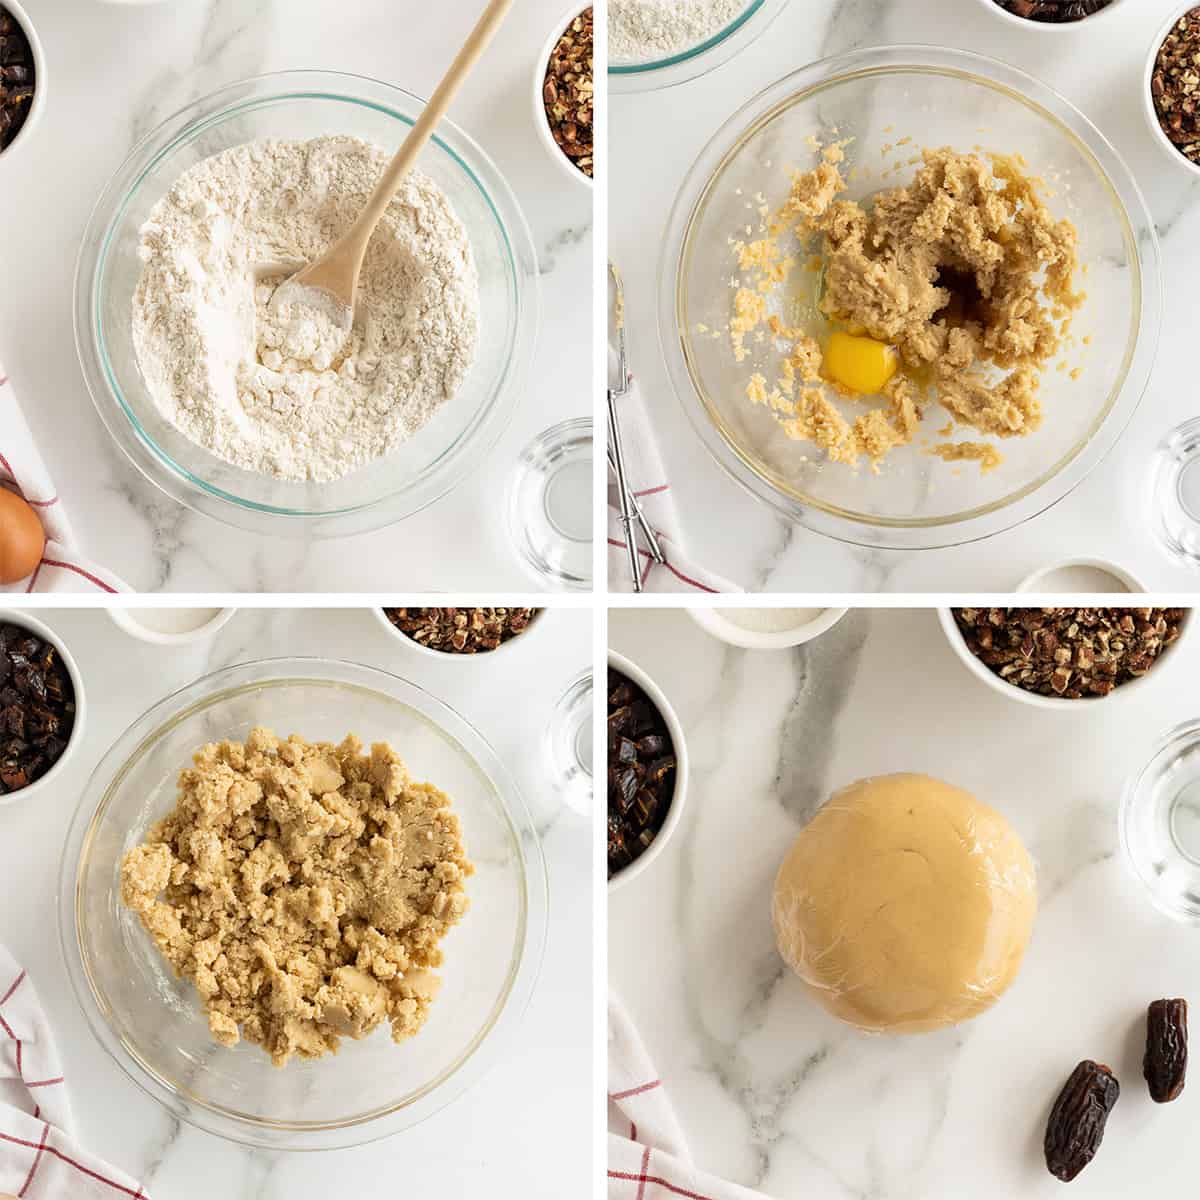
- Dry ingredients: Combine the flour, baking soda, and salt in a medium mixing bowl.
- Wet ingredients: In a large mixing bowl, use an electric mixer to cream the butter with granulated sugar and brown sugar. Add the egg and vanilla and continue mixing until well incorporated.
- Combine: Add the dry ingredients to the butter mixture and stir with a spoon until combined.
- Refrigerate: Using clean hands, work the dough until it holds together in a ball. Wrap the ball of dough in plastic wrap and refrigerate for an hour.
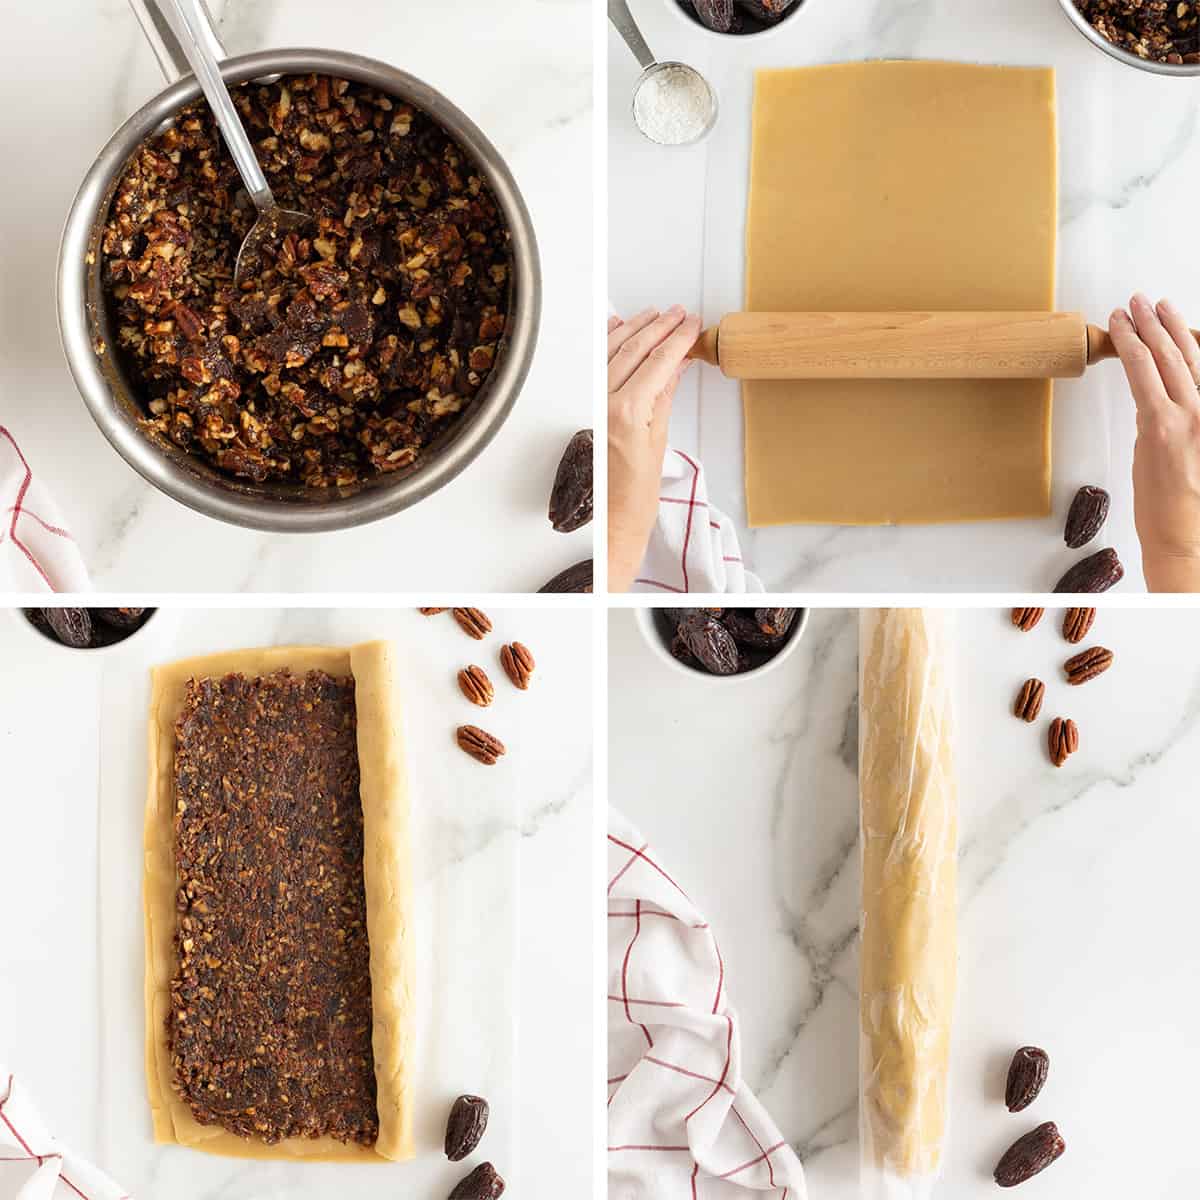
- Date filling: Place the chopped dates, granulated sugar and water in a small saucepan and bring the mixture to a boil. Reduce the heat and simmer, stirring occasionally, until the dates have cooked down to a paste-like consistency. Mix in the chopped nuts and remove the pan from the heat. Set the filling aside to cool.
- Shape the dough: Roll the chilled dough out on a lightly floured piece of wax paper to a 12- x 8-inch rectangle. Use your hands to square up the edges so you have a nicely shaped, evenly rolled out, rectangle.
- Fill and roll: Spread the cooled date mixture on the dough. Starting at one of the long ends, begin to carefully roll the dough into a log.
- Chill: Wrap the rolled dough in the wax paper and refrigerate for at least an hour or overnight.
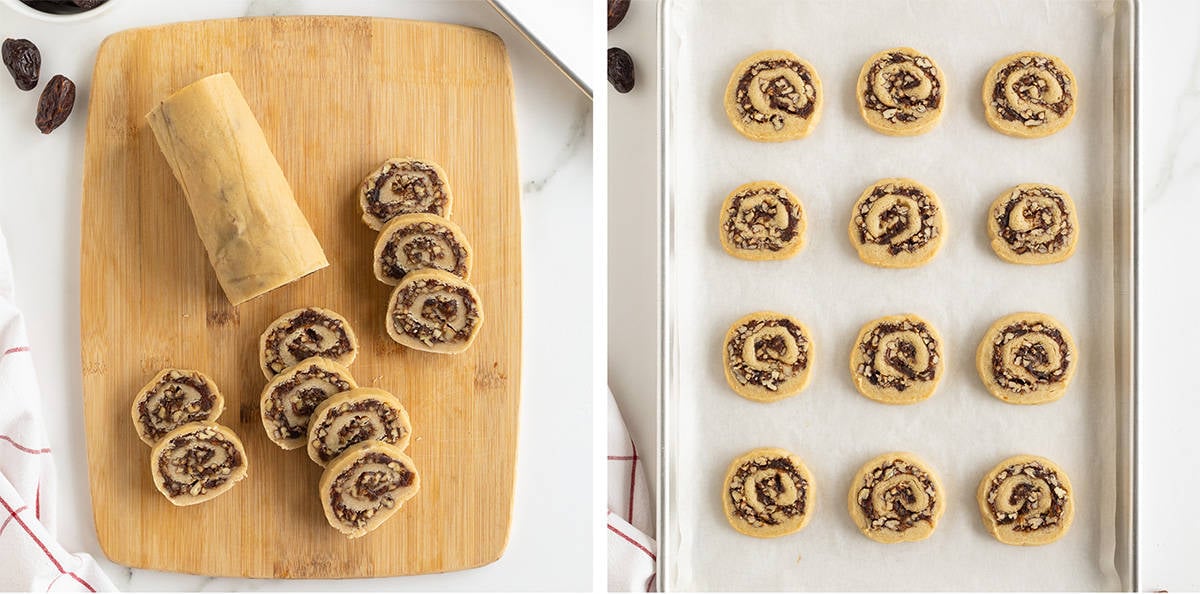
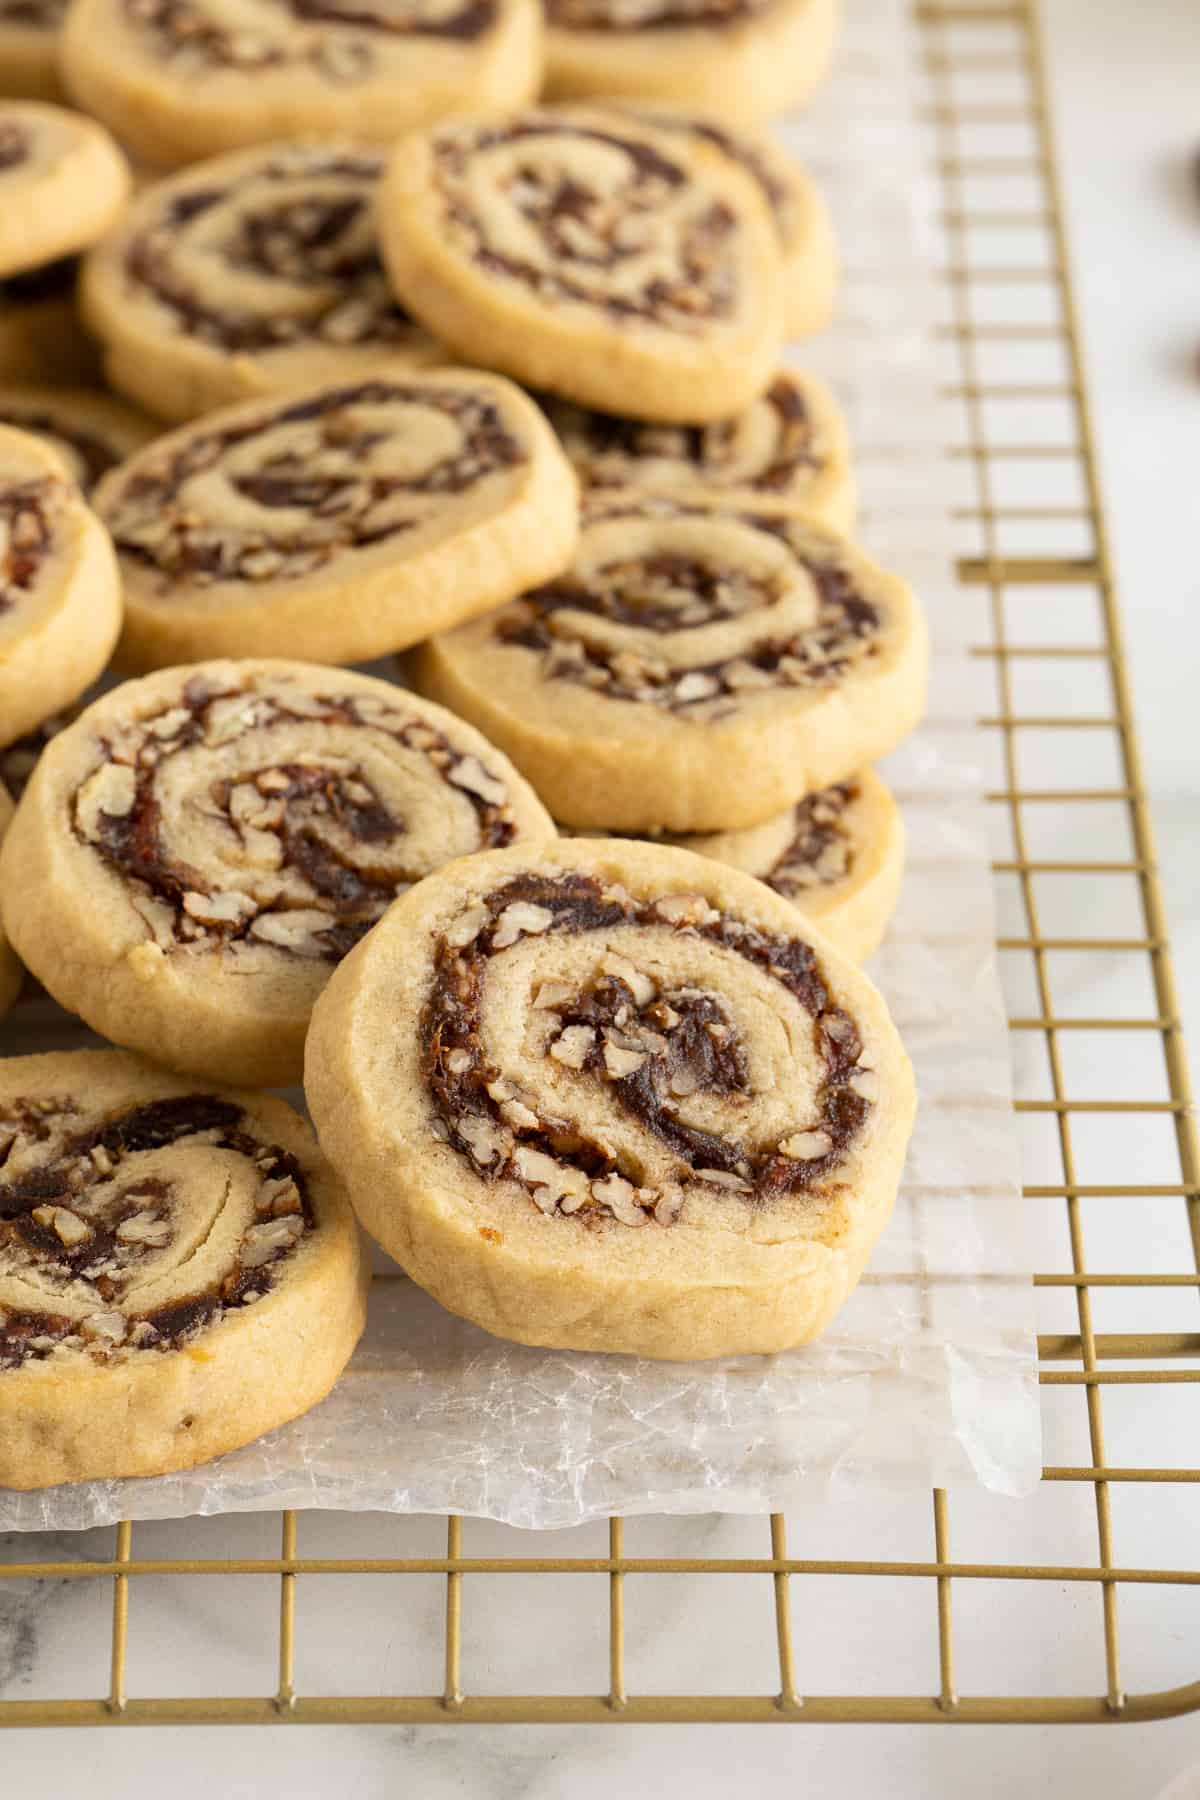
- Slice: Use a sharp knife to slice the chilled log of cookie dough into ¼-inch slices.
- Bake: Place the slices on a baking sheet lined with parchment paper and bake at 375 degrees F for 10 to 12 minutes. Remove from oven and allow to cool on baking sheets for a minute or two before transferring to a wire rack to cool completely.
Tips for the Best Date Pinwheel Cookies
Chill the dough twice: Don’t be tempted to skip the step of refrigerating the dough before rolling it out or it will be too soft and sticky to work with. Refrigerating it again after being rolled with the filling will make it much easier to slice neatly.
Date filling tips: Spoon the date filling on to the center of the rolled out rectangle of cookie dough and use an offset spatula to spread it out to within within about ½-inch of the edges. You want to leave a border so the filling won’t seep out of the pinwheels as they bake.
Size and shape: Slice the cookie dough log as evenly as possible so the cookies will be a uniform thickness and cook at the same rate. They may not be shaped perfectly so use your hands to round them out so they’ll be nice and pretty after they bake.
Storage Tips
Transfer the completely cooled cookies to an airtight container and store at room temperature for 4 to 5 days. To keep them fresh for up to a week, these cookies can be refrigerated. For longer storage, place in a freezer-safe container and freeze for 2 to 3 months.
More Christmas Cookie Recipes You’ll Love
- Chewy Iced Molasses Cookies
- Italian Cookies
- Jam Thumbprint Cookies
- Butterscotch Gingerbread Cookies
- Chocolate Peppermint Crinkle Cookies
- Eggnog Thumbprint Cookies
- Find more in my complete collection of cookie recipes.
I hope you give these delicious treats a try this holiday season.
Thanks Mom.
Sign up for my free newsletter for all the latest recipes and join me on Facebook, Instagram and Pinterest for more cooking inspiration!
Date Pinwheel Cookies
Ingredients
- 2 cups all-purpose flour
- ¼ teaspoon baking soda
- ¼ teaspoon salt
- ½ cup butter, softened
- ¾ cup granulated sugar, divided
- ½ cup light brown sugar
- 1 egg
- 1 teaspoon pure vanilla extract
- 8 ounces fresh dates, chopped (approximately 1 cup)
- ½ cup water
- 1 cup chopped pecans or walnuts
Instructions
- Combine the flour, baking soda, and salt in a medium mixing bowl and set aside.
- In a large mixing bowl, using a hand mixer, cream the butter with ½ cup granulated sugar and the brown sugar. Mix on medium speed for a minute or two. Add the egg and vanilla and continue mixing until well incorporated.
- Add the dry ingredients to the butter mixture and stir with a spoon until combined. Using clean hands, work the dough until it holds together in a ball. Wrap the ball of dough in plastic wrap and refrigerate for 1 hour.
- Meanwhile, place the chopped dates, remaining ¼ cup granulated sugar and the water in a small saucepan over MEDIUM heat. Bring the mixture to a boil then reduce the heat to LOW and simmer for about 5 minutes, stirring occasionally. When the dates have cooked down to a paste-like consistency, mix in the chopped nuts and remove the pan from the heat. Set aside to cool.
- Roll the chilled dough out on a lightly floured piece of wax paper to a 12- x 8-inch rectangle. Spread the cooled date mixture on the dough to within about ½-inch of the edges. Starting at one of the long ends, begin to carefully roll the dough into a log. Wrap the rolled dough in the wax paper and refrigerate for at least an hour or overnight.
- When ready to bake, preheat oven to 375 degrees F.
- Use a sharp knife to slice the roll into ¼-inch slices. Place on lightly greased or parchment paper lined baking sheets and bake for 10 to 12 minutes. Remove from the oven and allow to cool on thr baking sheets for a minute or two before transferring to a wire rack to cool completely.
Nutrition
Nutrition information is automatically calculated using generic ingredients, and is an estimate not a guarantee. For more accurate results, please refer to the labels on your ingredients at home.
Like this? Please rate & comment below!
This post was originally published on December 8, 2012. It has been updated with new text and images.


How long can you refrigerate the dough for before you must use it?
You can refrigerate the dough for up to 3 days before baking. Keep it well wrapped so it doesn’t dry out. When you’re ready to bake, let the dough sit at room temperature just long enough to make slicing easier.
As you state, my grandmother’s and mother’s recipes dont include the detailed steps, so I look online for instructions and found your site. Thank you!! My mother’s recipe uses 1/2 tsp soda and salt and adds 1/4 tsp cinnamon and cloves. It adds a nice flavor without being too strong.
Hi Valerie, I have been making traditional date pinwheels for many years and wanted to try your recipe because it looked easier. The pinwheels turned out perfect. They taste better than my old recipe and did not take as long to make. I will be using your recipe from now on. Thank you!!
I’m so happy to hear this! Thanks so much for your comment and happy holidays. 🙂
Tip: Don’t add nuts to date mixture. Instead sprinkle on the date mixture that has already been spread on dough.
I actually freeze rolled up cookies before I cut them. They are really easy to cult that way and are pretty much defrosted by the time you put them in the oven.
I made these cookies with my grandmother every Christmas and I’m now 75 and I have made them every year .
Very tasty but I had to cut the sugar by alot. Are these meant to be crispy because mine weren’t?
They shouldn’t be crispy. Glad they worked out for you!
I followed this recipe as written and I think they were amazing. Easy to roll, with patience. I didn’t chill the filling (let it cool to room temp) and it spread perfectly in my opinion. The cookies did bake up fluffy and in our view they were fantastic. This recipe is going into my binder.